> ## Documentation Index
> Fetch the complete documentation index at: https://docs.acelabusa.com/llms.txt
> Use this file to discover all available pages before exploring further.
# Setting up Your Account Profile
> Learn how to set up your account profile, including adding teammates, to stay organized in Acelab.
*Written by Armaan Shah · Updated October 21, 2025*
***
## How to Set Up Your Account
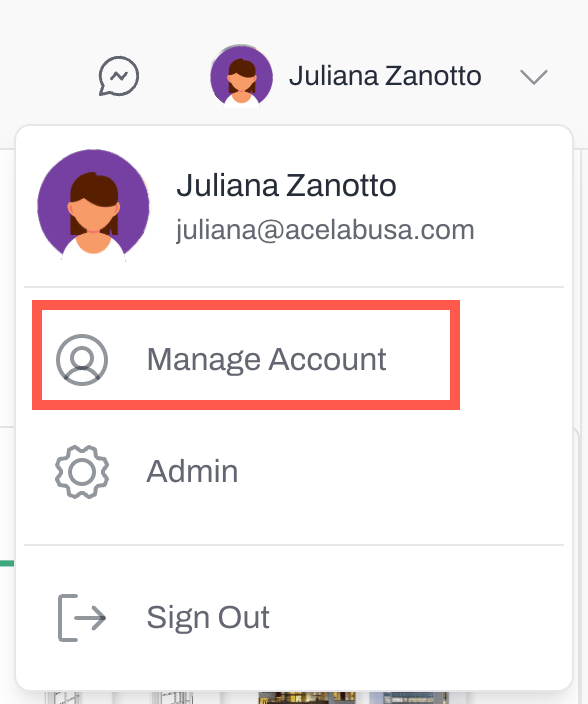
* Click on the person icon in the top right of the app and click on '**Manage Account'** to access your account.
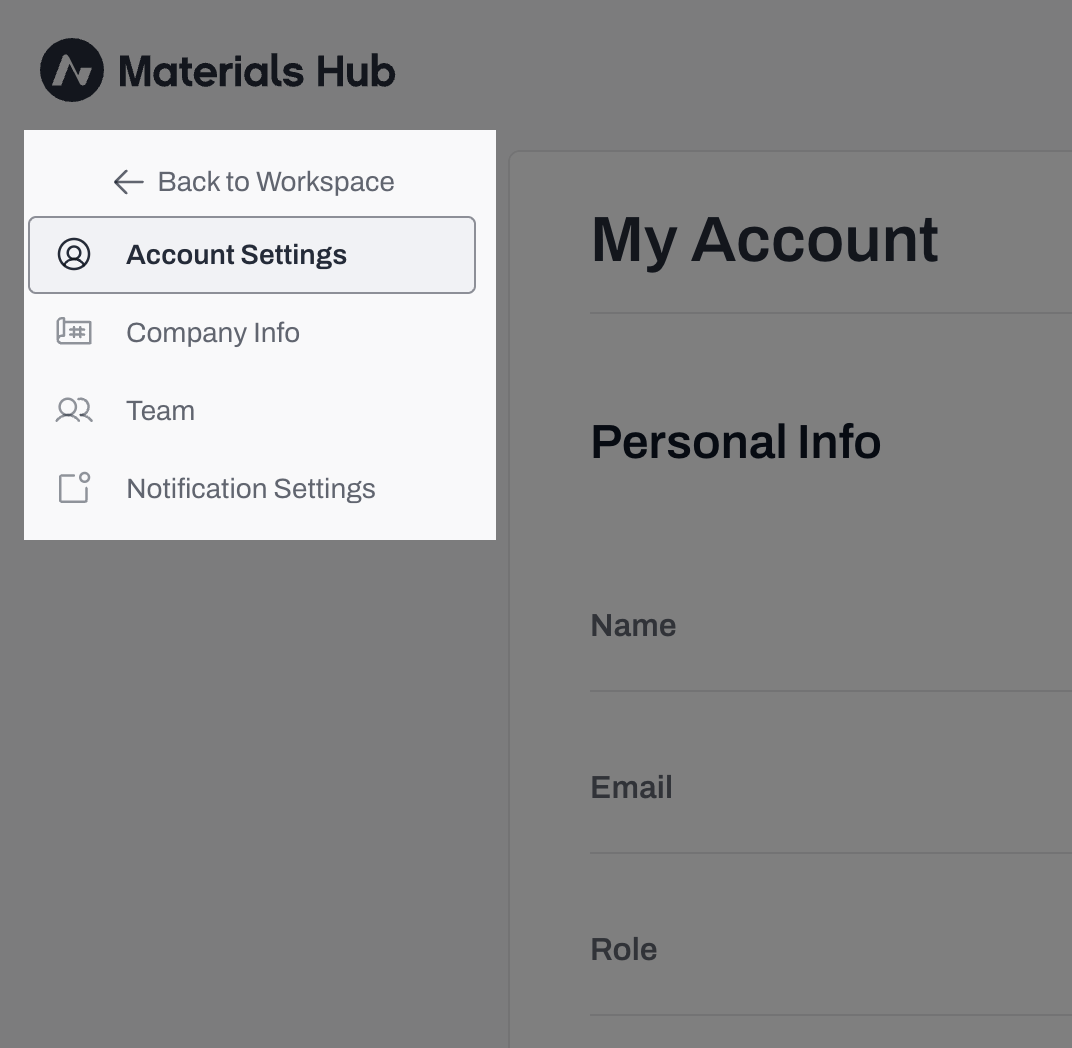
* The menu to the left allows you to navigate to the different sections
* **Personal Information** (in Account Settings)
* **Company Info**
* **Team**
* **Notification Settings**
**Note:** The Company Info and Team tabs will not be available until you join or create a company in Acelab. Keep reading below to learn how to join or create a company.
***
## Personal Info
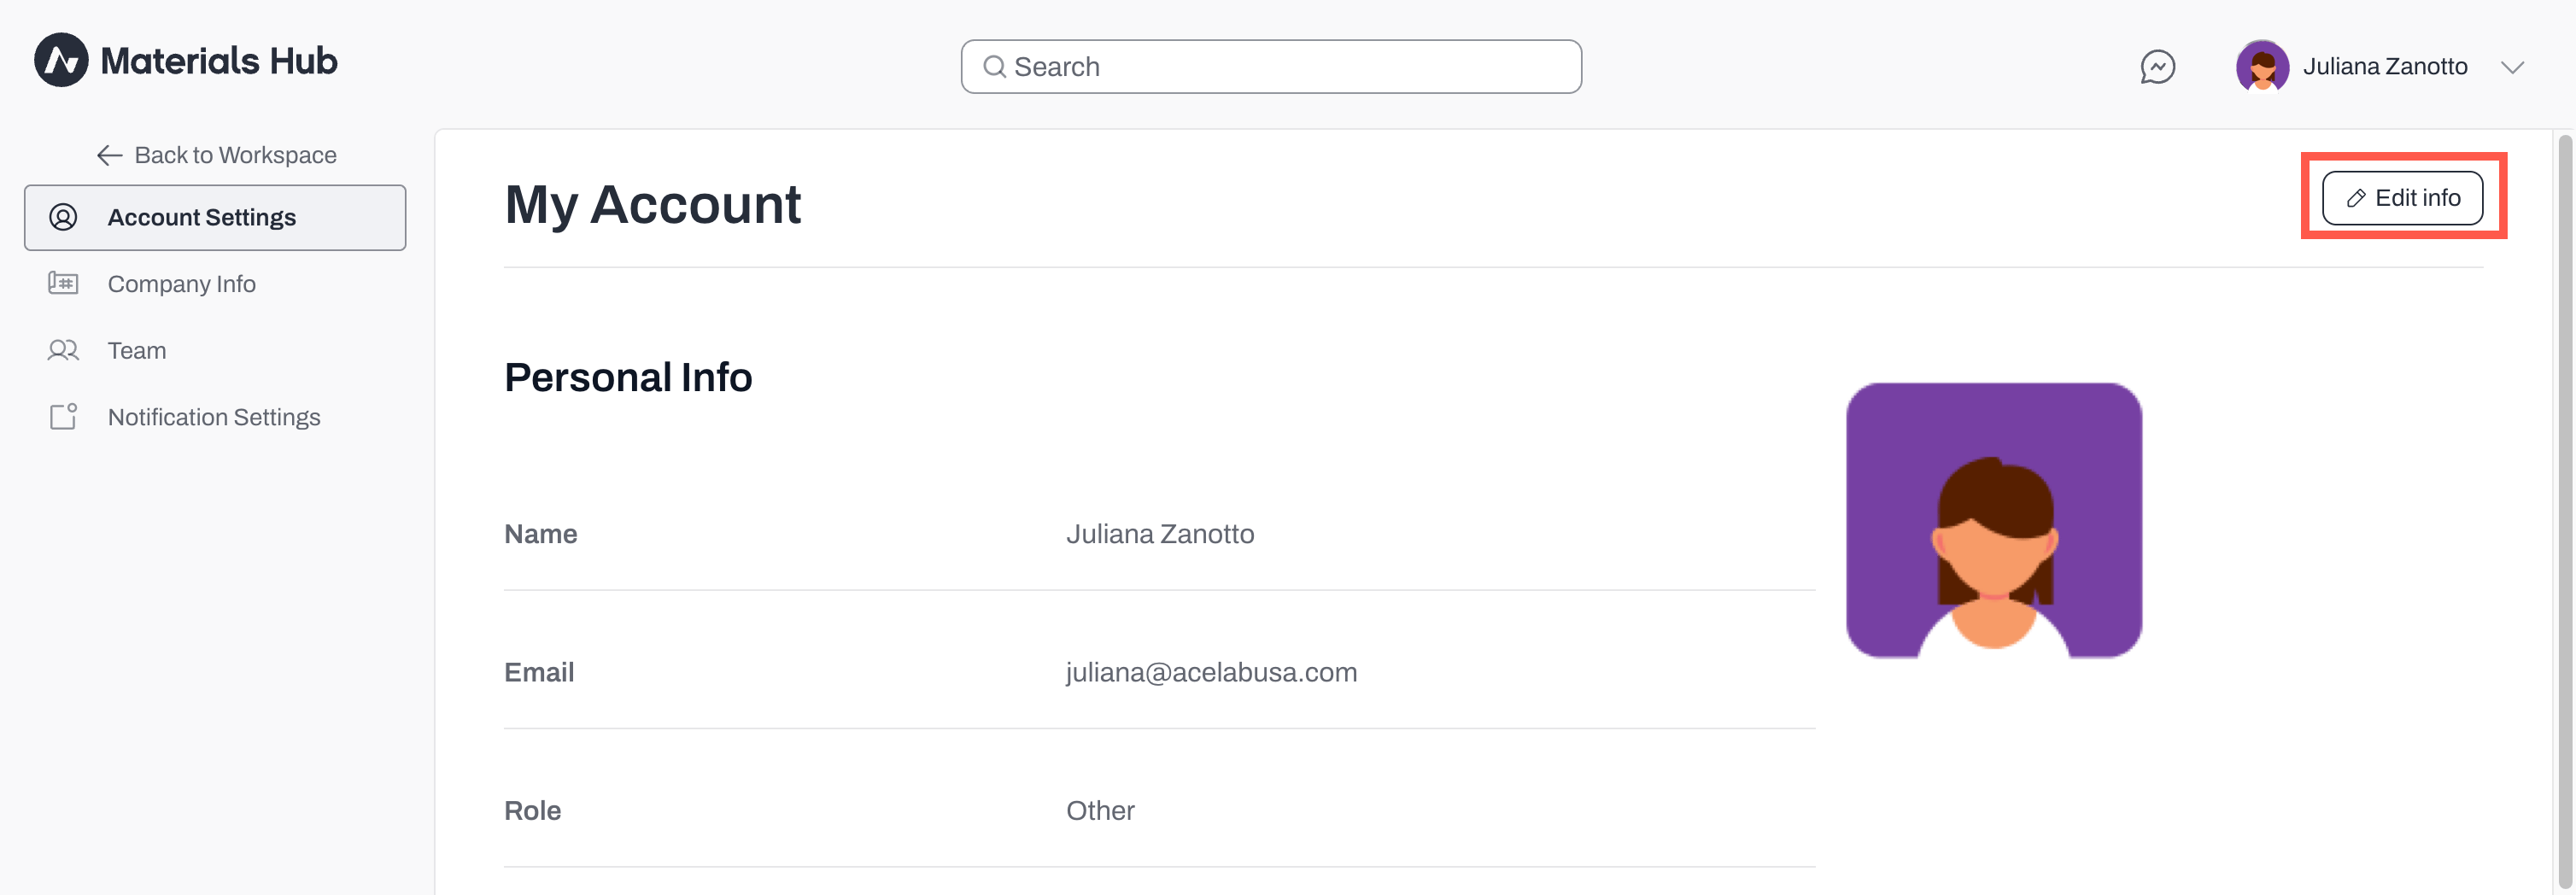
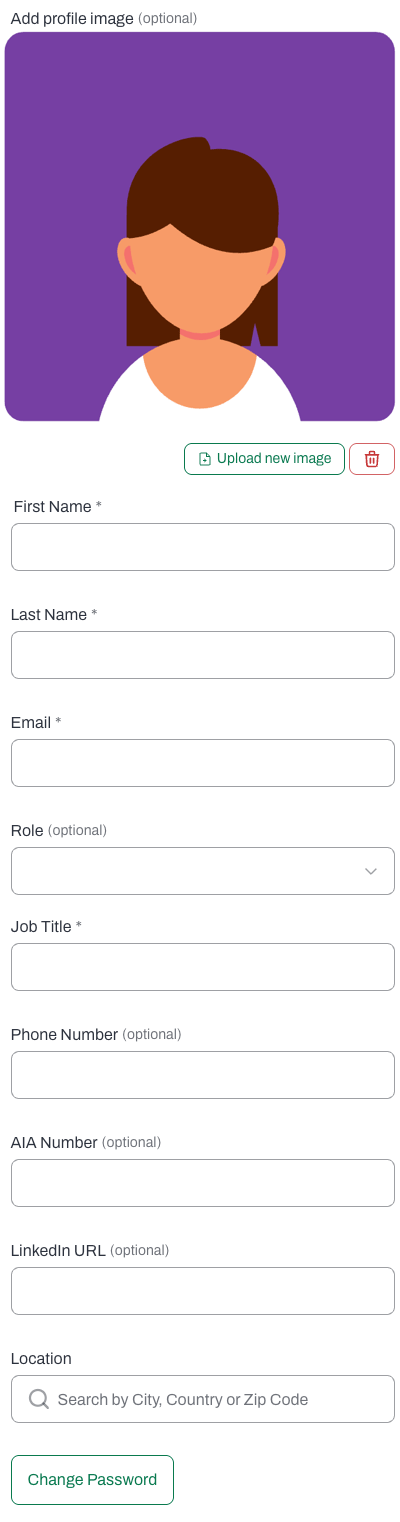
* From the Account Settings tab, select **Edit info** to complete your personal information section.
* We recommend completing all fields, but at a minimum, add your name, email, AIA number, and LinkedIn link
* If needed, scroll down to **Change Password**
* Click the **Save Changes** button at the top right corner
***
## Join a Company
* In the **Account Settings** tab, scroll all the way down
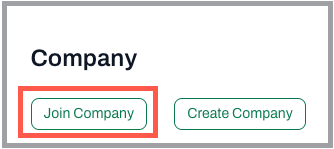
* If you have not yet joined a Company, you will see the option to **Join Company**
* If you don't find a company you want to join, you can **Create Company** ([see below](#create-a-company))
* Click to **Join Company**
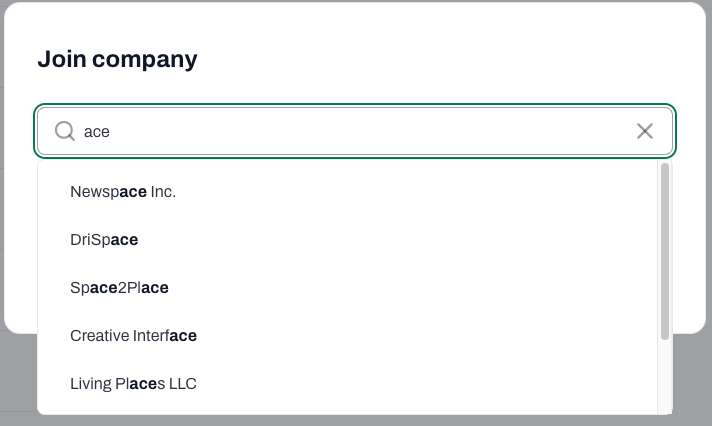
* Begin typing your company's name, and if the company is already created on Acelab, it will appear in the drop-down menu.
* Select your company
* Click **Request to join**
* If your company Admin has chosen to approve requests from anyone using the company email domain automatically, you will be immediately added to the company in Acelab.
* If your company is not using automatic approvals based on email domain, your request to join will be sent to the company Admin for approval.
**Note:** If your company **is not listed** in the dropdown menu, please contact your company's Admin to check whether a company has already been created. If the company has not yet been created, Admins will be able to select **Create Company** ([see below](#create-a-company))
***
## Create a Company
* In the **Account Settings** tab, scroll all the way down
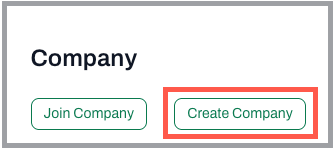
* Click to **Create Company**
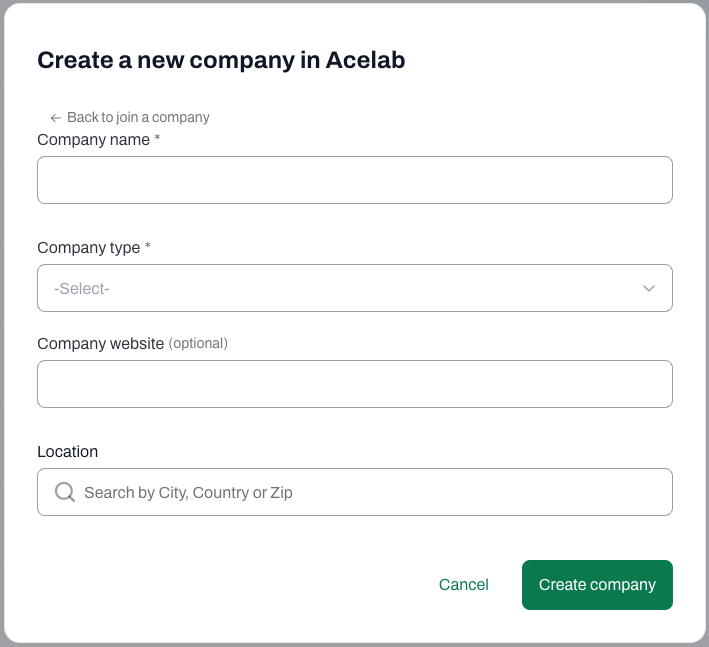
* Complete all fields, including company location
* The company section is important to ensure seamless collaboration
* Click **Create Company**
***
## Leave a Company
* In the Account Settings page, scroll all the way down
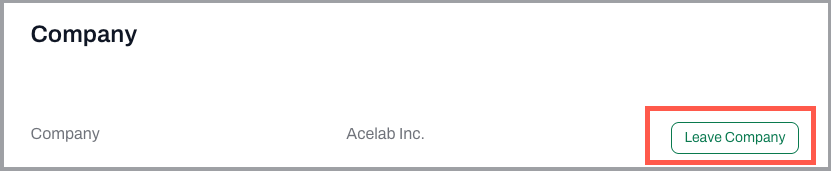
* To leave a company, select **Leave Company**
* This is irreversible, so please ensure that this is the desired action. To rejoin the firm on Acelab you will need to reach out to an Admin who may send you an invitation.
***
## Company Info
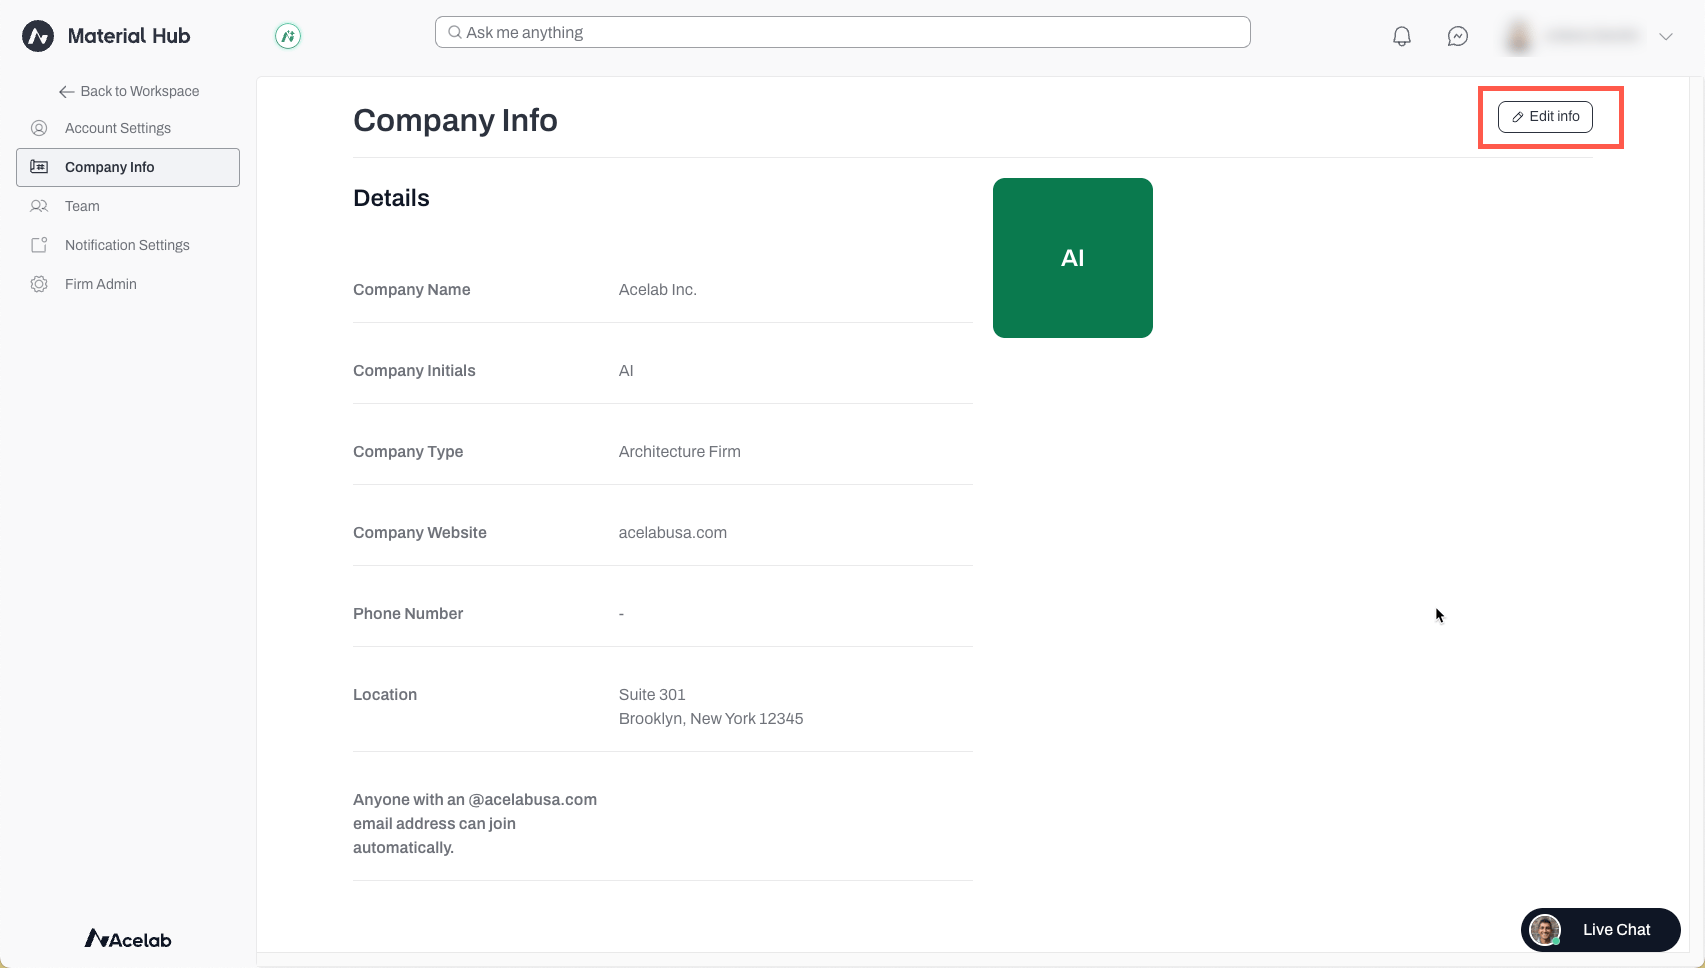
* In the Company Info tab, click **Edit info** (available to Admin only)
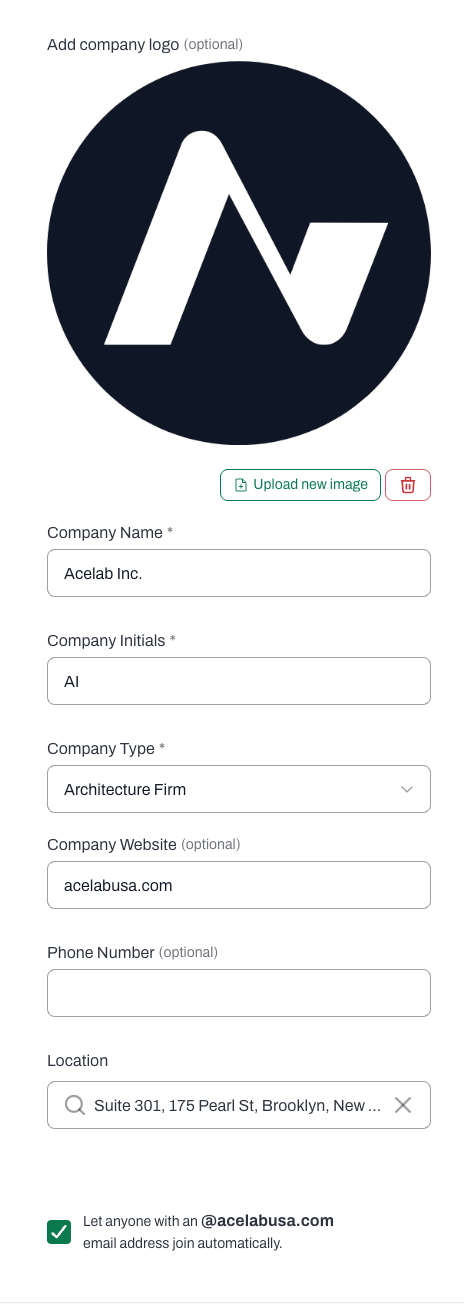
* Add or edit your company information
* Add a company logo
* Check the box if you want collaborators whose email address matches the company email domain to join automatically, without needing an Admin invite or approval.
* Click **Save Changes** at the top right corner
***
## Team
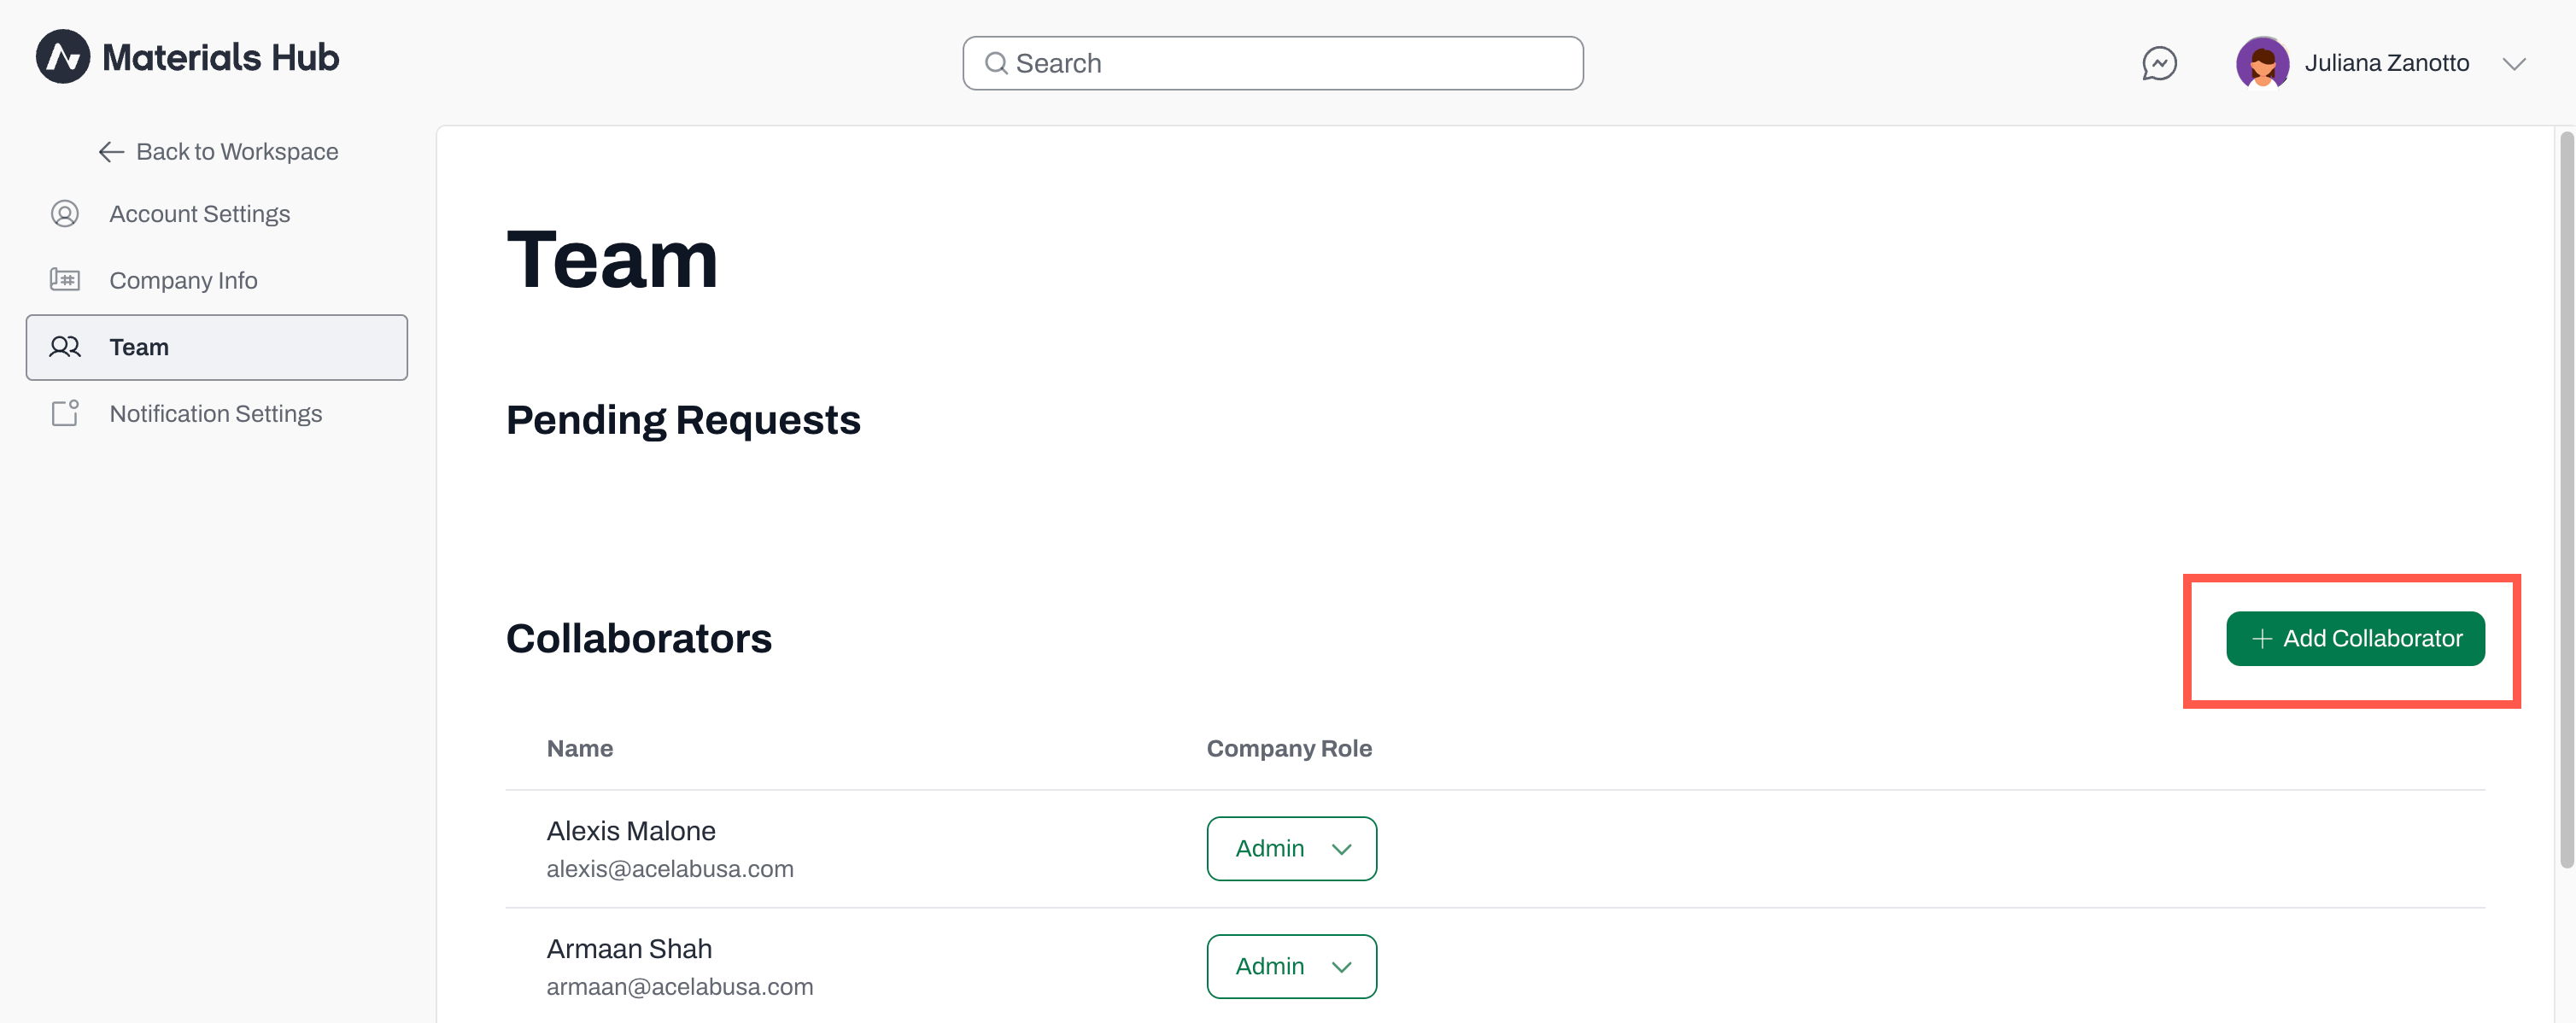
* In the Team tab, you can manage collaborators' invites, permission levels, and requests.
* To add collaborators, click **+ Add Collaborator** (available to Admin only)
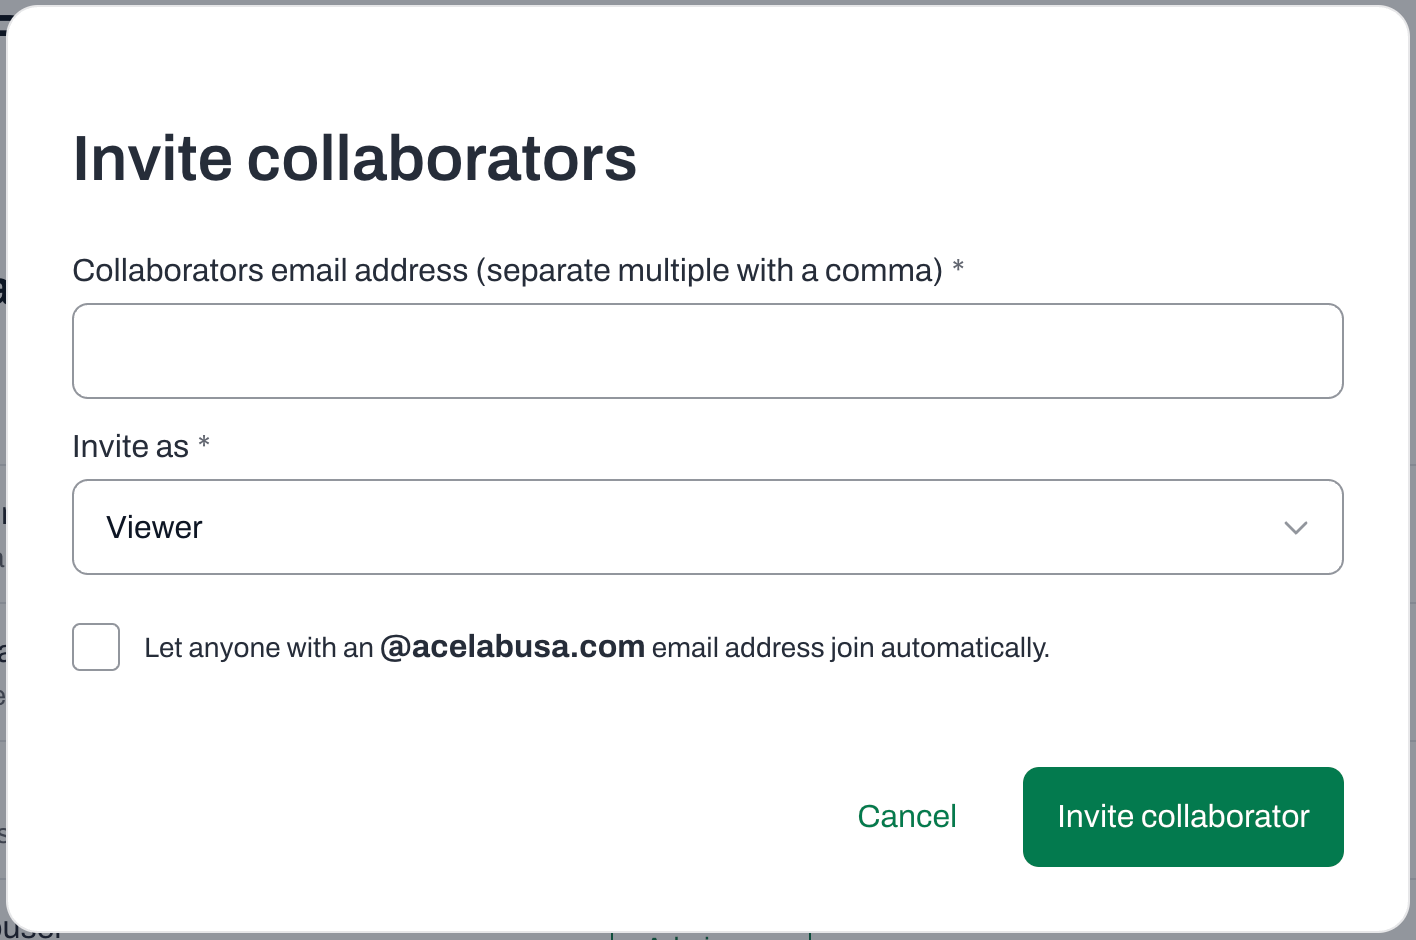
* Add in all team members' emails, separated by commas
* Select their permission level from the drop-down menu (learn more about each permission level in the article [Permissions in Acelab](/help-center/getting-started/permissions-in-acelab))
* You can change permission levels any time
* Check the box if you want to let anyone with your company's email address join automatically, without needing an Admin's approval or invitation
* Click **Invite Collaborator**
**Tip:** For a seamless roll out, let your team know about the incoming invitations and ask them to check their spam folders.
**Note:** Collaborators added to the company will have access to the Firm Library, but they won’t automatically gain access to all projects. Team members need to be added to each project from the project's page. To learn more about adding collaborators to projects, check out [this article](/help-center/working-on-projects/managing-project-collaborators).
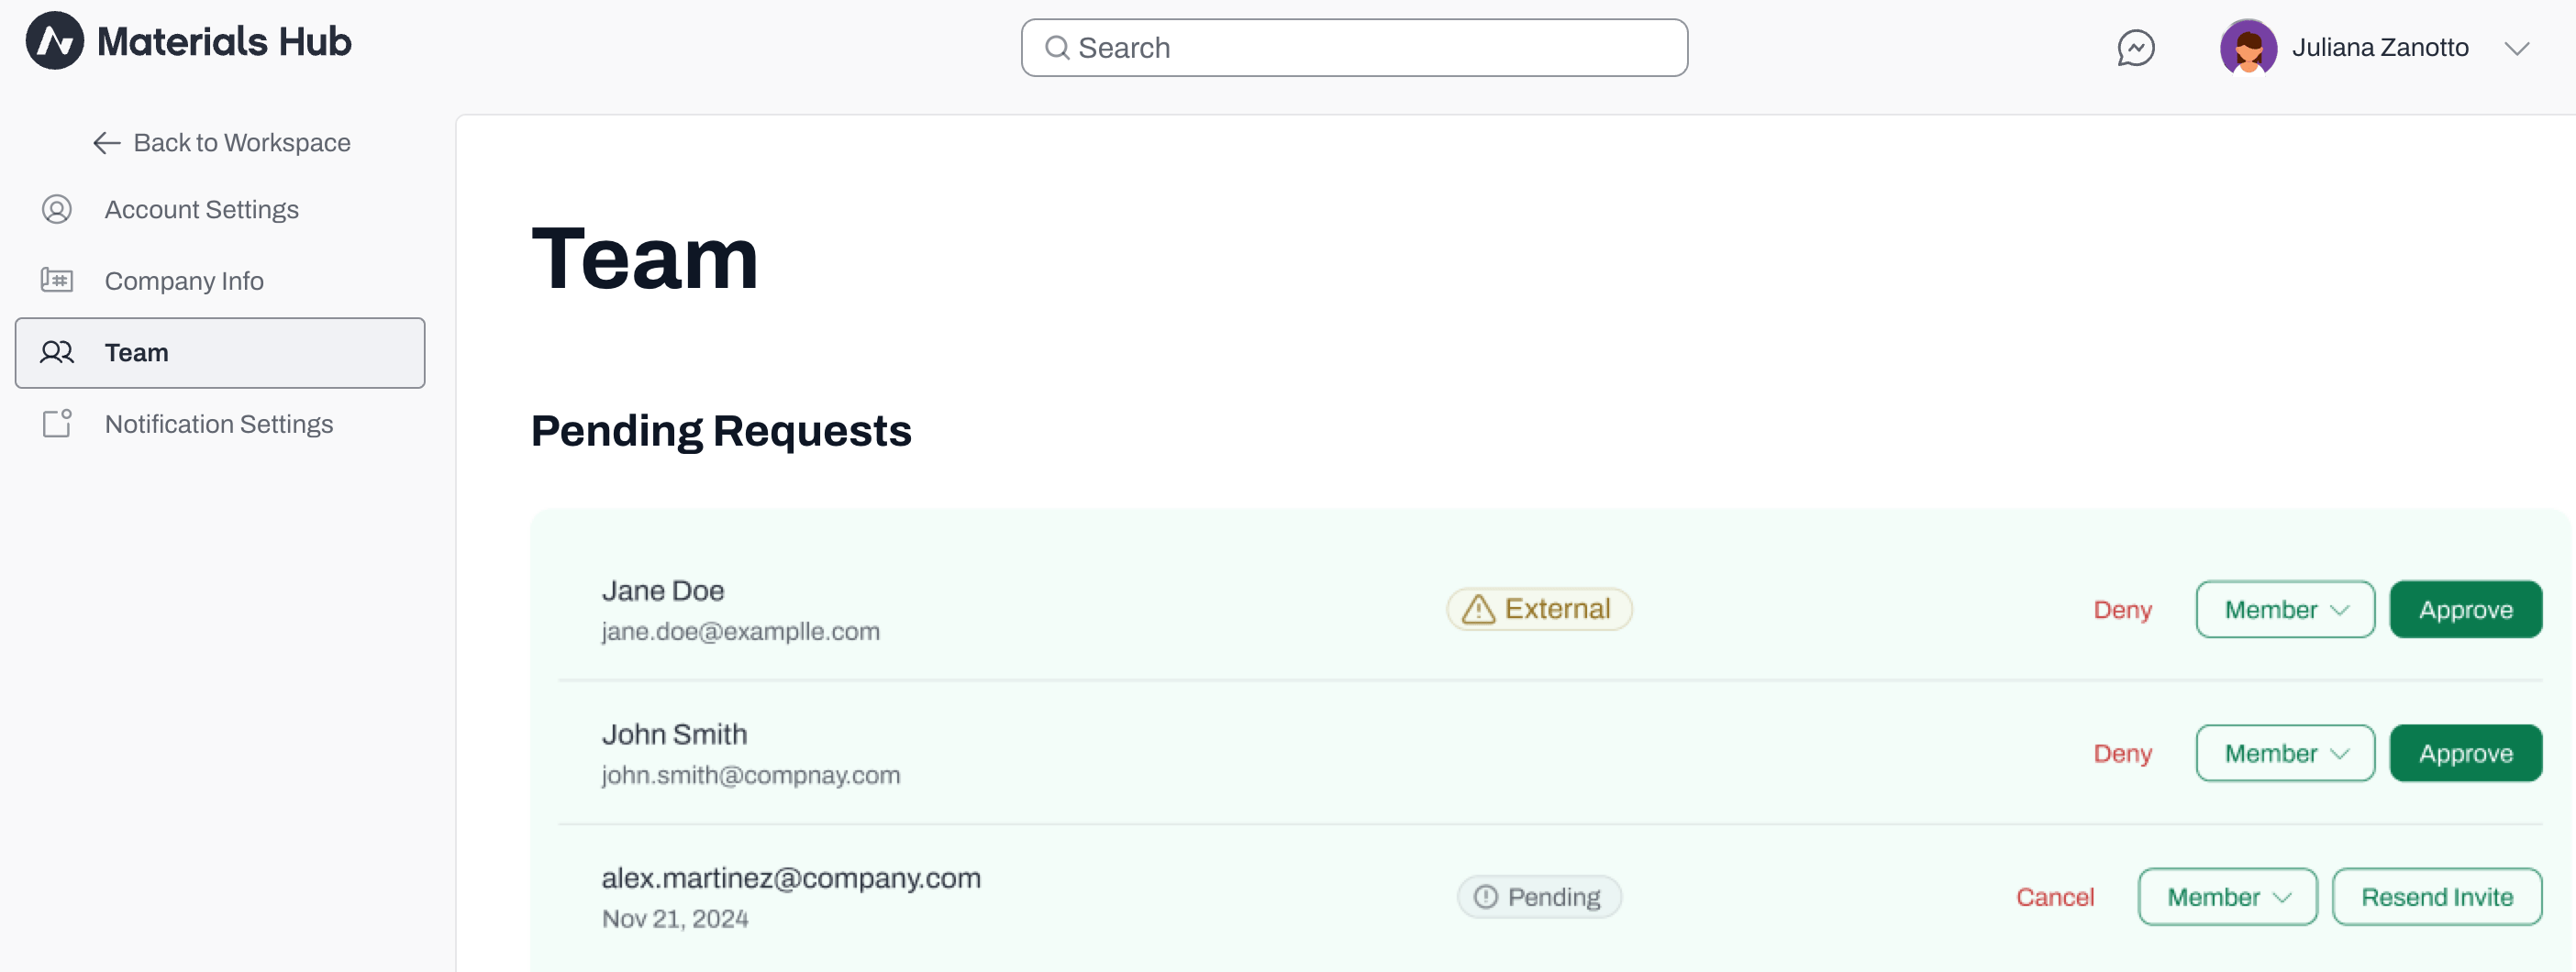
* Collaborators who **have received an invitation** but have not yet accepted it, will appear in the **Pending Requests** section
* Collaborators who **have requested to join the company** will also appear in the Pending Requestes section
* As an Admin you can:
* **Cancel** a pending invitation that was sent out
* **Approve** a collaborator's request to join the company
* **Deny** a collaborator's request to join the company
* **Resend Invite** if a collaborator has not received the previous invitation
* Change **permission** levels using the drop-down menu
***
## Notification Settings
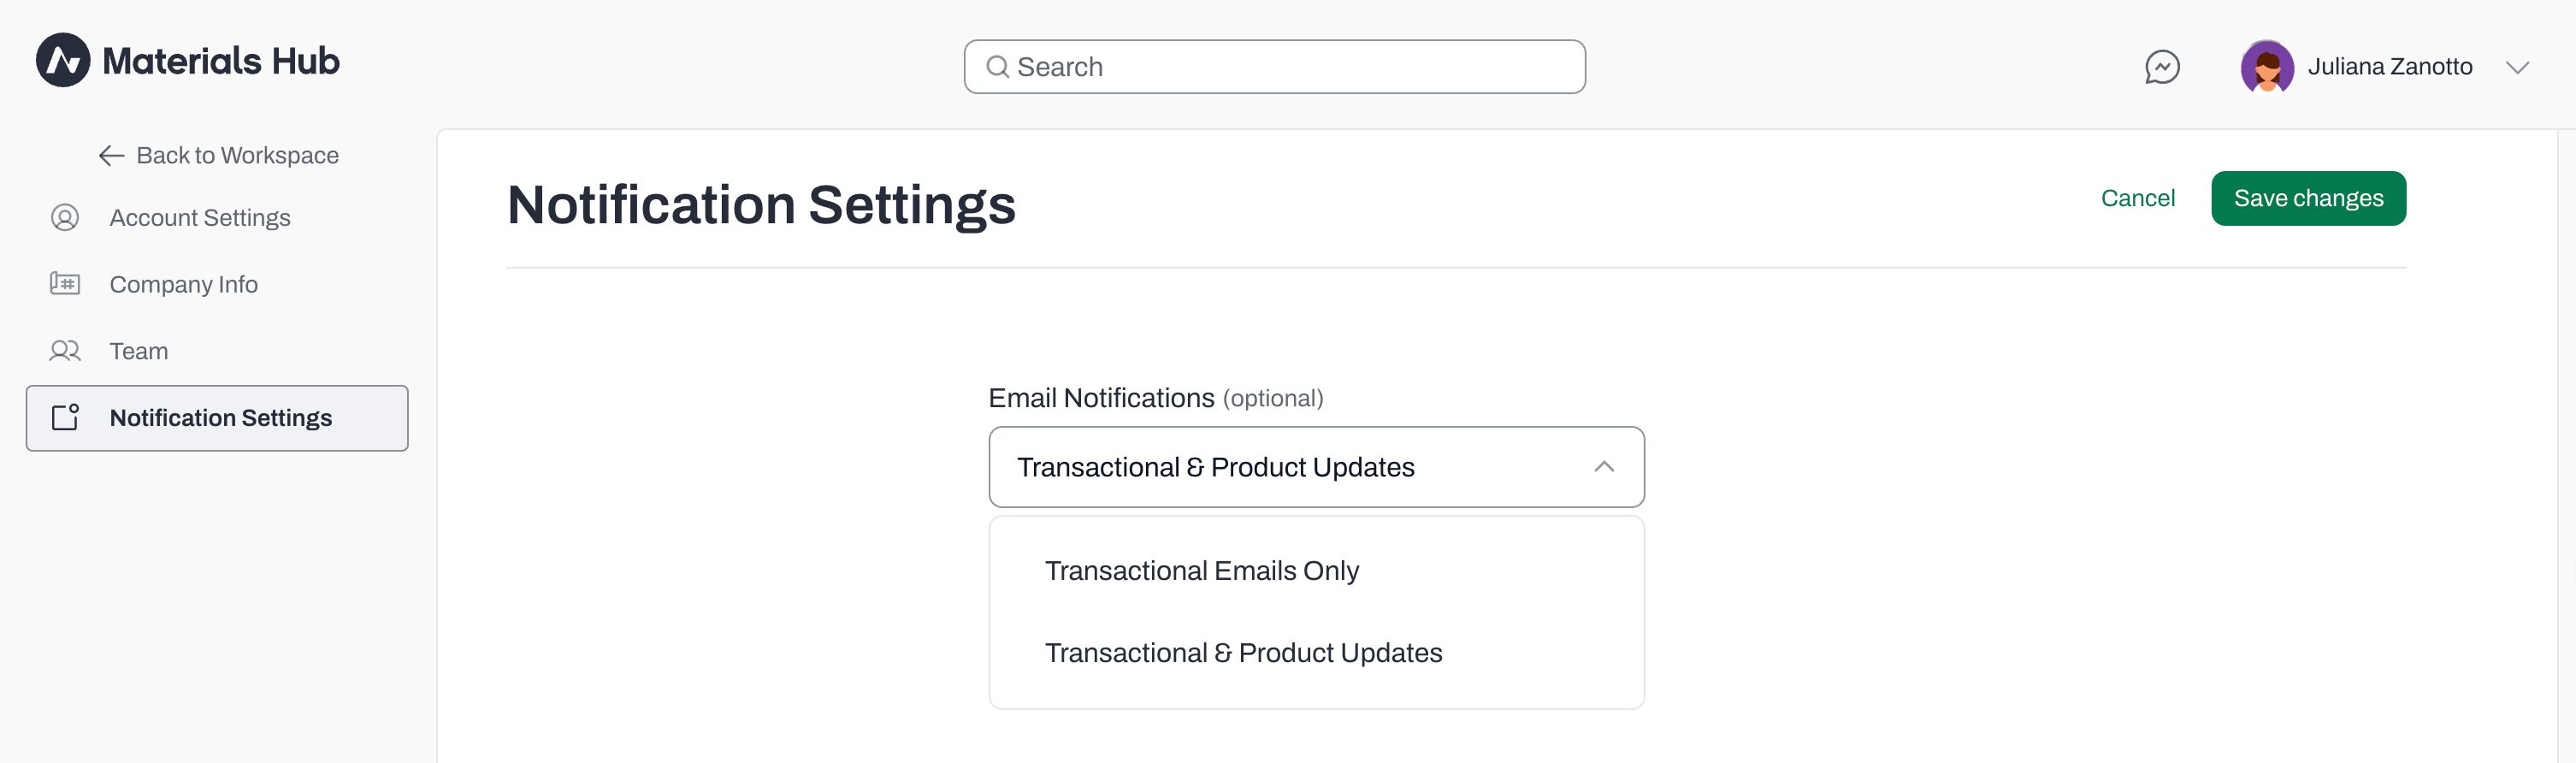
* In the Notification Settings tab, click **Edit Setting t**o select your email preferences
* Select which types of emails you would like to receive
* By default, users are set up to receive 'Transactional & Product Updates' emails
* Use the drop-down menu if you wish to receive Transactional emails only
* Note: Opting out of Product Update emails will prevent you from notifications about new launches
* Click **Save changes** at the top right corner
Congratulations!
Your account is set up and ready to go.
***
## 📚 Keep Learning 📚
### Next: **Firm Library Overview**
[Go to next article](/help-center/building-your-firm-library/firm-library-overview)
 * We recommend completing all fields, but at a minimum, add your name, email, AIA number, and LinkedIn link
* If needed, scroll down to **Change Password**
* Click the **Save Changes** button at the top right corner
* We recommend completing all fields, but at a minimum, add your name, email, AIA number, and LinkedIn link
* If needed, scroll down to **Change Password**
* Click the **Save Changes** button at the top right corner
 * Select your company
* Click **Request to join**
* If your company Admin has chosen to approve requests from anyone using the company email domain automatically, you will be immediately added to the company in Acelab.
* If your company is not using automatic approvals based on email domain, your request to join will be sent to the company Admin for approval.
* Select your company
* Click **Request to join**
* If your company Admin has chosen to approve requests from anyone using the company email domain automatically, you will be immediately added to the company in Acelab.
* If your company is not using automatic approvals based on email domain, your request to join will be sent to the company Admin for approval.
 ***
## Company Info
* In the Company Info tab, click **Edit info** (available to Admin only)
***
## Company Info
* In the Company Info tab, click **Edit info** (available to Admin only)
 * Add or edit your company information
* Add a company logo
* Check the box if you want collaborators whose email address matches the company email domain to join automatically, without needing an Admin invite or approval.
* Click **Save Changes** at the top right corner
* Add or edit your company information
* Add a company logo
* Check the box if you want collaborators whose email address matches the company email domain to join automatically, without needing an Admin invite or approval.
* Click **Save Changes** at the top right corner
 * Add in all team members' emails, separated by commas
* Select their permission level from the drop-down menu (learn more about each permission level in the article [Permissions in Acelab](/help-center/getting-started/permissions-in-acelab))
* You can change permission levels any time
* Check the box if you want to let anyone with your company's email address join automatically, without needing an Admin's approval or invitation
* Click **Invite Collaborator**
* Add in all team members' emails, separated by commas
* Select their permission level from the drop-down menu (learn more about each permission level in the article [Permissions in Acelab](/help-center/getting-started/permissions-in-acelab))
* You can change permission levels any time
* Check the box if you want to let anyone with your company's email address join automatically, without needing an Admin's approval or invitation
* Click **Invite Collaborator**
 ***
## Notification Settings
* In the Notification Settings tab, click **Edit Setting t**o select your email preferences
* Select which types of emails you would like to receive
* By default, users are set up to receive 'Transactional & Product Updates' emails
* Use the drop-down menu if you wish to receive Transactional emails only
* Note: Opting out of Product Update emails will prevent you from notifications about new launches
* Click **Save changes** at the top right corner
***
## Notification Settings
* In the Notification Settings tab, click **Edit Setting t**o select your email preferences
* Select which types of emails you would like to receive
* By default, users are set up to receive 'Transactional & Product Updates' emails
* Use the drop-down menu if you wish to receive Transactional emails only
* Note: Opting out of Product Update emails will prevent you from notifications about new launches
* Click **Save changes** at the top right corner
 Congratulations!
Your account is set up and ready to go.
***
## 📚 Keep Learning 📚
### Next: **Firm Library Overview**
[Go to next article](/help-center/building-your-firm-library/firm-library-overview)
Congratulations!
Your account is set up and ready to go.
***
## 📚 Keep Learning 📚
### Next: **Firm Library Overview**
[Go to next article](/help-center/building-your-firm-library/firm-library-overview)