> ## Documentation Index
> Fetch the complete documentation index at: https://docs.acelabusa.com/llms.txt
> Use this file to discover all available pages before exploring further.
# Linking and Unlinking Material Hub Projects to Revit
> Connect your Material Hub project to Revit, keep product data flowing, and learn how to switch, reassign, or disconnect projects.
*Written by Patricia Causey · Updated March 20, 2026*
## Link a Material Hub Project to Revit
Linking a project connects your Acelab product data to your Revit model. Once linked, you can map products to Revit assets, sync data, and keep your schedules up to date.
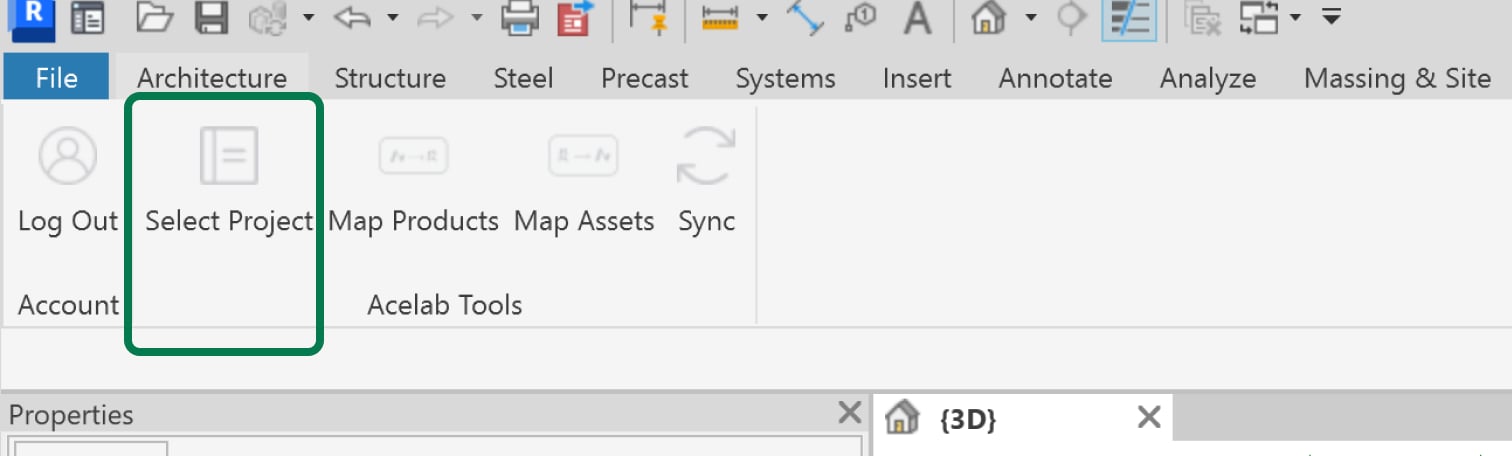
1. Click **Select Project** in the ribbon the Acelab tab.
 2. From the dropdown menu, select the Acelab project -
* The dropdown includes all projects you've created or been invited to in Acelab.
2. From the dropdown menu, select the Acelab project -
* The dropdown includes all projects you've created or been invited to in Acelab.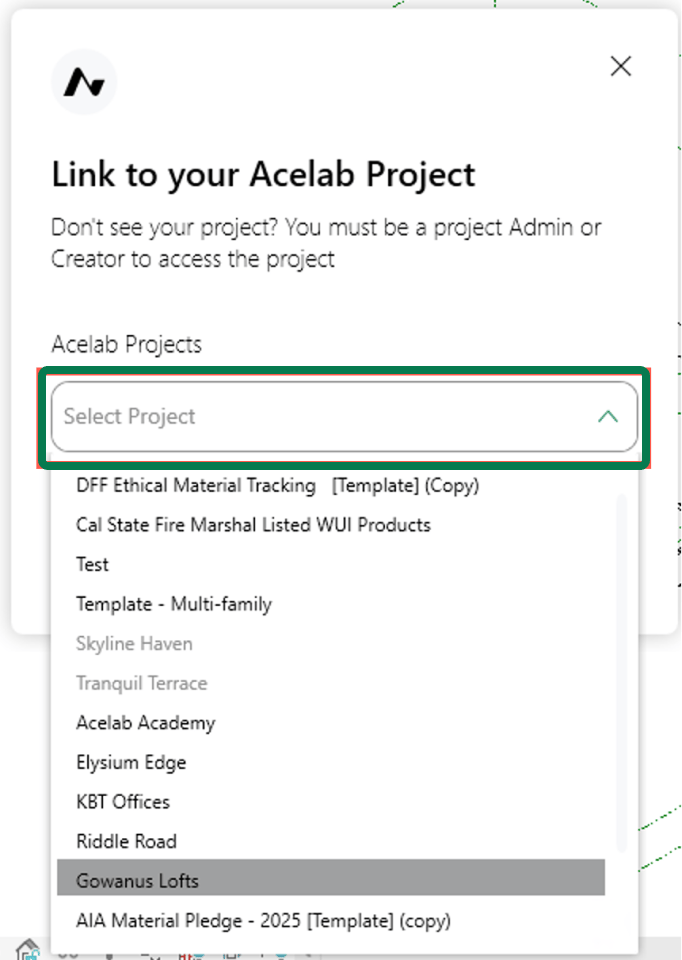 3. Click **Next**.
4. A confirmation message will appear indicating the project has been successfully linked. Click **Close** to dismiss it.
**Tip:** Make sure the products you need are already saved in your Acelab project before linking. This ensures they're available for mapping once the connection is established.
***
## Reassigning a Project Link
An Acelab project can only be linked to one Revit Project at a time, and a Revit Project can only be linked to one Acelab project at a time. If either side already has an existing link, you'll see a reassignment modal when you try to connect them. There are two scenarios where this can happen.
### Scenario 1: The Acelab Project Is Already Linked to a Different Revit Project
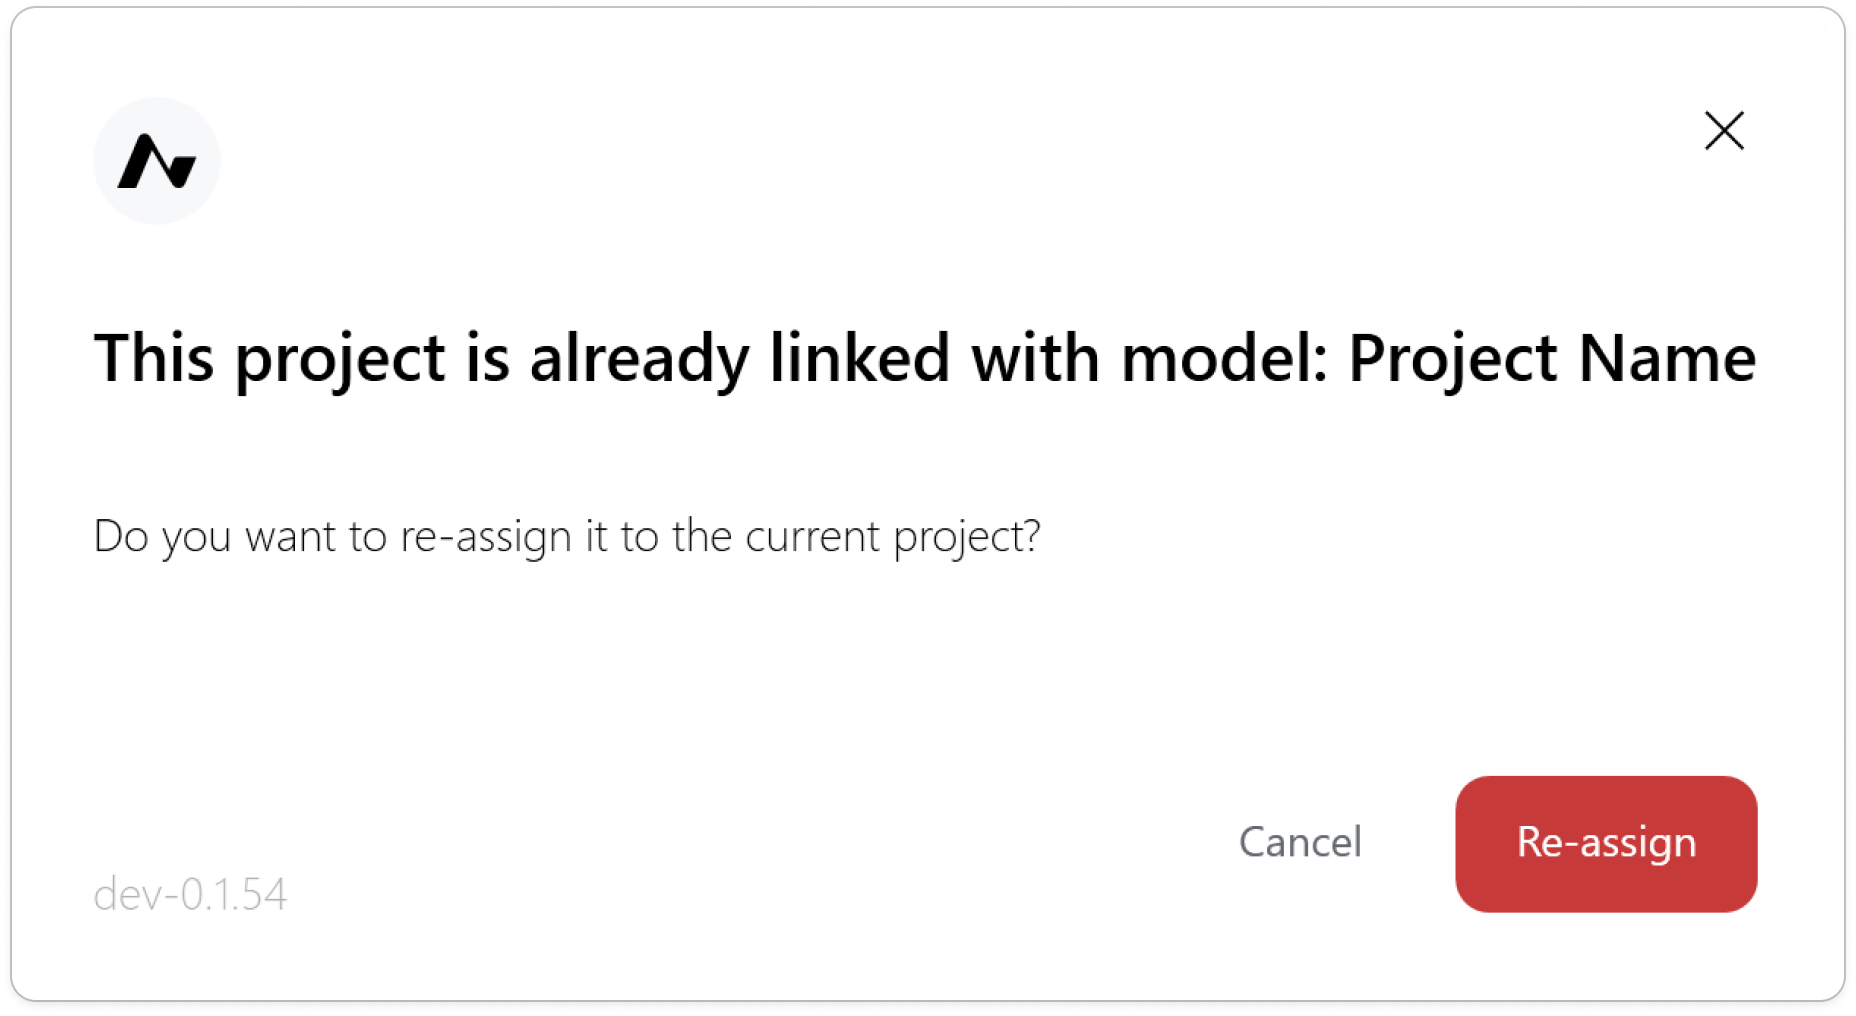
If you select an Acelab project that is currently linked to another Revit project:
1. Click **Select Project** in the top bar menu and choose the project you want to link.
2. A modal will appear showing you which Revit project the selected acelab project is currently linked to.
3. You have two options:
* **Reassign** — Breaks the existing link between the project and the other Revit project, and links the Acelab project to your current Revit project instead.
* **Cancel** — Keeps the existing link unchanged and returns you to the project dropdown.
### Scenario 2: The Revit File Is Already Linked to an Acelab Project by Another User
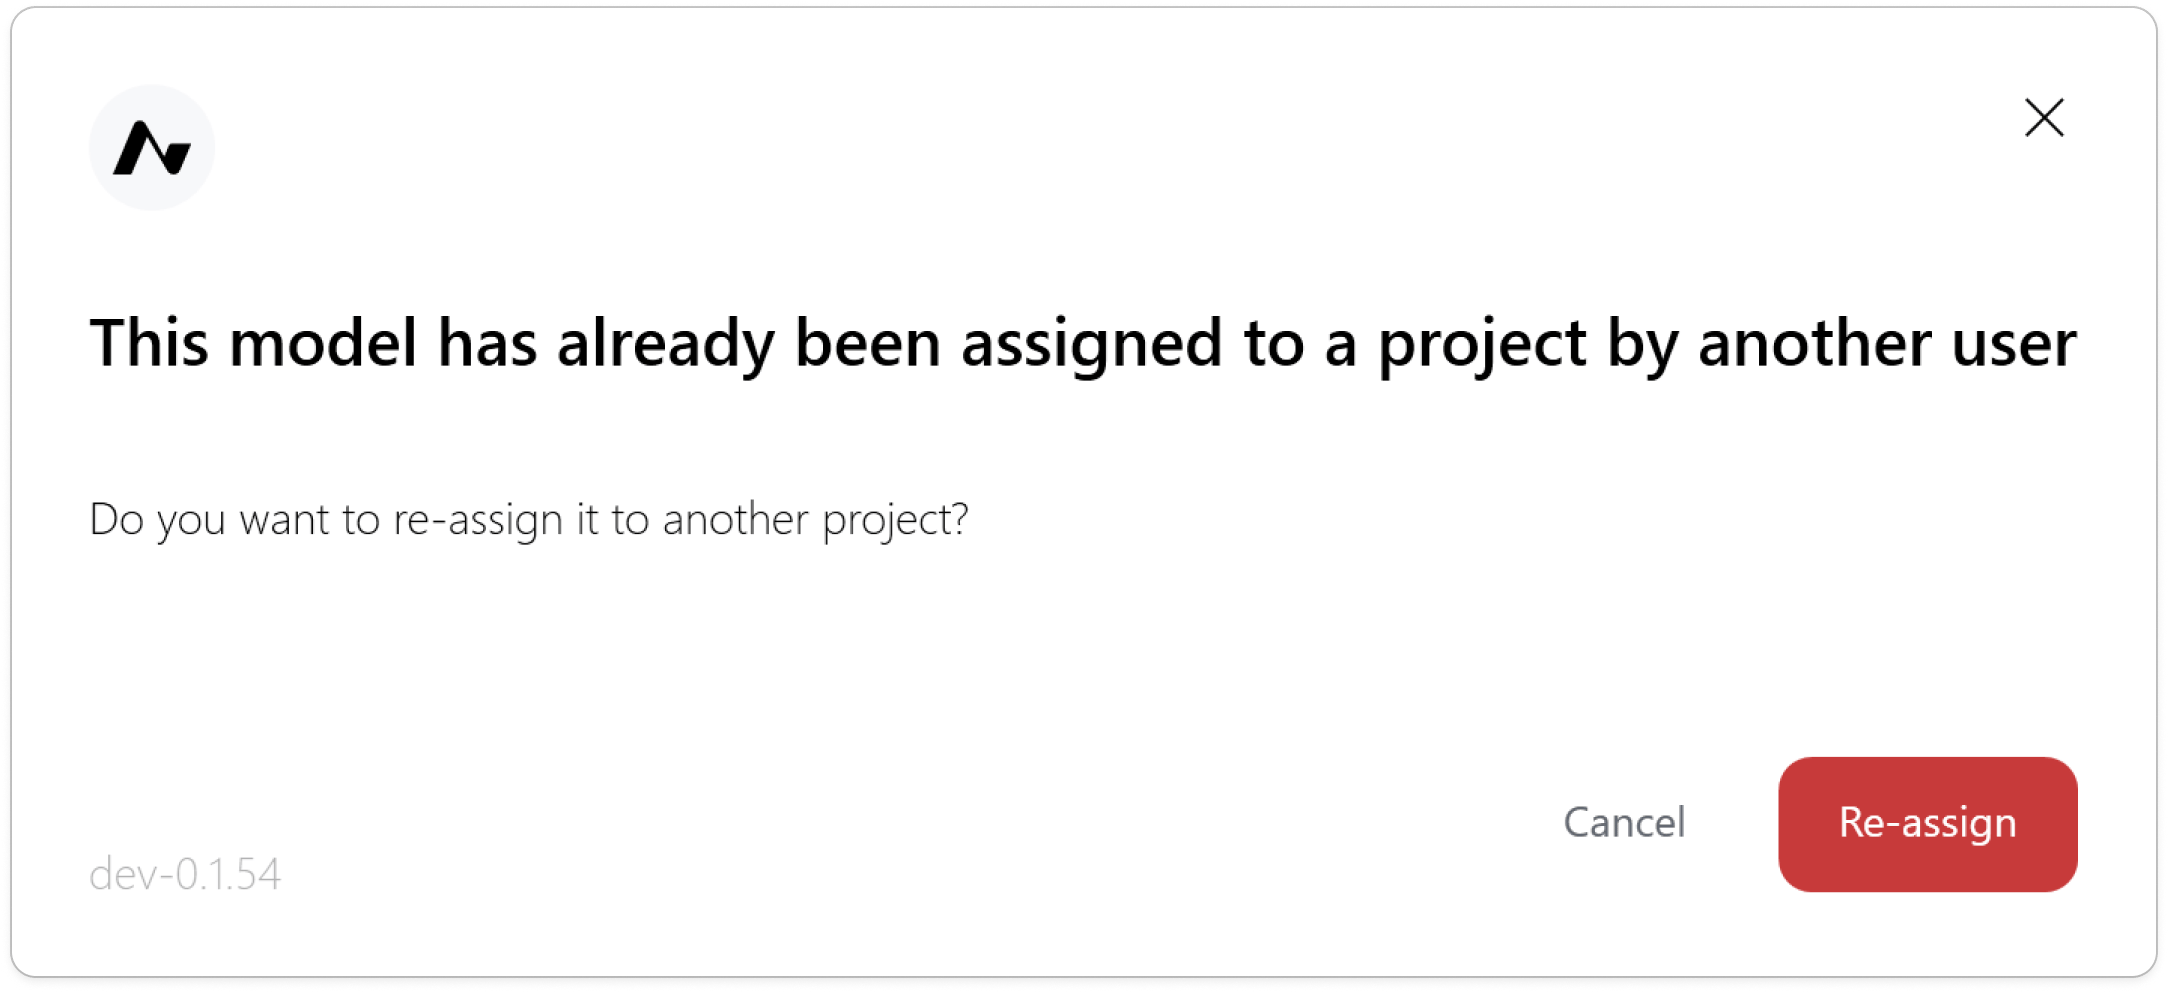
If the Revit file you're working in is already linked to an Acelab project that you don't have access to:
1. When you sign in and click on Select Project option in Acelab Ribbon, a modal will appear informing you that the Revit file is already linked to an Acelab project by another user.
2. You have two options:
* **Reassign** — Breaks the existing link and allows you to select a different Acelab project to link to this Revit file.
* **Cancel** — Keeps the existing link in place. You won't be able to map products and sync.
**Important:** Reassigning in either scenario removes all existing product-to-element mappings. You will need to remap your Acelab products to Revit elements after reassigning. Previously synced data (such as type parameter values) will remain in the Revit model, but those values will no longer update through Acelab.
Tip: Coordinate with your team before reassigning. If another team member set up the link and mappings, reassigning will undo their work. Check with them first, or ask to be added as a collaborator on the linked Acelab project instead.
***
## Unlink or Switch to a Different Project
If you need to disconnect the current project or link a different one, you can do so directly from the Acelab tab in Revit.
1. Click **Select Project** in the top bar menu.
3. Click **Next**.
4. A confirmation message will appear indicating the project has been successfully linked. Click **Close** to dismiss it.
**Tip:** Make sure the products you need are already saved in your Acelab project before linking. This ensures they're available for mapping once the connection is established.
***
## Reassigning a Project Link
An Acelab project can only be linked to one Revit Project at a time, and a Revit Project can only be linked to one Acelab project at a time. If either side already has an existing link, you'll see a reassignment modal when you try to connect them. There are two scenarios where this can happen.
### Scenario 1: The Acelab Project Is Already Linked to a Different Revit Project
If you select an Acelab project that is currently linked to another Revit project:
1. Click **Select Project** in the top bar menu and choose the project you want to link.
2. A modal will appear showing you which Revit project the selected acelab project is currently linked to.
3. You have two options:
* **Reassign** — Breaks the existing link between the project and the other Revit project, and links the Acelab project to your current Revit project instead.
* **Cancel** — Keeps the existing link unchanged and returns you to the project dropdown.
### Scenario 2: The Revit File Is Already Linked to an Acelab Project by Another User
If the Revit file you're working in is already linked to an Acelab project that you don't have access to:
1. When you sign in and click on Select Project option in Acelab Ribbon, a modal will appear informing you that the Revit file is already linked to an Acelab project by another user.
2. You have two options:
* **Reassign** — Breaks the existing link and allows you to select a different Acelab project to link to this Revit file.
* **Cancel** — Keeps the existing link in place. You won't be able to map products and sync.
**Important:** Reassigning in either scenario removes all existing product-to-element mappings. You will need to remap your Acelab products to Revit elements after reassigning. Previously synced data (such as type parameter values) will remain in the Revit model, but those values will no longer update through Acelab.
Tip: Coordinate with your team before reassigning. If another team member set up the link and mappings, reassigning will undo their work. Check with them first, or ask to be added as a collaborator on the linked Acelab project instead.
***
## Unlink or Switch to a Different Project
If you need to disconnect the current project or link a different one, you can do so directly from the Acelab tab in Revit.
1. Click **Select Project** in the top bar menu.
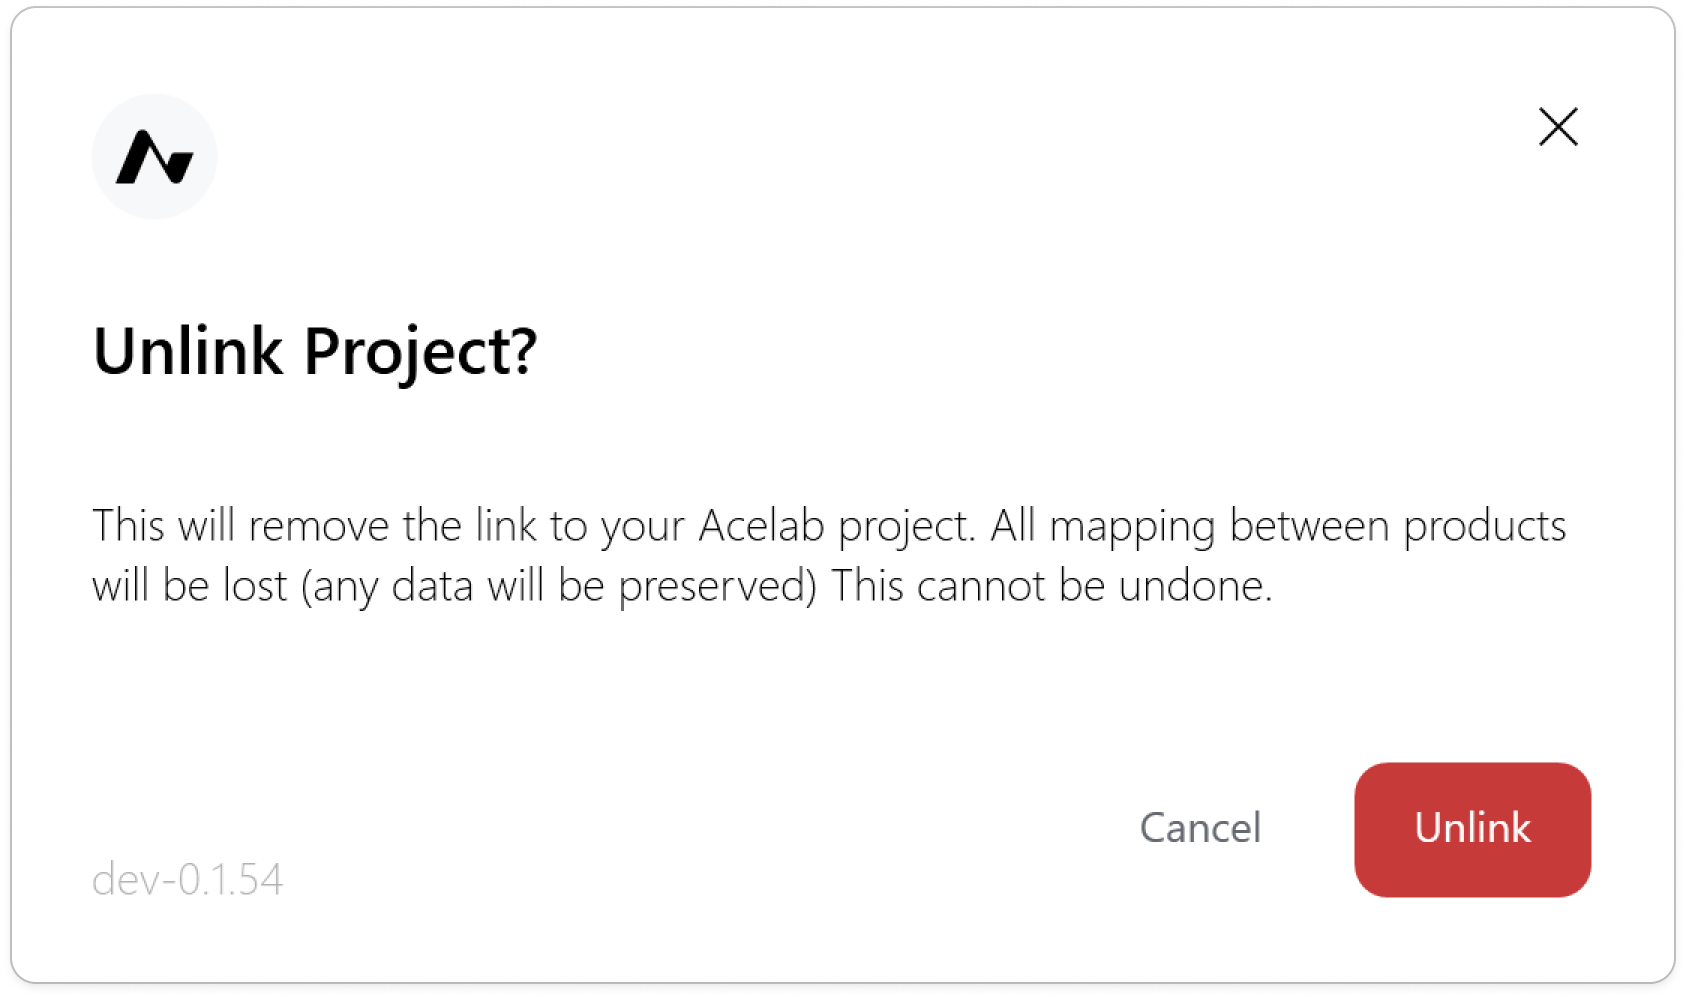
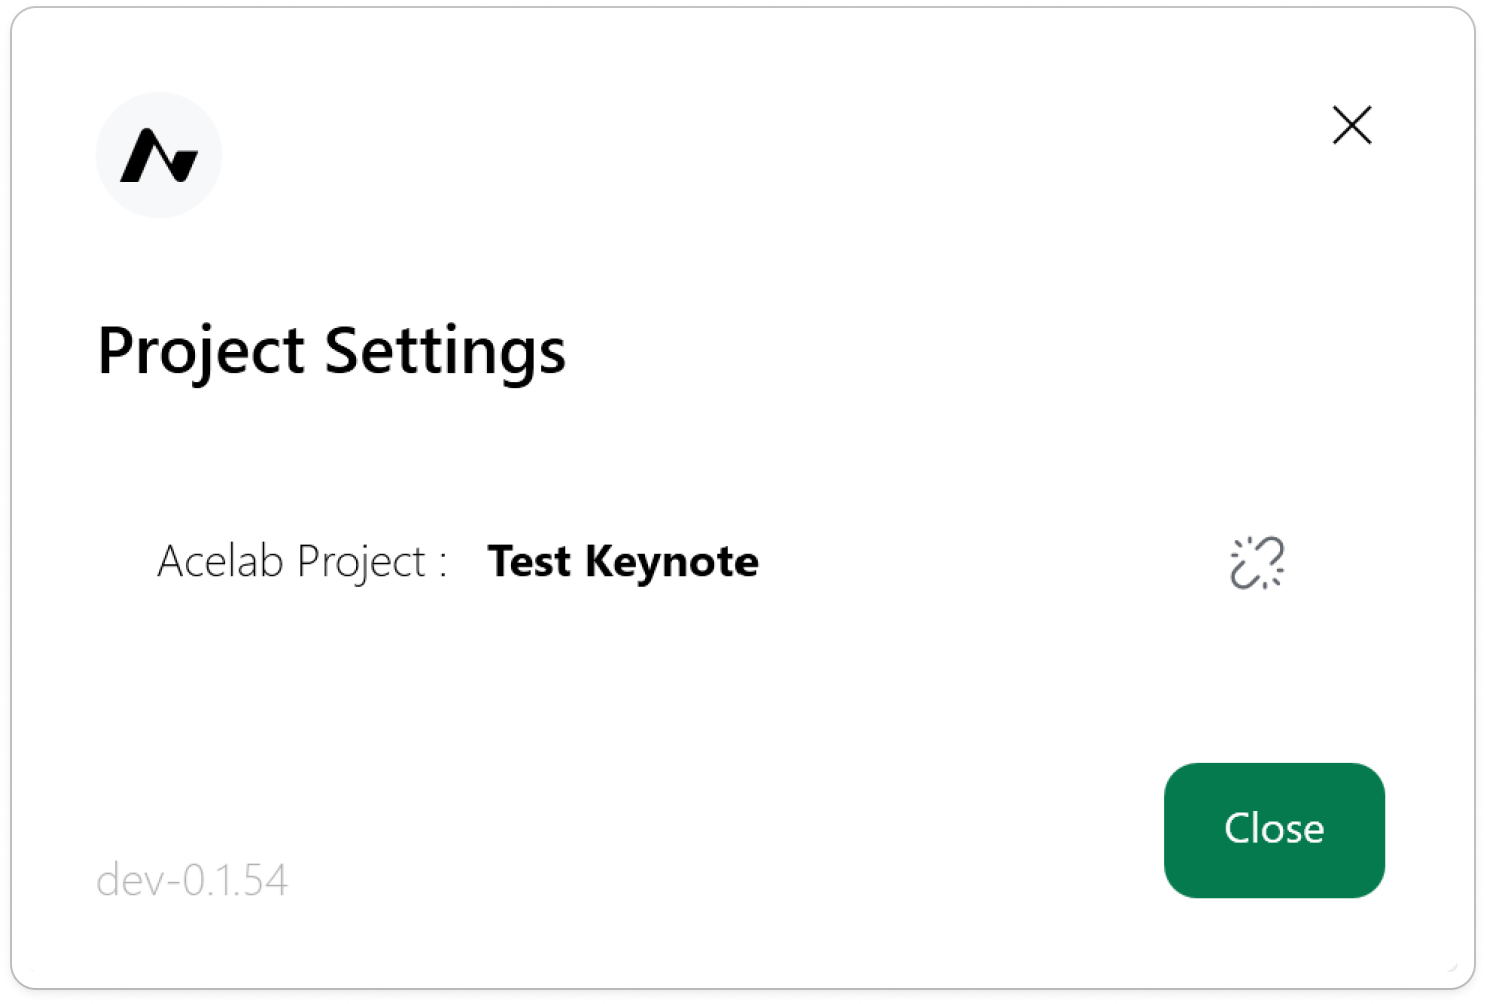 2. Click on Unlink Icon
3. Click **Unlink** to confirm.
**Note:** Unlinking a project removes the connection between your Revit model and that Acelab project. Any previously synced data in Revit (such as type parameter values) will remain in the model, but no further syncs will occur until a new project is linked.
***
## What Happens When You Link a Project?
Once a project is linked, you can:
* **Map products** from your Acelab schedule to Revit families and materials (see [Mapping Acelab Products to Revit Elements](/help-center/revit-integration/mapping-acelab-products-to-revit-elements))
* **Sync data** between the Material Hub and Revit to populate schedule fields with product information (see [Syncing Data Between Material Hub & Revit](/help-center/revit-integration/syncing-data-between-material-hub-revit))
***
## Troubleshooting
| Issue | Solution |
| ----------------------------------------------- | ---------------------------------------------------------------------------------------------------------------------------------------------- |
| Project not appearing in the dropdown | Make sure you've been added as a collaborator on the project in Acelab, or that you created the project yourself. |
| Link confirmation not appearing | Try signing out and signing back in to the Acelab tab in Revit, then attempt linking again. |
| Reassign modal appears when selecting a project | The Acelab project is already linked to another Revit file. You can reassign it, but this will remove all existing mappings. |
| "Linked by another user" modal appears | The Revit file is linked to an Acelab project you don't have access to. Ask to be added as a collaborator, or reassign to a different project. |
| Mappings missing after reassigning | This is expected. Reassigning breaks all previous mappings. You'll need to remap your products to Revit elements. |
| Need to link to a different project | Follow the steps in "Unlink or Switch to a Different Project" above. |
2. Click on Unlink Icon
3. Click **Unlink** to confirm.
**Note:** Unlinking a project removes the connection between your Revit model and that Acelab project. Any previously synced data in Revit (such as type parameter values) will remain in the model, but no further syncs will occur until a new project is linked.
***
## What Happens When You Link a Project?
Once a project is linked, you can:
* **Map products** from your Acelab schedule to Revit families and materials (see [Mapping Acelab Products to Revit Elements](/help-center/revit-integration/mapping-acelab-products-to-revit-elements))
* **Sync data** between the Material Hub and Revit to populate schedule fields with product information (see [Syncing Data Between Material Hub & Revit](/help-center/revit-integration/syncing-data-between-material-hub-revit))
***
## Troubleshooting
| Issue | Solution |
| ----------------------------------------------- | ---------------------------------------------------------------------------------------------------------------------------------------------- |
| Project not appearing in the dropdown | Make sure you've been added as a collaborator on the project in Acelab, or that you created the project yourself. |
| Link confirmation not appearing | Try signing out and signing back in to the Acelab tab in Revit, then attempt linking again. |
| Reassign modal appears when selecting a project | The Acelab project is already linked to another Revit file. You can reassign it, but this will remove all existing mappings. |
| "Linked by another user" modal appears | The Revit file is linked to an Acelab project you don't have access to. Ask to be added as a collaborator, or reassign to a different project. |
| Mappings missing after reassigning | This is expected. Reassigning breaks all previous mappings. You'll need to remap your products to Revit elements. |
| Need to link to a different project | Follow the steps in "Unlink or Switch to a Different Project" above. |