> ## Documentation Index
> Fetch the complete documentation index at: https://docs.acelabusa.com/llms.txt
> Use this file to discover all available pages before exploring further.
# Mapping Acelab Products to Revit Elements
> Link products from your Acelab Materials Hub to elements in your Revit model, and swap products without losing your connections.
*Written by Patricia Causey · Updated June 19, 2026*
## Before You Begin
* Install the Acelab Revit plug-in from [here](https://cdn.prod.website-files.com/69975a27432ddb9dcf949f22/6a18759e22a405f203d45efd_AcelabRevitAddin%20\(20\)%20\(1\).zip).
* Sign in to your Acelab account within Revit
* Link your Revit project to an Acelab project (see Revit Integration for setup steps)
## Two Ways to Map Products
You can map products starting from either direction:
* **Product-first**: Start with a product in Acelab and connect it to Revit elements
* **Element-first**: Start with your Revit model and assign Acelab products to each element
Choose whichever approach fits your current task.
***
## Map from Your Revit Model (Element-First)
Use this approach when you want to see all your model elements and assign products to each one.
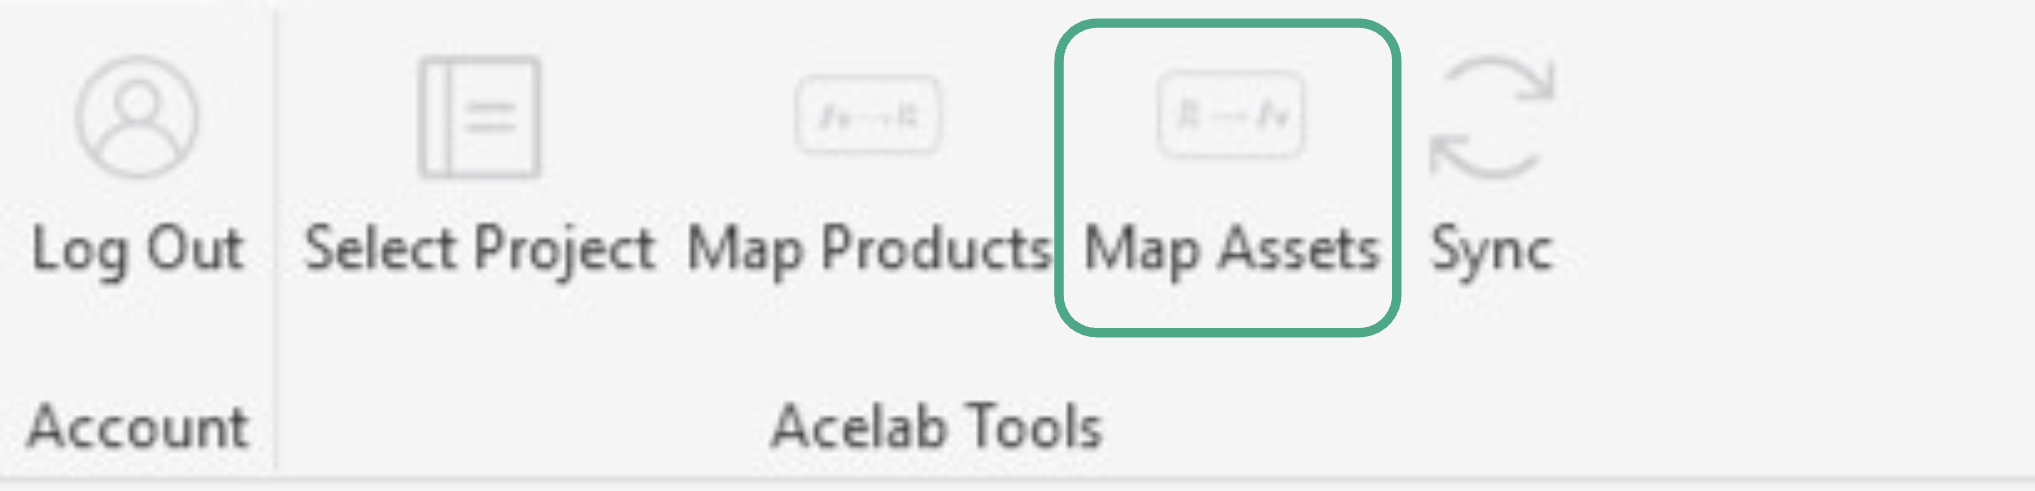
1. Click **Map Assets** in the Acelab tab.
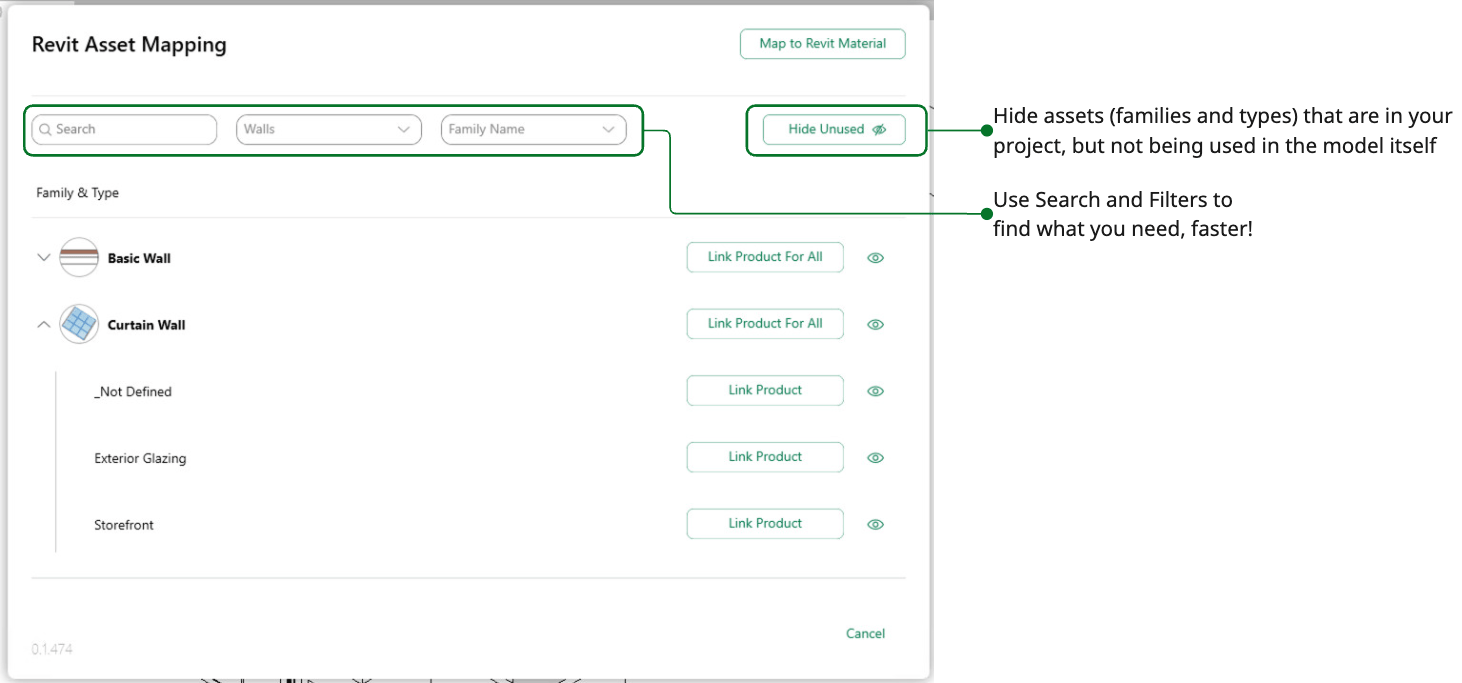
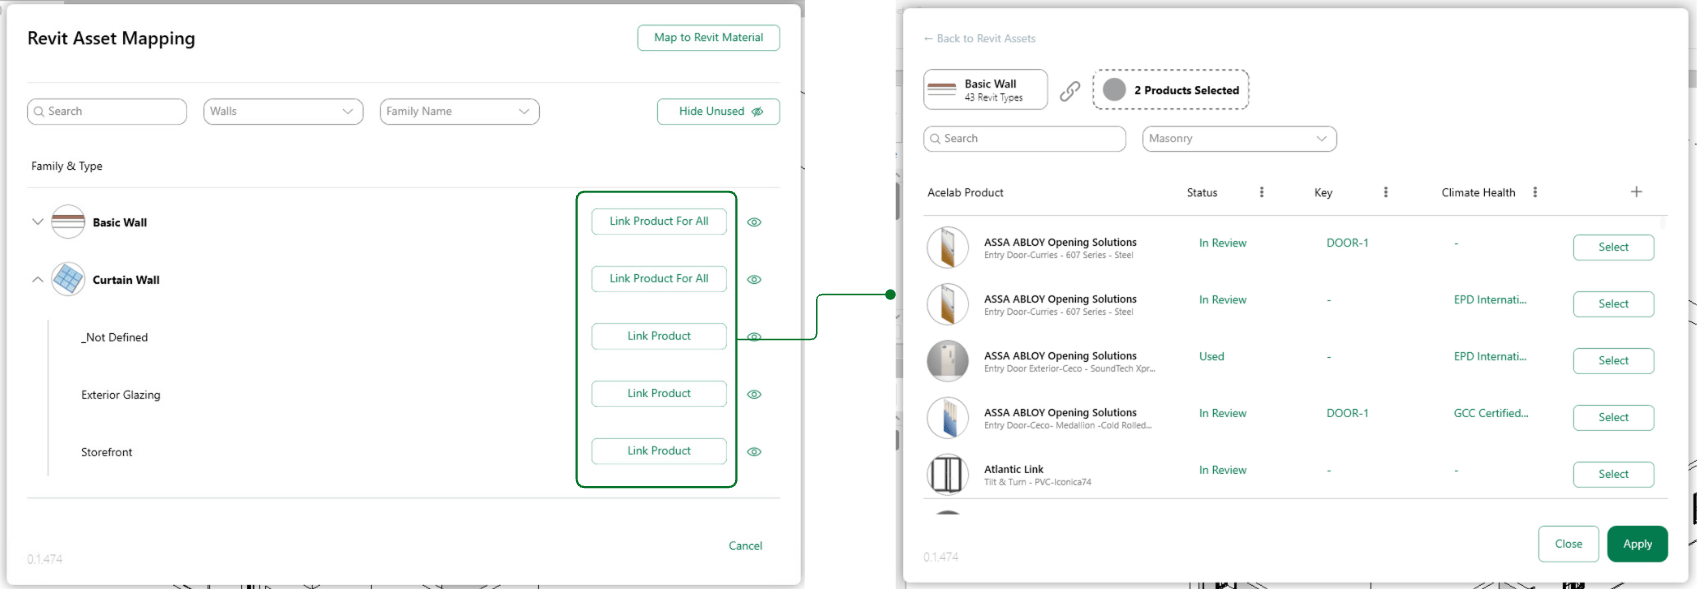
 2. Browse your model's elements organized by type (families and materials). Use the Search, Filter, and Hide Unused features to help find what you need, faster.
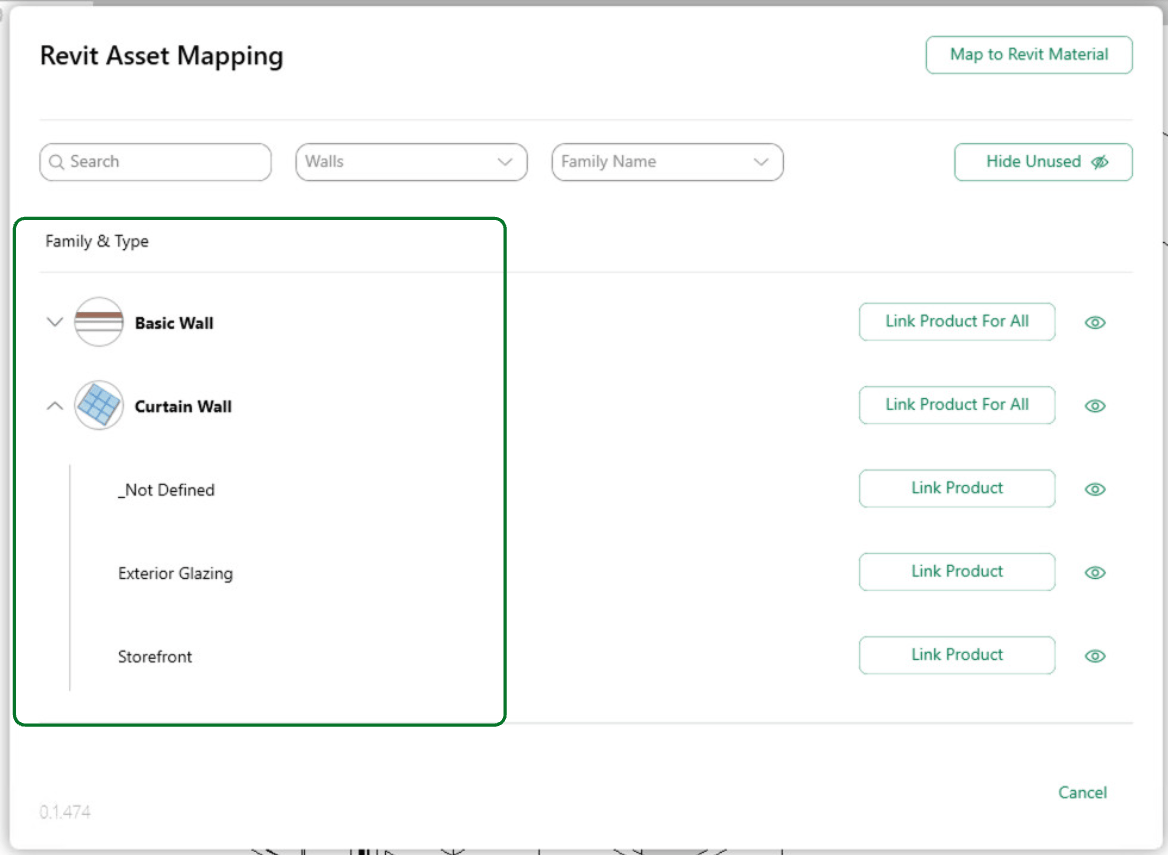
 3. Locate the element you want to assign.
 4. Click **Link Product for All** or **Link Product**. This will open the **Products** modal, where you will see a list of the products you have saved in your project that you can link to available Revit assets.
1. **Link Product for All** allows to you link a family (including all types) to a product
2. **Link Product** allows you to link a specific type to a product.
4. Click **Link Product for All** or **Link Product**. This will open the **Products** modal, where you will see a list of the products you have saved in your project that you can link to available Revit assets.
1. **Link Product for All** allows to you link a family (including all types) to a product
2. **Link Product** allows you to link a specific type to a product.
 5. In the **Products** modal, select the product to complete the assignment. Click **Select** to confirm the assignment.
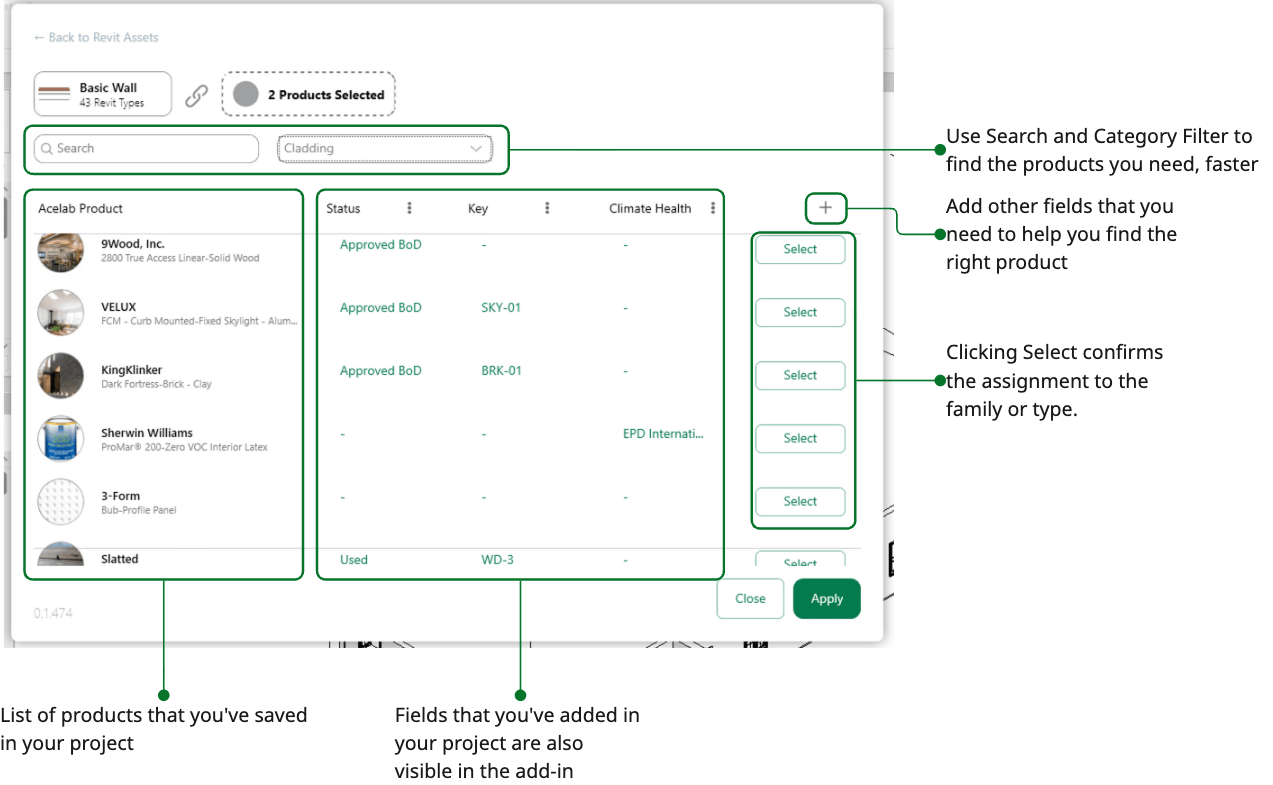 1. **Remove mapping selection:** Once you've confirmed the selection, the Select button will change to Unselect. Click Unselect to remove the mapping to that product.
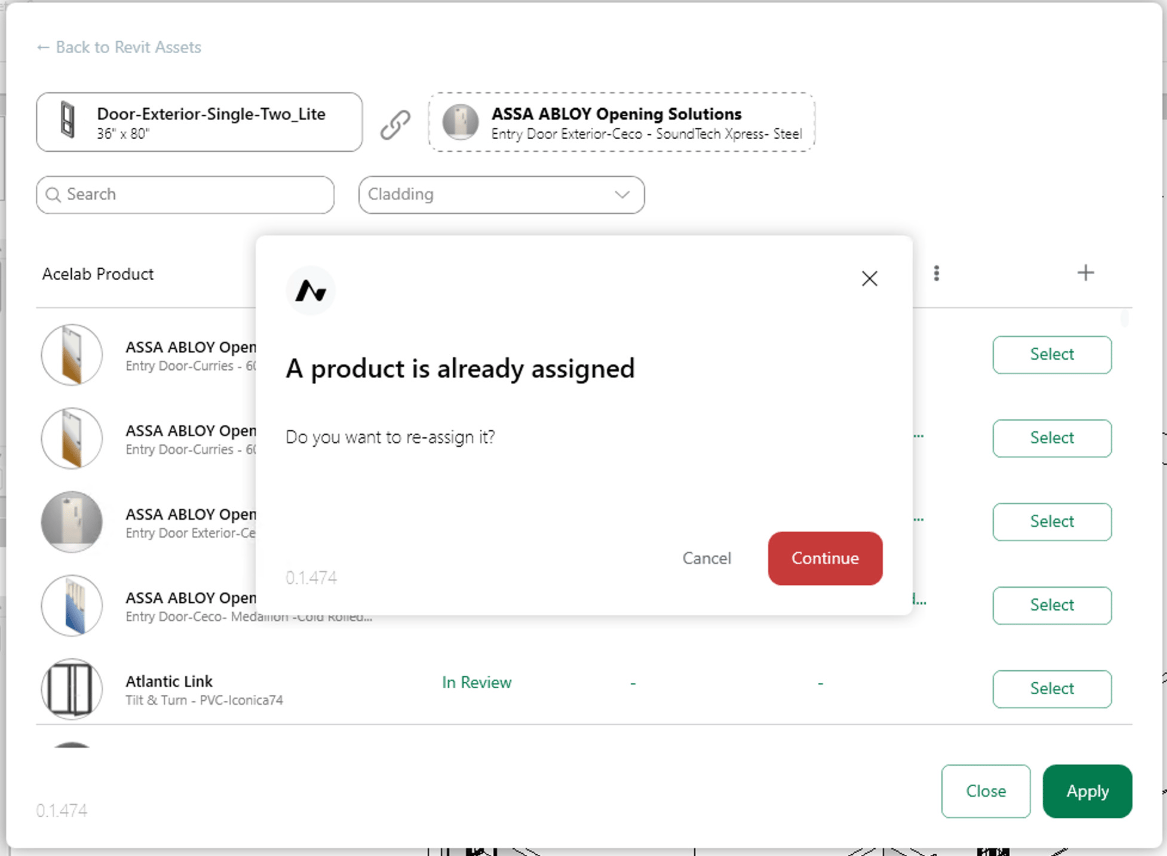
2. Reassign asset to another product: Simply click **Select** on another product. A confirmation pop up will appear; click **Continue**
1. **Remove mapping selection:** Once you've confirmed the selection, the Select button will change to Unselect. Click Unselect to remove the mapping to that product.
2. Reassign asset to another product: Simply click **Select** on another product. A confirmation pop up will appear; click **Continue**
 6. Repeat for additional elements as needed.
**Outcome:** Each Revit element will now display its assigned Acelab product data in various Type Parameters. You can review and update assignments from this same view.
***
## Map from Your Product Schedule (Product-First)
Use this approach when you've already selected a product and want to connect it to Revit elements.
1. Click **Map Products** in the Acelab tab.
6. Repeat for additional elements as needed.
**Outcome:** Each Revit element will now display its assigned Acelab product data in various Type Parameters. You can review and update assignments from this same view.
***
## Map from Your Product Schedule (Product-First)
Use this approach when you've already selected a product and want to connect it to Revit elements.
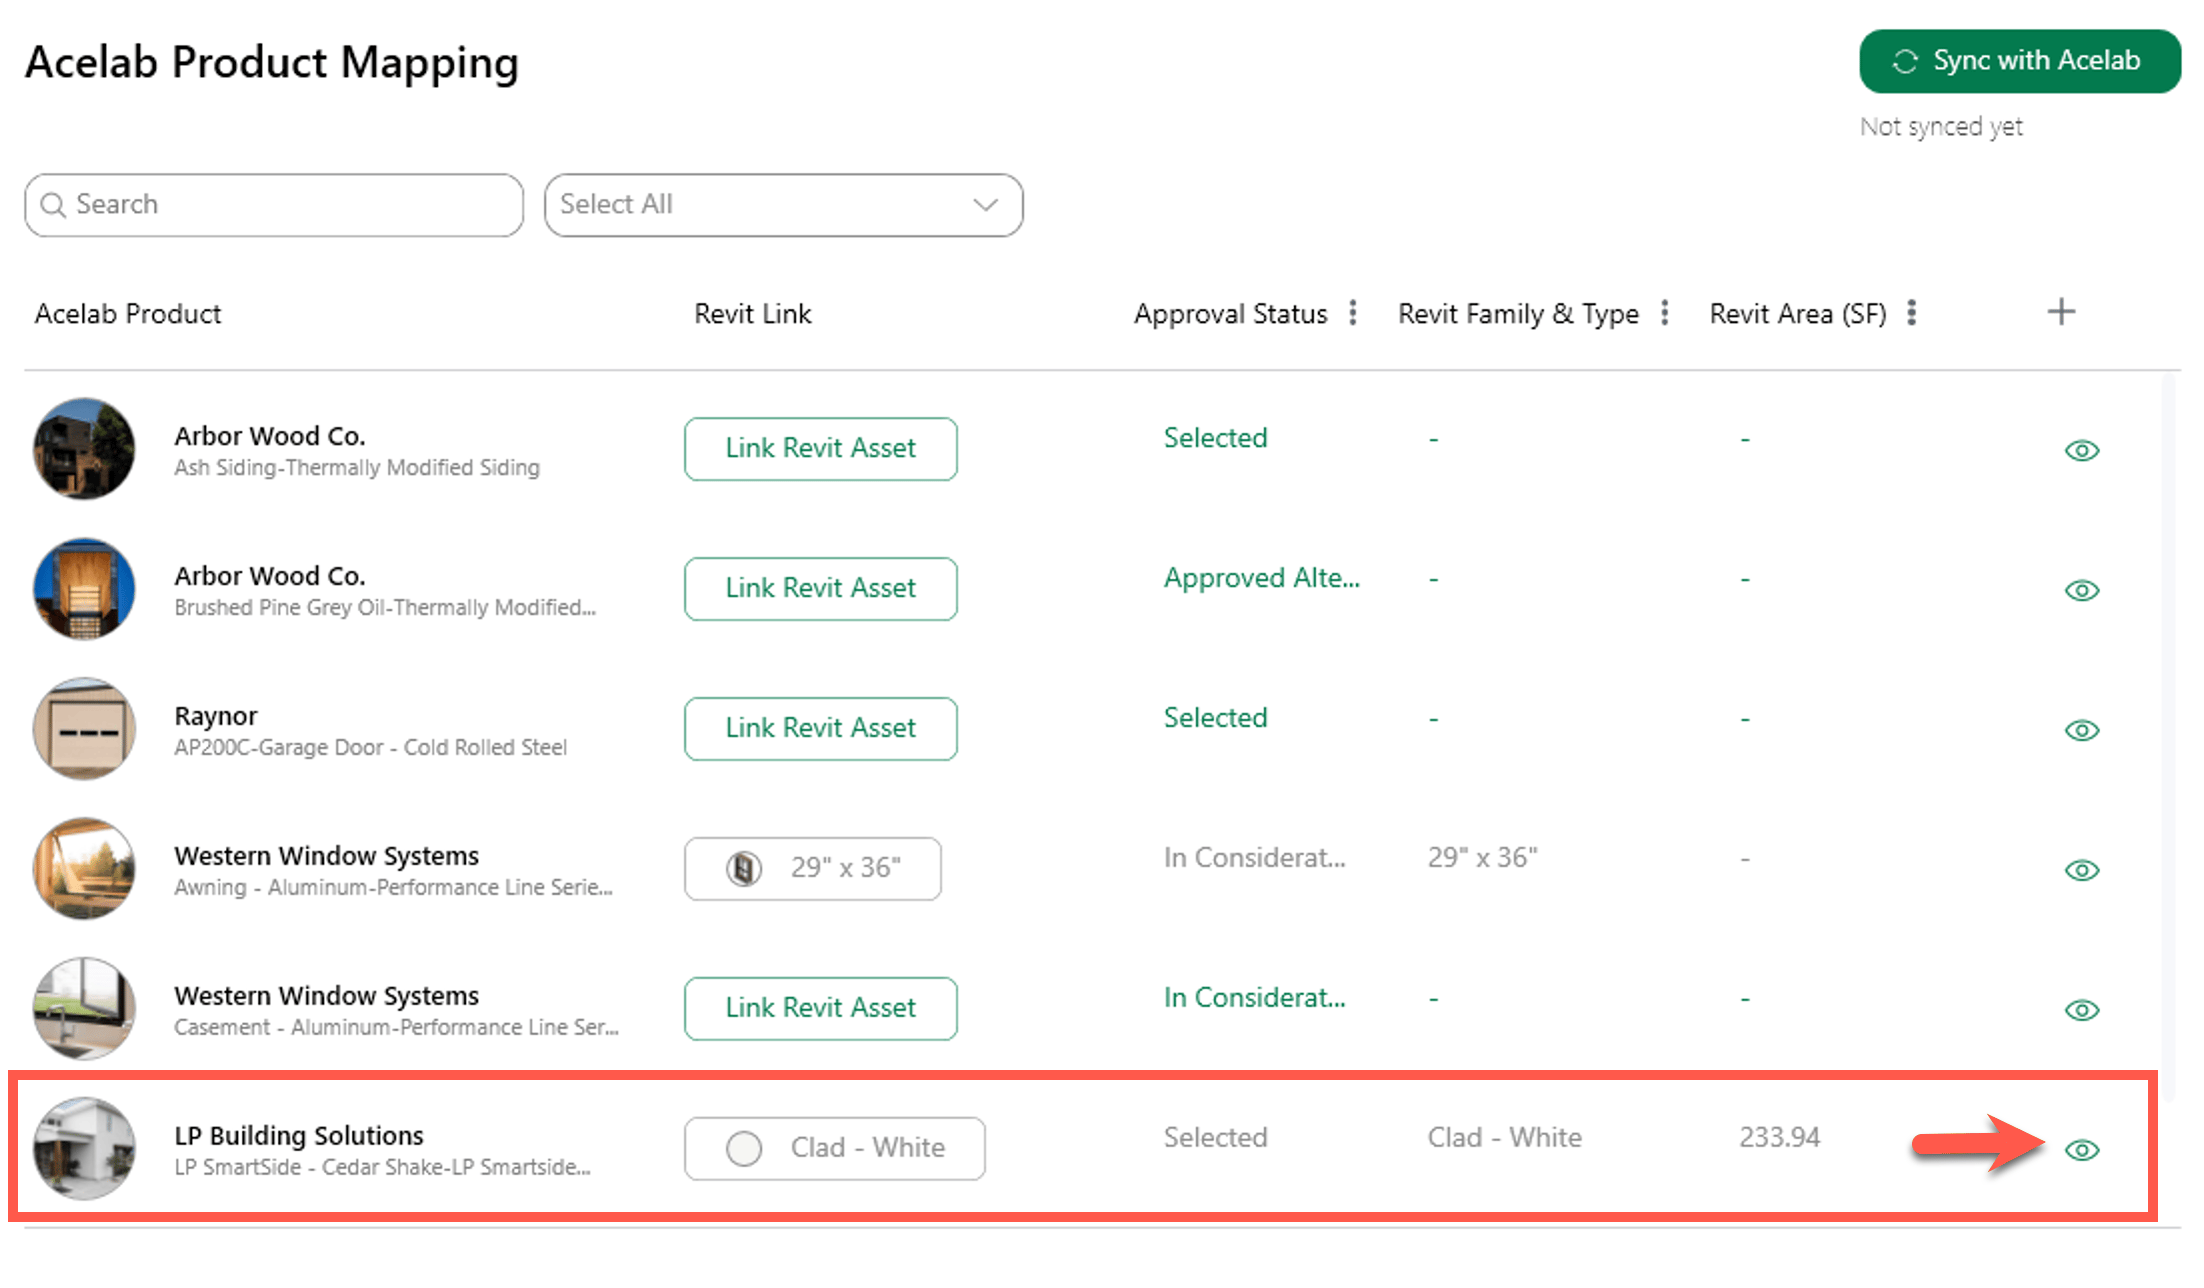
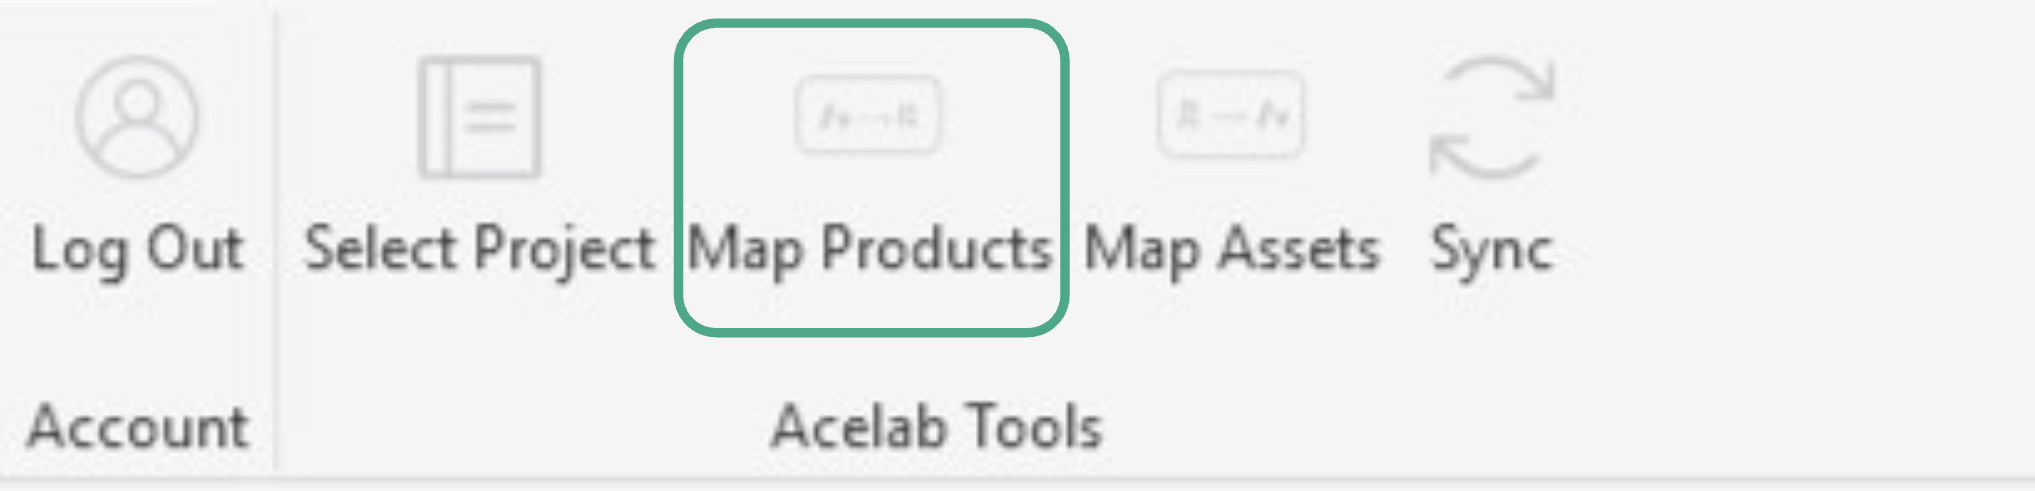
1. Click **Map Products** in the Acelab tab.
 2. Browse products that you have saved in your project. Use the Search and Filter features to help find what you need, faster.
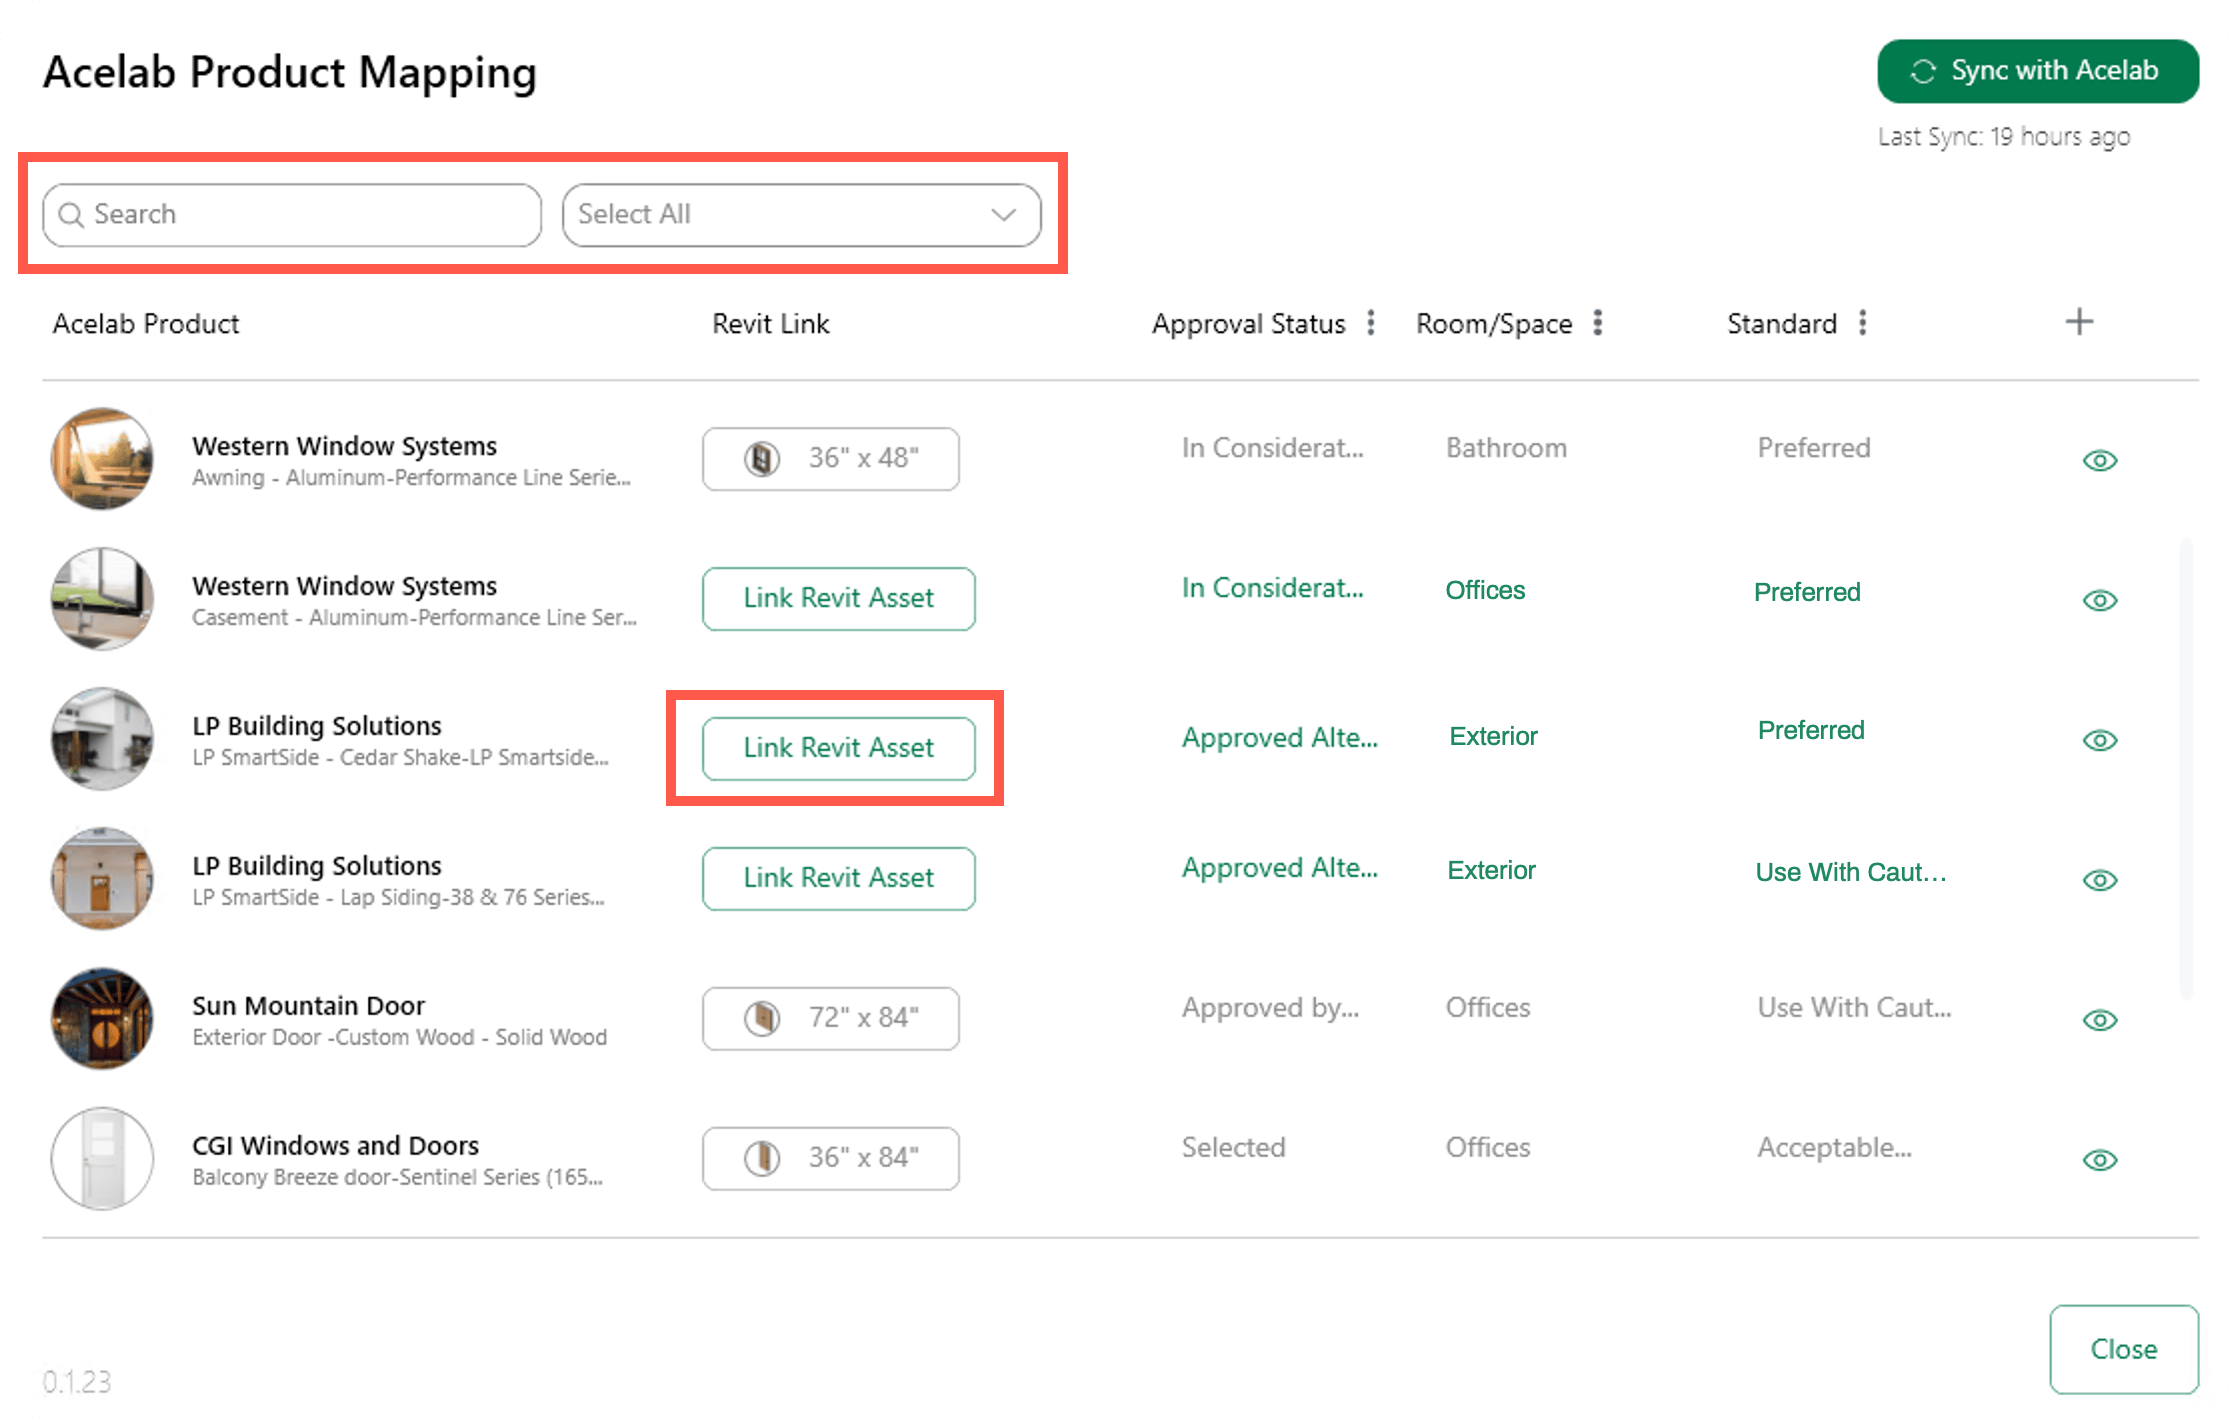
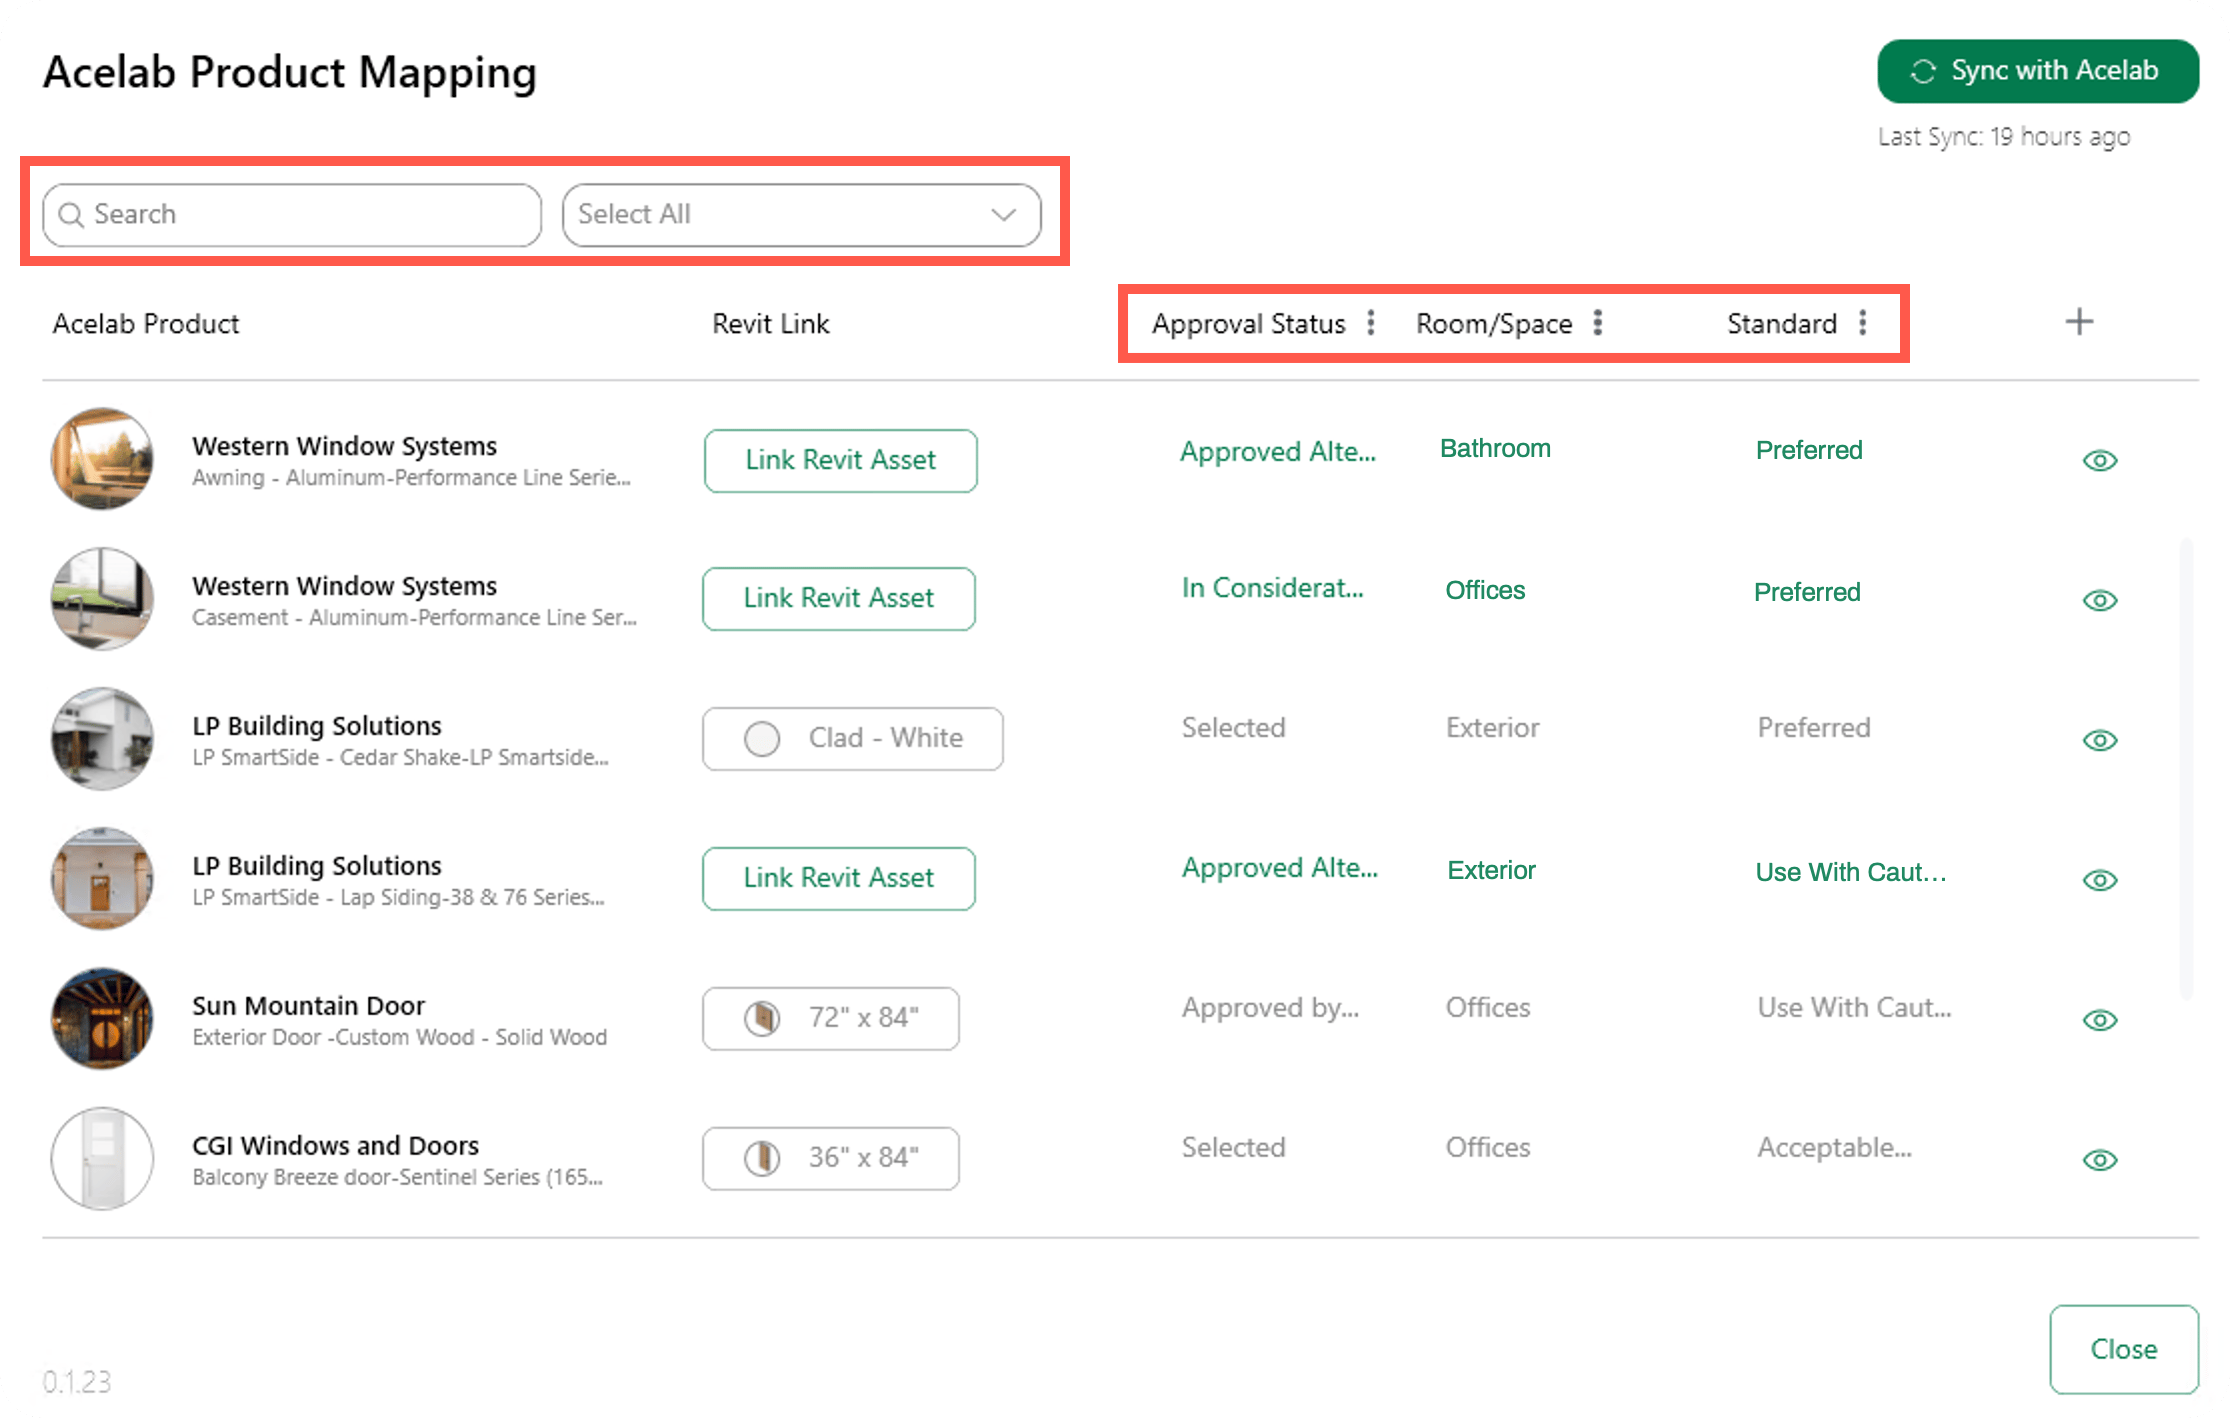 3. Click **Link Revit Asset** next to the product.
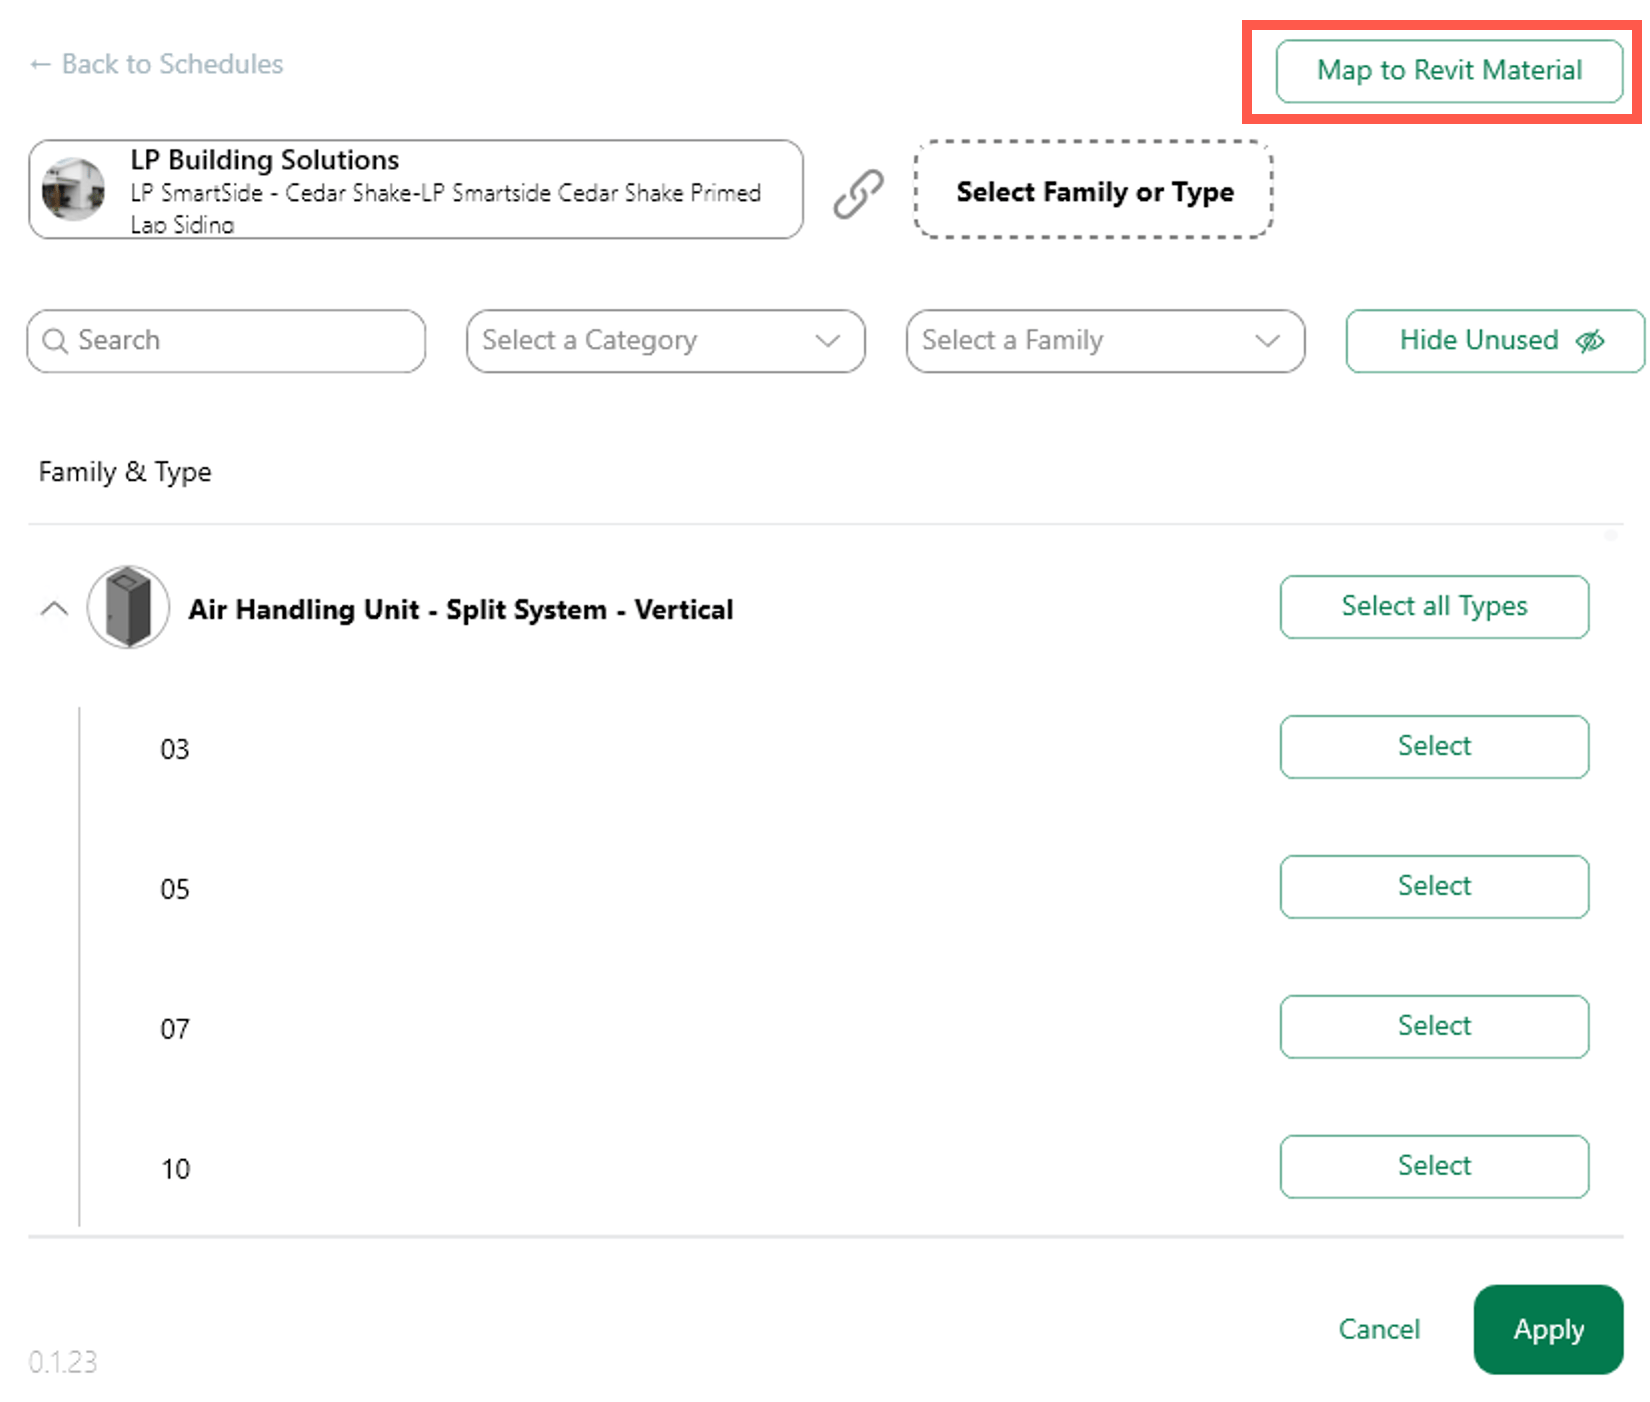
 4. Option: Instead of selecting a category and family name, click on the **Map to Revit Material** button at the top-right corner to switch from family selection to material selection
 5. Select the material **Class** from the drop-down menu, then click the **Select** button next to the material. Click **Apply** to save your changes.
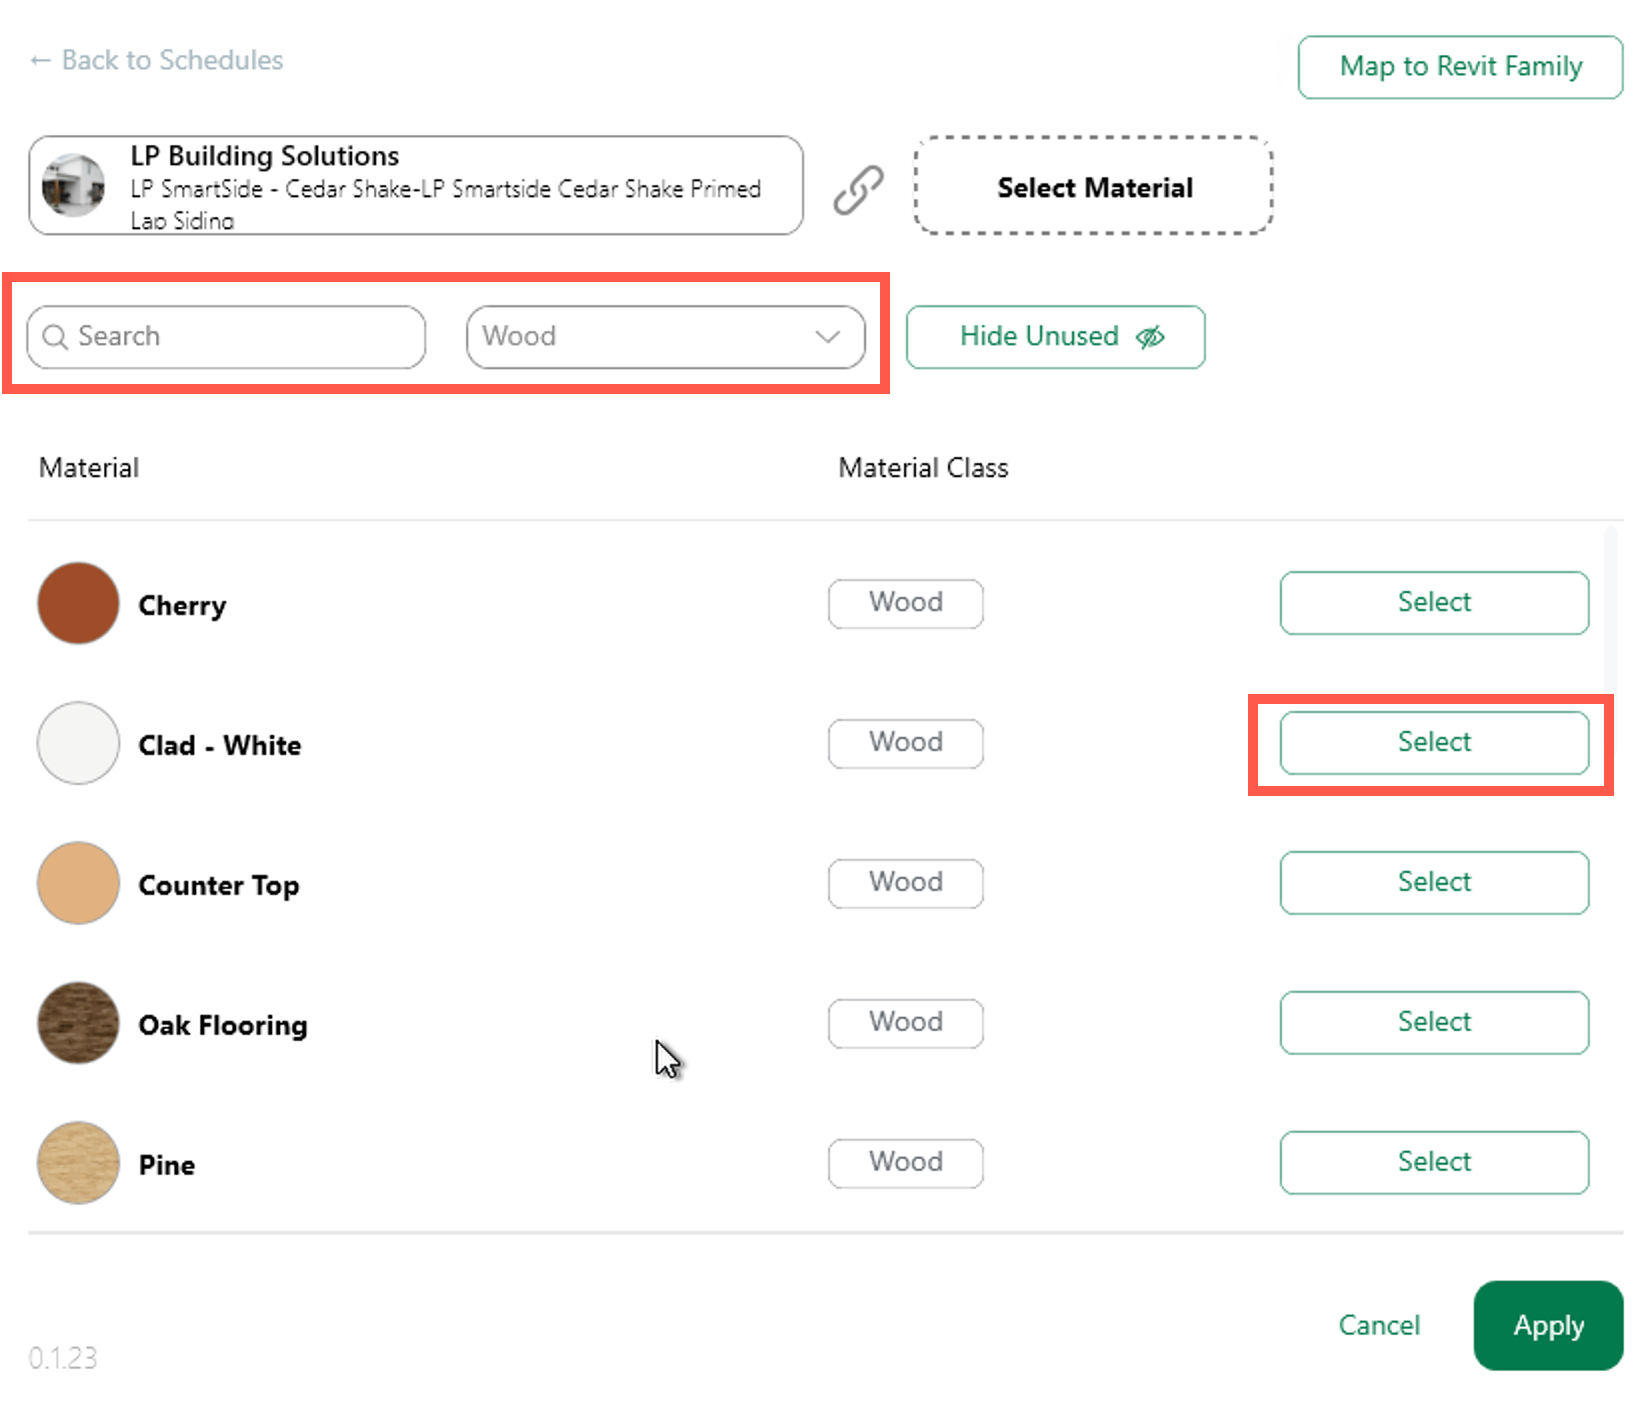 **Outcome**: The product appears linked in the mapping table. Click the eye icon to view all connected assets.
***
## Swap Products Without Breaking Links
When project requirements change, you can replace a product in your schedule without losing your Revit connections.
1. Open your project schedule in the Acelab web app.
2. Locate the row containing the product you want to replace.
3. Select a different product for that row.
4. Your Revit connection remains intact—element settings, geometry, materials, and instance parameters stay in place.
Think of each schedule row as a labeled container. You can change what's inside (the product) while the container keeps its position and connections.
***
## Sync Changes to Acelab
After mapping or swapping products, sync your Revit project to see updates in the Materials Hub.
1. Click **Sync** in the Acelab tab.
2. Select **Sync with Acelab**.
3. Wait for the confirmation message.
4. Open your project in the Materials Hub and navigate to **Schedules** to see Revit data populated in your schedule fields.
***
## Related Articles
* [Revit Integration Overview](/help-center/revit-integration/revit-integration-overview)
* [Syncing Data Between Material Hub and Revit](/help-center/revit-integration/syncing-data-between-material-hub-revit)
* [Working with Schedules](/help-center/working-on-projects/working-with-schedules)
**Outcome**: The product appears linked in the mapping table. Click the eye icon to view all connected assets.
***
## Swap Products Without Breaking Links
When project requirements change, you can replace a product in your schedule without losing your Revit connections.
1. Open your project schedule in the Acelab web app.
2. Locate the row containing the product you want to replace.
3. Select a different product for that row.
4. Your Revit connection remains intact—element settings, geometry, materials, and instance parameters stay in place.
Think of each schedule row as a labeled container. You can change what's inside (the product) while the container keeps its position and connections.
***
## Sync Changes to Acelab
After mapping or swapping products, sync your Revit project to see updates in the Materials Hub.
1. Click **Sync** in the Acelab tab.
2. Select **Sync with Acelab**.
3. Wait for the confirmation message.
4. Open your project in the Materials Hub and navigate to **Schedules** to see Revit data populated in your schedule fields.
***
## Related Articles
* [Revit Integration Overview](/help-center/revit-integration/revit-integration-overview)
* [Syncing Data Between Material Hub and Revit](/help-center/revit-integration/syncing-data-between-material-hub-revit)
* [Working with Schedules](/help-center/working-on-projects/working-with-schedules)