> ## Documentation Index
> Fetch the complete documentation index at: https://docs.acelabusa.com/llms.txt
> Use this file to discover all available pages before exploring further.
# Customizing Your SpecPlanner
> Learn how to add Acelab and Company Fields to your SpecPlanner, navigate large field sets, and rename or revert MasterFormat section names.
*Written by Patricia Causey · Updated March 19, 2026*
## Before You Begin
Some features in this article require a Premium plan.
| **Feature** | **Plan Required** |
| --------------------------------- | ----------------- |
| Acelab Fields in SpecPlanner | Premium |
| Company Fields in SpecPlanner | Premium |
| Unlimited SpecPlanner fields | Premium |
| Horizontal field navigation | Premium |
| Rename MasterFormat sections | All plans |
| Revert MasterFormat section names | All plans |
💡 If you're unsure which plan your firm has, contact your Acelab account admin or reach out to Acelab support.
***
## Add Acelab Fields and Company Fields to SpecPlanner
⭐ ***Premium Feature.** This section requires a Premium plan.*
You can enrich your SpecPlanner with additional context by pulling in fields from two sources:
* **Default Fields** — standard product data fields maintained by Acelab, such as category, manufacturer, and specification details.
* **Company Fields** — custom fields your firm has created to track internal data relevant to your workflow.
## How to Add Fields
1. Open your project in the Materials Hub and navigate to **SpecPlanner**.
2. Click **+ Add Field**. In the field picker, choose either the **Default Fields** or **Company Fields** tab depending on the data source you need.
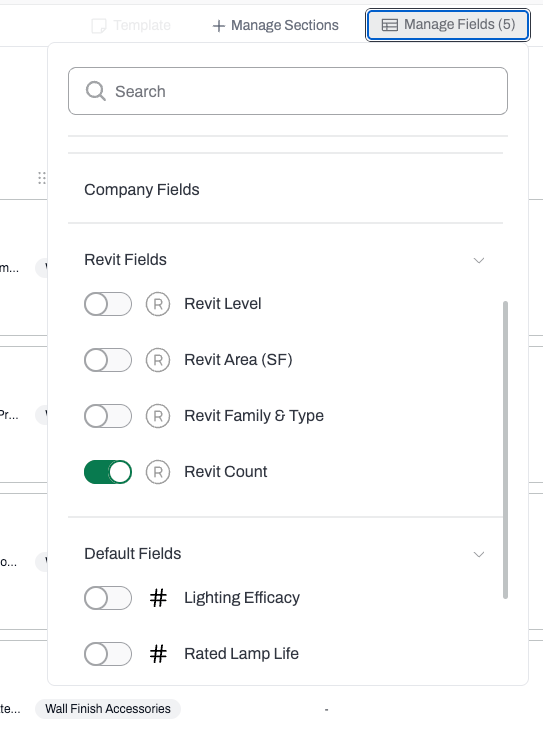 3. Select the field(s) you want to add and confirm.
The selected fields will appear in your SpecPlanner view and populate with data from the corresponding products in your project.
***
## Navigate Fields and Remove Field Limits
***Premium feature.*** *Unlimited fields and horizontal navigation require a Premium plan. Free plan users are limited to a three fields and cannot scroll horizontally through additional columns.*
You can add as many fields as your workflow requires — there is no cap on the number of columns in your SpecPlanner. When the number of fields exceeds the visible screen width, a horizontal navigation control appears so you can scroll through all columns without losing context.
## How Horizontal Navigation Works
Once you've added enough fields to exceed the visible width of the SpecPlanner:
* Horizontal scroll controls appear at the top or bottom of the field area.
* Use the scroll bar or arrow controls to move left and right across all fields.
3. Select the field(s) you want to add and confirm.
The selected fields will appear in your SpecPlanner view and populate with data from the corresponding products in your project.
***
## Navigate Fields and Remove Field Limits
***Premium feature.*** *Unlimited fields and horizontal navigation require a Premium plan. Free plan users are limited to a three fields and cannot scroll horizontally through additional columns.*
You can add as many fields as your workflow requires — there is no cap on the number of columns in your SpecPlanner. When the number of fields exceeds the visible screen width, a horizontal navigation control appears so you can scroll through all columns without losing context.
## How Horizontal Navigation Works
Once you've added enough fields to exceed the visible width of the SpecPlanner:
* Horizontal scroll controls appear at the top or bottom of the field area.
* Use the scroll bar or arrow controls to move left and right across all fields.
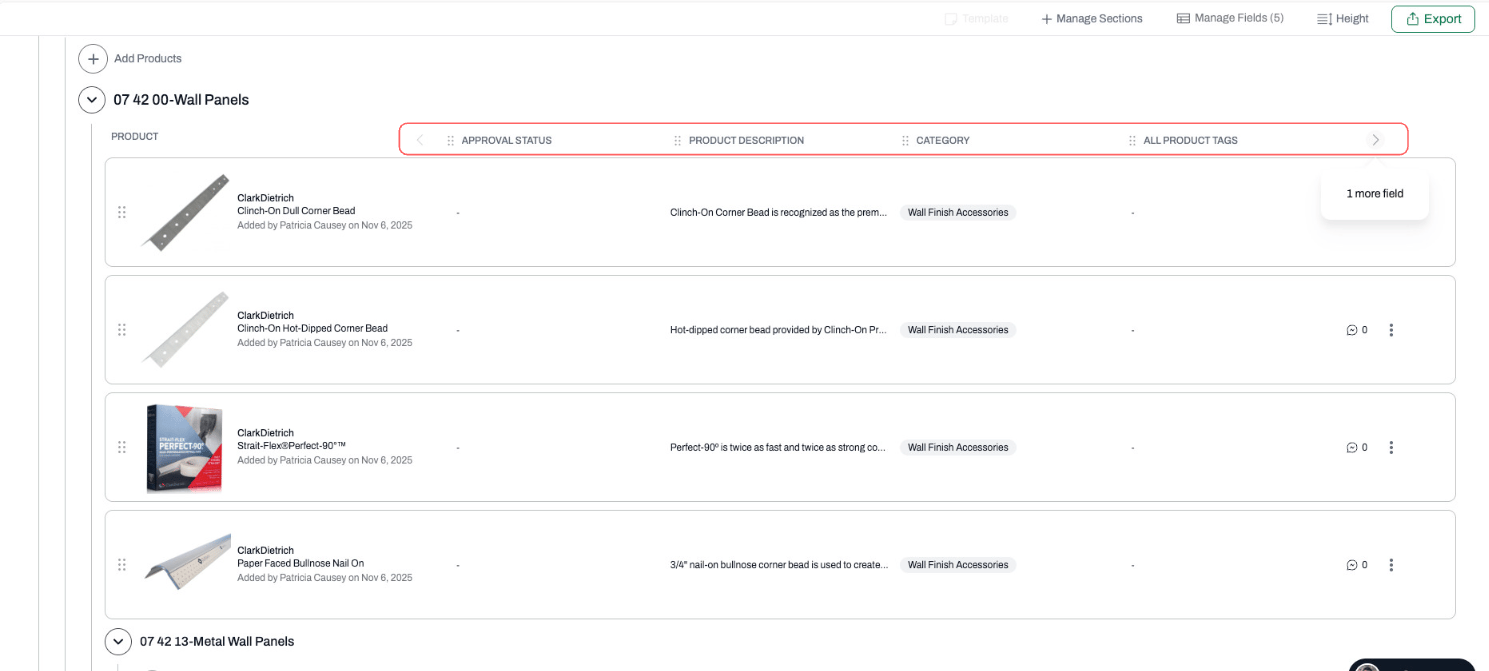 * Fixed columns (such as product name and section) remain pinned while you scroll — think of it like a wide spreadsheet where the first few columns stay locked while you scroll right.
***
## Rename a MasterFormat Section
All users can rename MasterFormat sections in SpecPlanner to better match internal naming conventions or project-specific terminology.
## How to Rename a Section
1. In SpecPlanner, locate the MasterFormat section you want to rename.
2. Hover at the section name and click on the **Change MasterFormat Section** icon
* Fixed columns (such as product name and section) remain pinned while you scroll — think of it like a wide spreadsheet where the first few columns stay locked while you scroll right.
***
## Rename a MasterFormat Section
All users can rename MasterFormat sections in SpecPlanner to better match internal naming conventions or project-specific terminology.
## How to Rename a Section
1. In SpecPlanner, locate the MasterFormat section you want to rename.
2. Hover at the section name and click on the **Change MasterFormat Section** icon
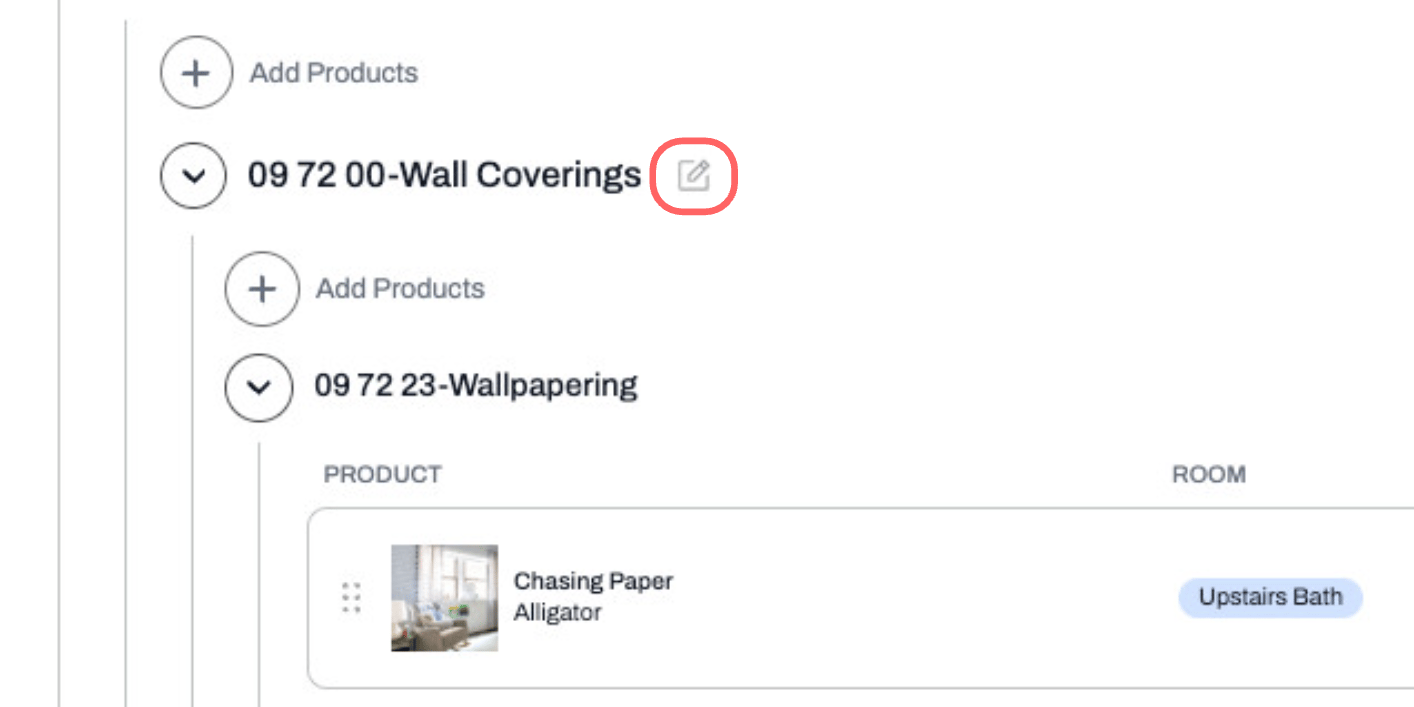 3. The **Change MasterFormat Section** modal will open, showing the current section name and number.
4. Type your new section name in the name field.
3. The **Change MasterFormat Section** modal will open, showing the current section name and number.
4. Type your new section name in the name field.
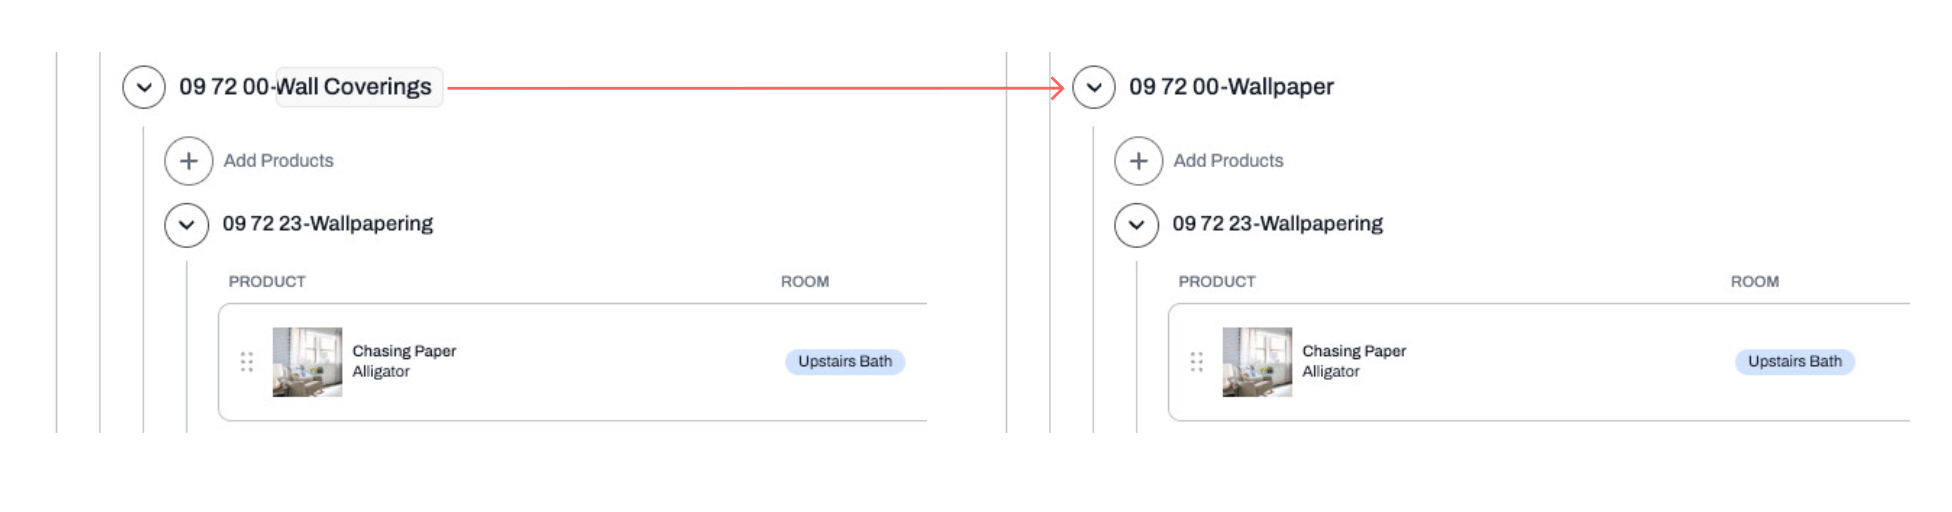 5. Click **Save**.
The section will display your custom name throughout the project view.
***
## Revert a MasterFormat Section Name to Default
If you've renamed a MasterFormat section and want to restore the original name and number, you can revert it at any time.
## How to Revert a Section Name
1. In SpecPlanner, locate the section with the custom name.
2. Hover at the section name and click on the **Change MasterFormat Section** icon. Select **Revert to Acelab Default**.
5. Click **Save**.
The section will display your custom name throughout the project view.
***
## Revert a MasterFormat Section Name to Default
If you've renamed a MasterFormat section and want to restore the original name and number, you can revert it at any time.
## How to Revert a Section Name
1. In SpecPlanner, locate the section with the custom name.
2. Hover at the section name and click on the **Change MasterFormat Section** icon. Select **Revert to Acelab Default**.
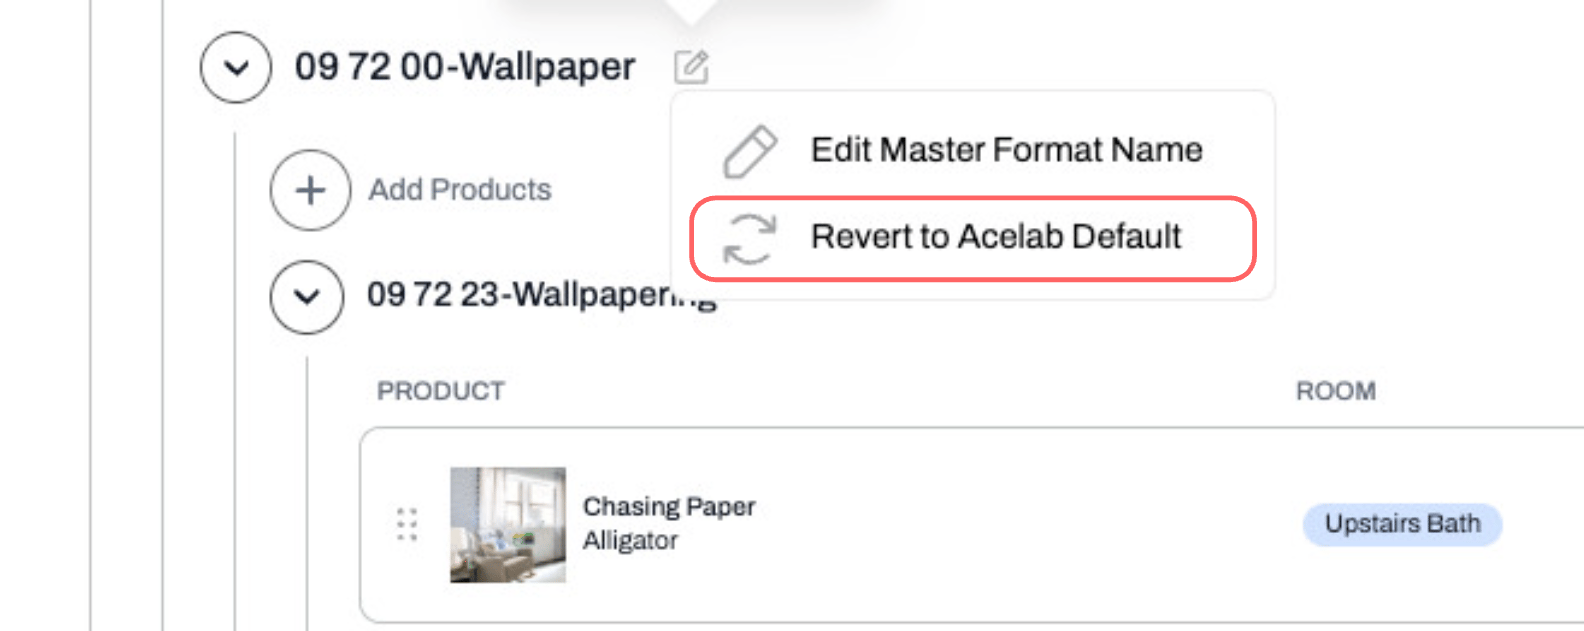 3. The section name and number will reset to the standard MasterFormat value.
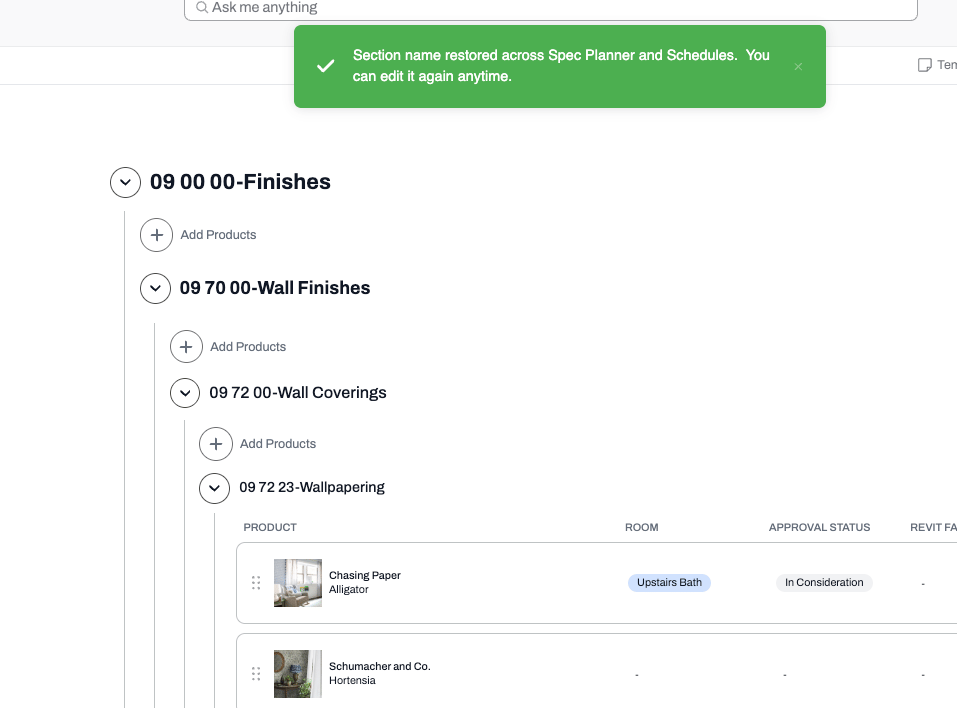 The **Revert to Original** option only appears when a section has been renamed. If the section is already using the default name, this option will not be visible.
***
## What to Expect
After customizing your SpecPlanner:
* Acelab and Company Fields you've added will display populated data alongside your specified products.
* On Premium, you can add fields without limit and navigate across them horizontally within the same view.
* Renamed MasterFormat sections show your custom labels throughout the project. Reverting restores the original MasterFormat name and number instantly.
The **Revert to Original** option only appears when a section has been renamed. If the section is already using the default name, this option will not be visible.
***
## What to Expect
After customizing your SpecPlanner:
* Acelab and Company Fields you've added will display populated data alongside your specified products.
* On Premium, you can add fields without limit and navigate across them horizontally within the same view.
* Renamed MasterFormat sections show your custom labels throughout the project. Reverting restores the original MasterFormat name and number instantly.