> ## Documentation Index
> Fetch the complete documentation index at: https://docs.acelabusa.com/llms.txt
> Use this file to discover all available pages before exploring further.
# Import From File
> Bulk-import product data from a spreadsheet into your Materials Hub schedule in minutes — no manual entry required.
*Written by Patricia Causey · Updated May 26, 2026*
## **Before You Begin**
* You must have **Creator** or **Admin** permissions on the project to import a CSV file.
* Download the **sample CSV template** from the Upload screen to ensure your file is formatted correctly.
* Maximum file size is **25MB**. CSV format only.
**[Check out this article for steps on preparing your .csv file](/help-center/working-on-projects/preparing-your-csv-for-import-into-schedules)**
💡Need a guide on setting up your .csv template? [Jump to this section to download the template](#example-csv-template).
***
## **How to Start an Import**
There are two ways to open the CSV import flow, depending on your project state.
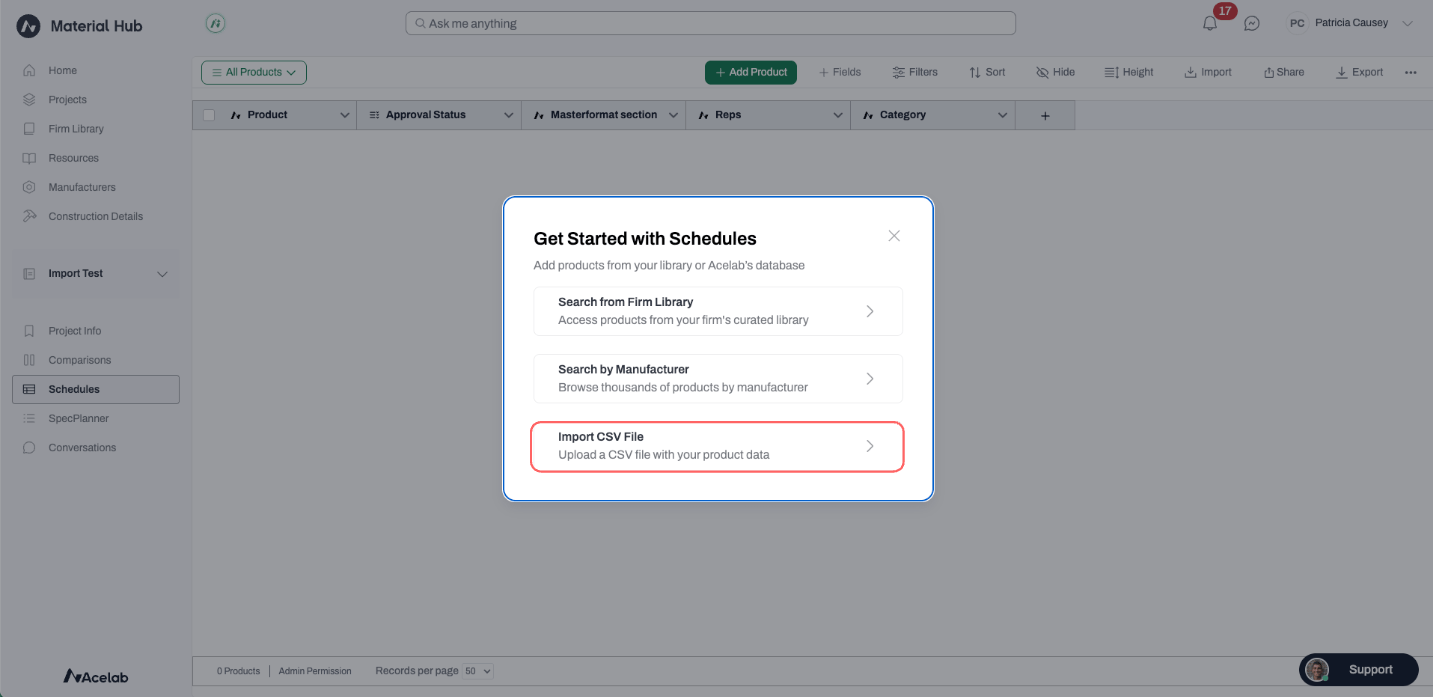
**From an empty schedule:**
1. Open a project with no products scheduled. The **Get Started with Schedule** modal will appear automatically.
2. Click **Import CSV File**.
 **From an existing schedule:**
1. Open any project schedule.
2. Click the **Import** button in the schedule toolbar.
**From an existing schedule:**
1. Open any project schedule.
2. Click the **Import** button in the schedule toolbar.
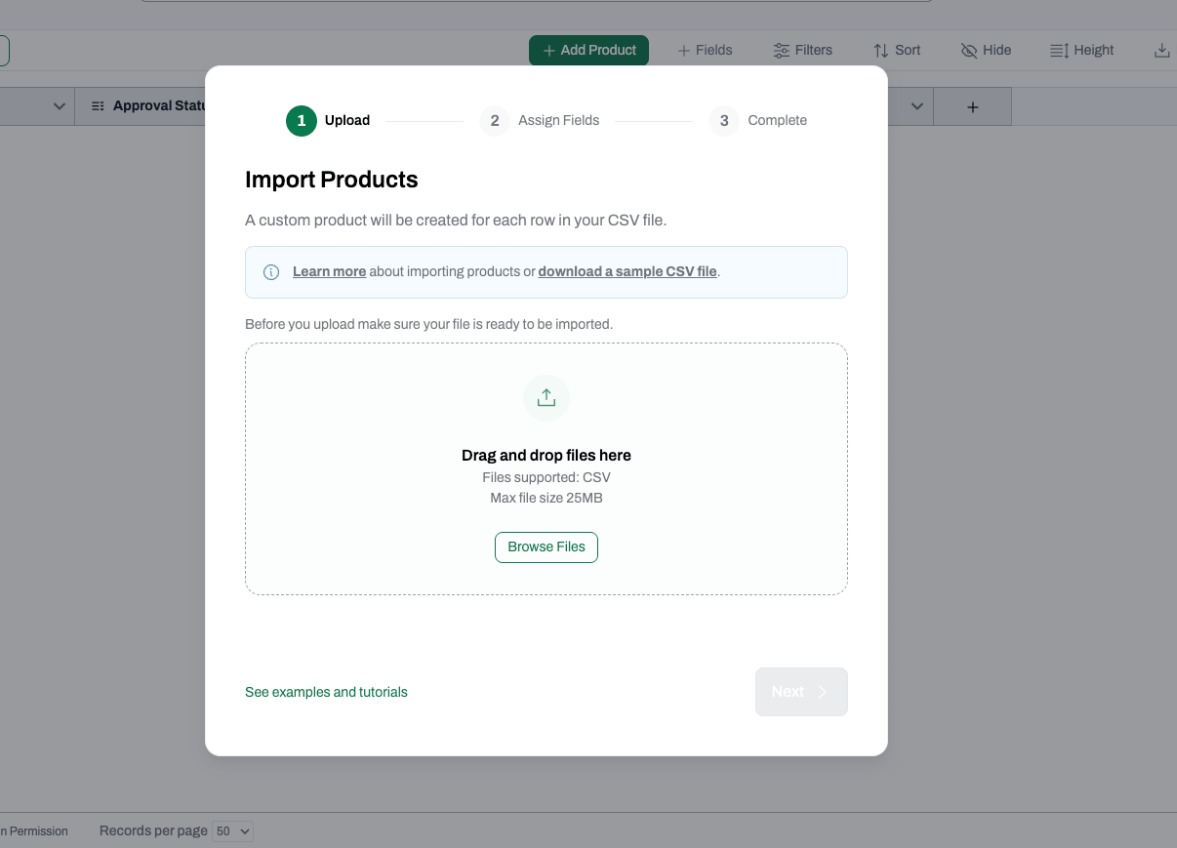
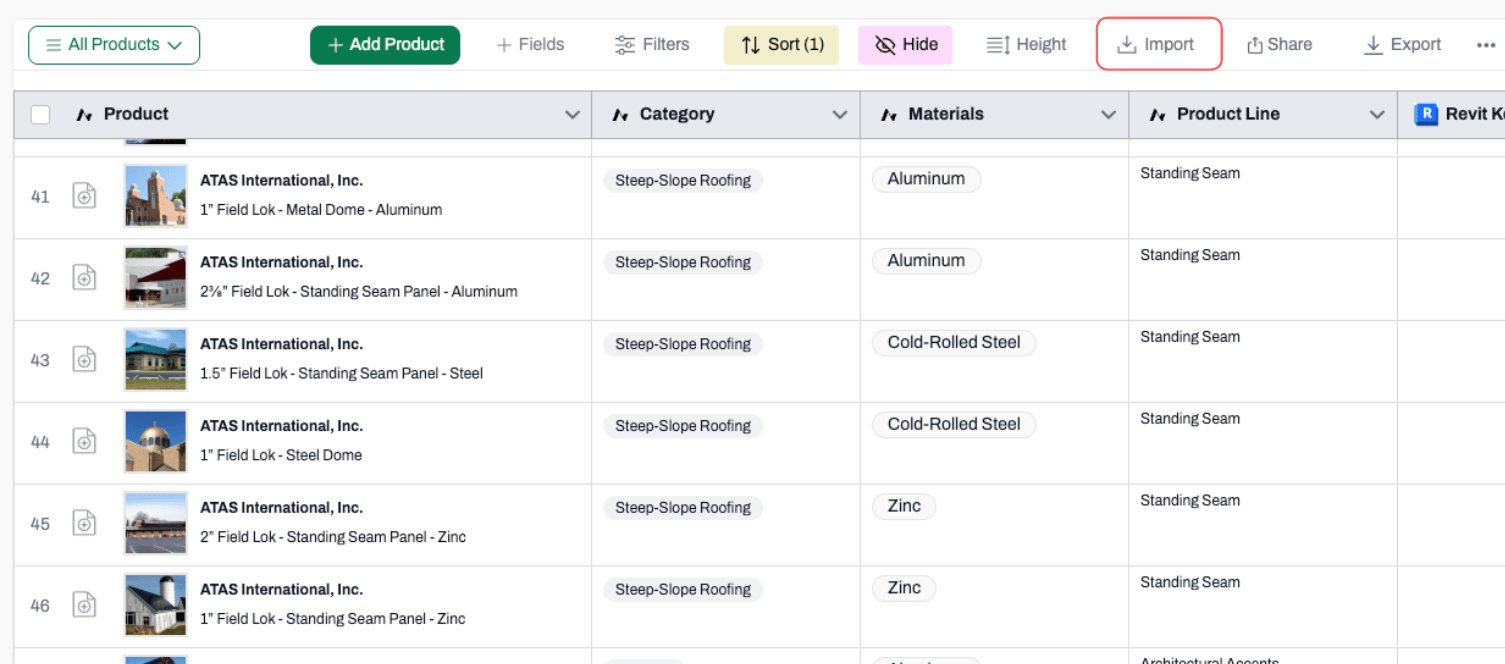 Both entry points open the **Import CSV** modal on the Upload screen.
***
## **Step 1: Upload Your CSV File**
1. In the **Import CSV** modal, drag and drop your CSV file onto the upload area, or click **Browse File** to select a file from your computer.
Both entry points open the **Import CSV** modal on the Upload screen.
***
## **Step 1: Upload Your CSV File**
1. In the **Import CSV** modal, drag and drop your CSV file onto the upload area, or click **Browse File** to select a file from your computer.
 2. A progress indicator will show upload completion.
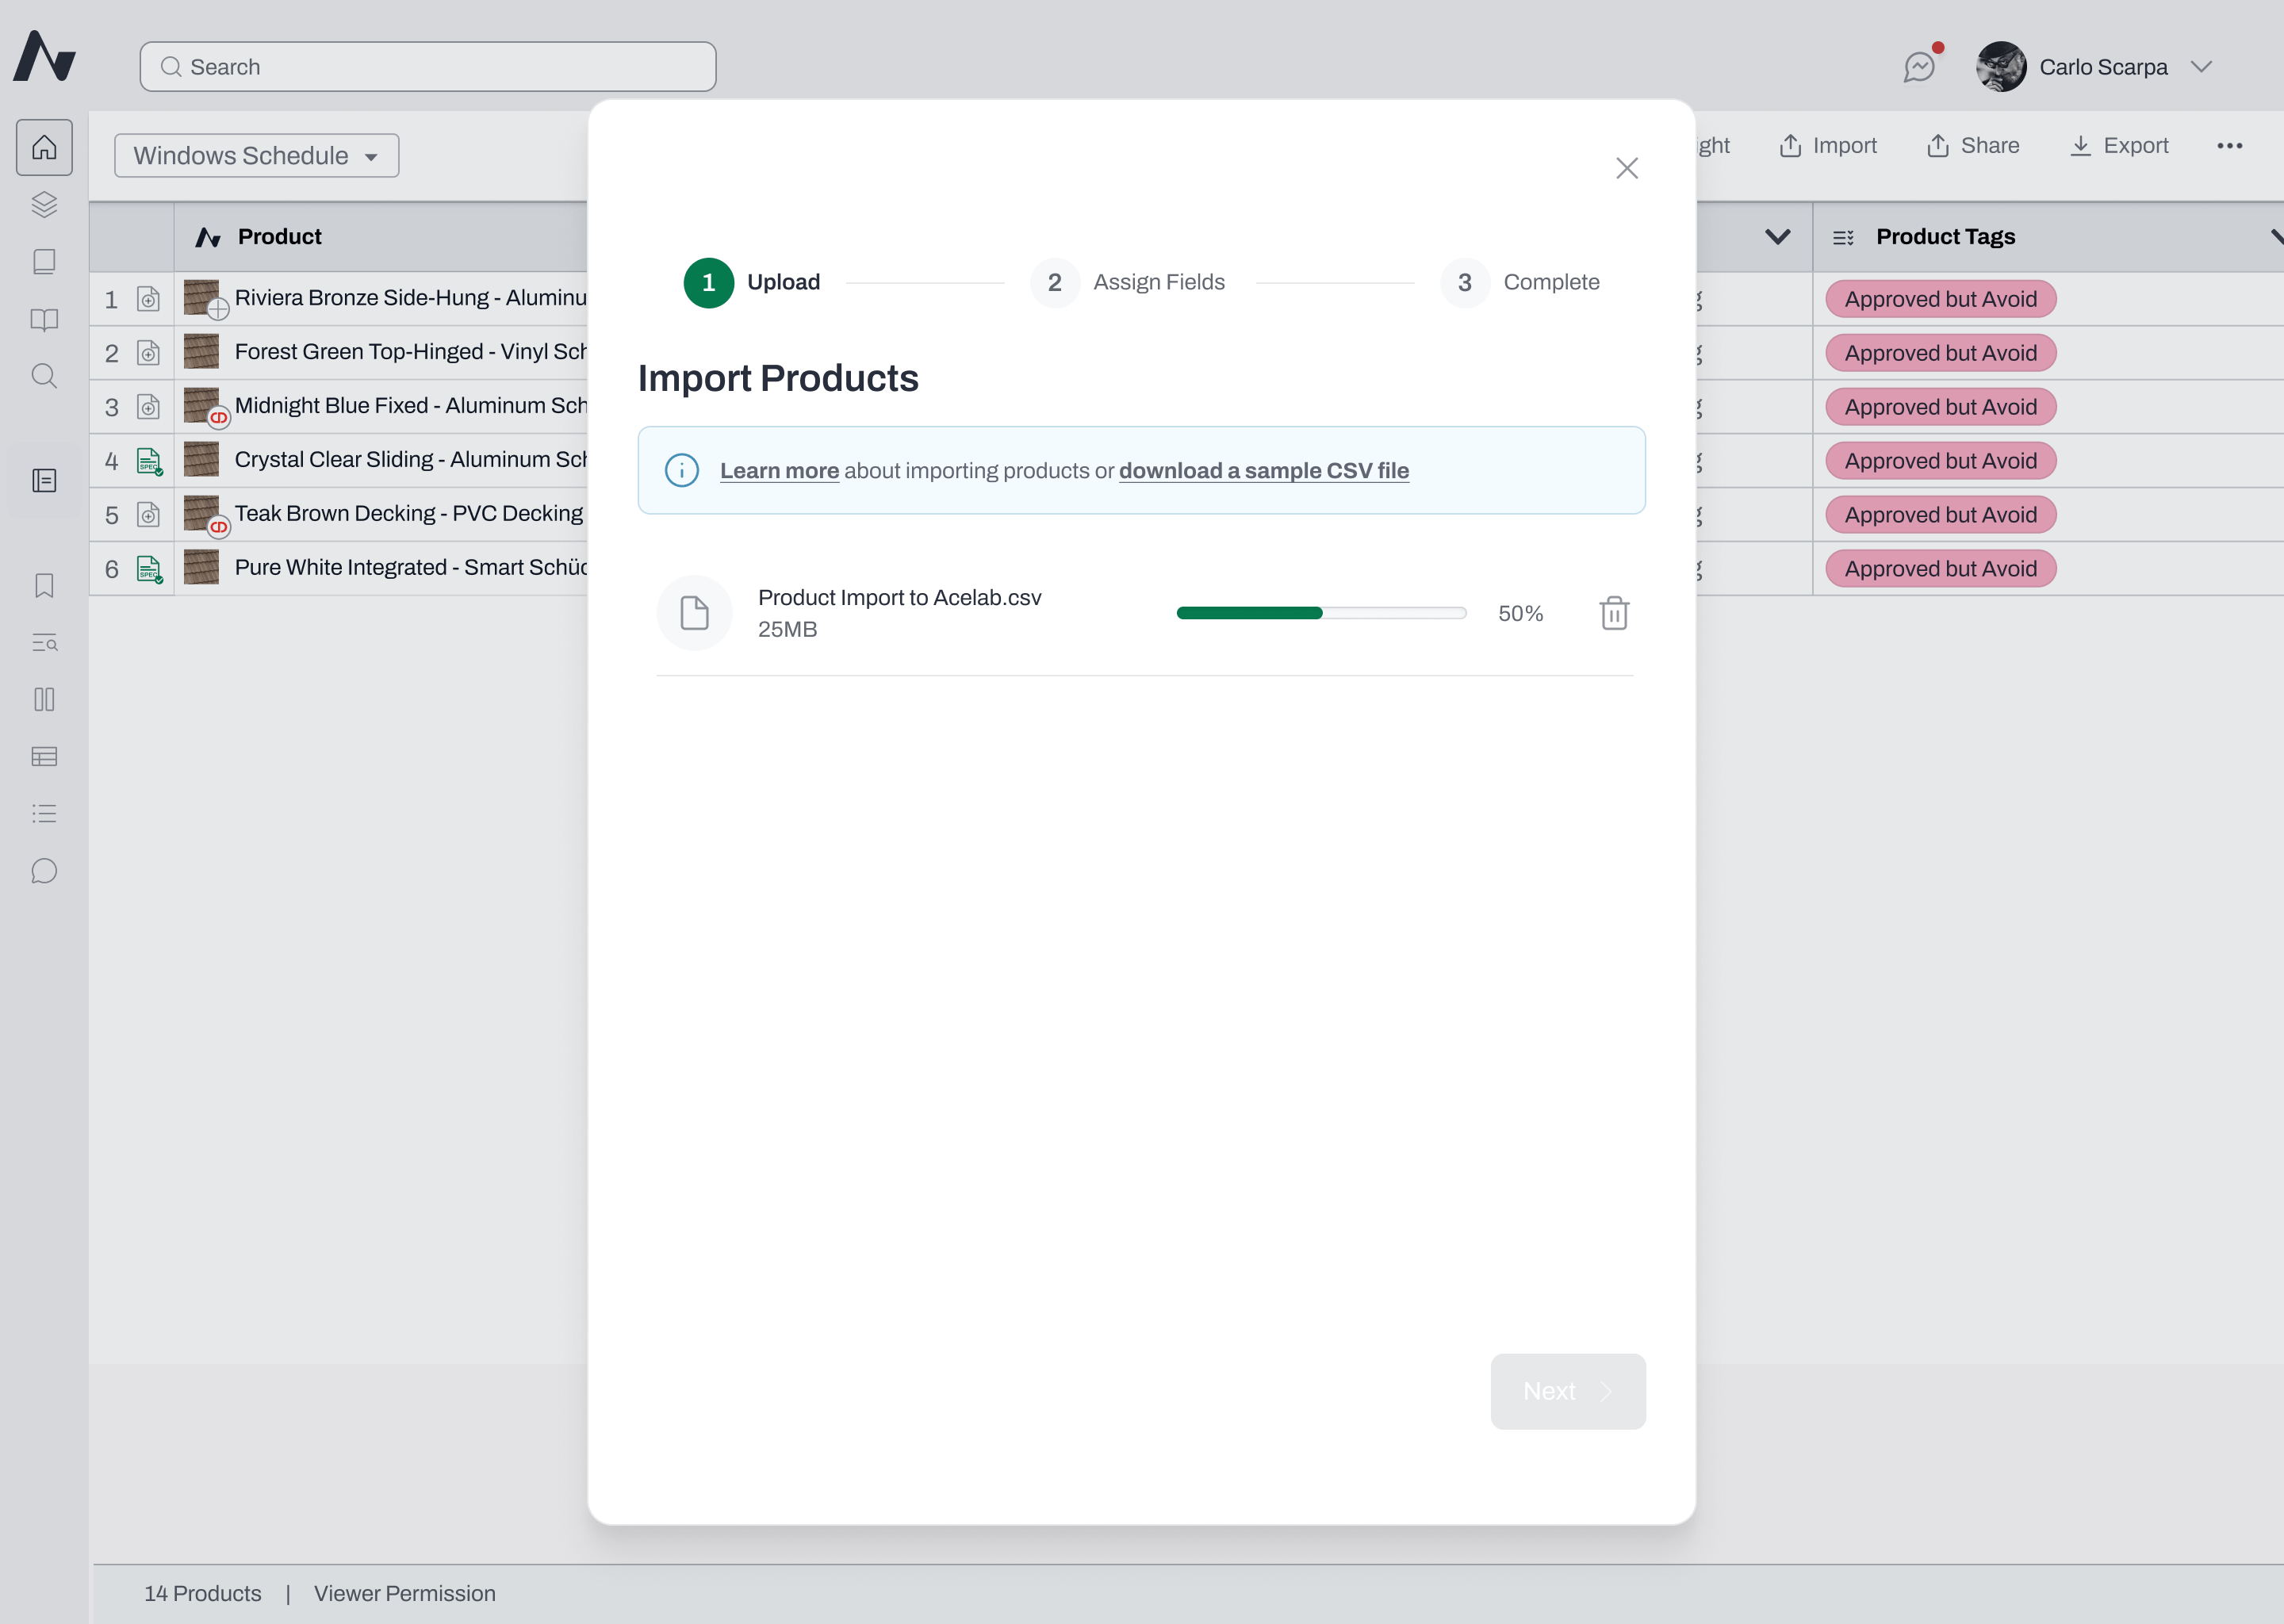 3. Once uploaded, the upload area is replaced by a file preview showing the file name, size, and a success indicator.
4. To start over, click the **delete icon** to remove the file and upload a different one.
5. Click **Next** to proceed. This button stays disabled until the upload is successful.
3. Once uploaded, the upload area is replaced by a file preview showing the file name, size, and a success indicator.
4. To start over, click the **delete icon** to remove the file and upload a different one.
5. Click **Next** to proceed. This button stays disabled until the upload is successful.
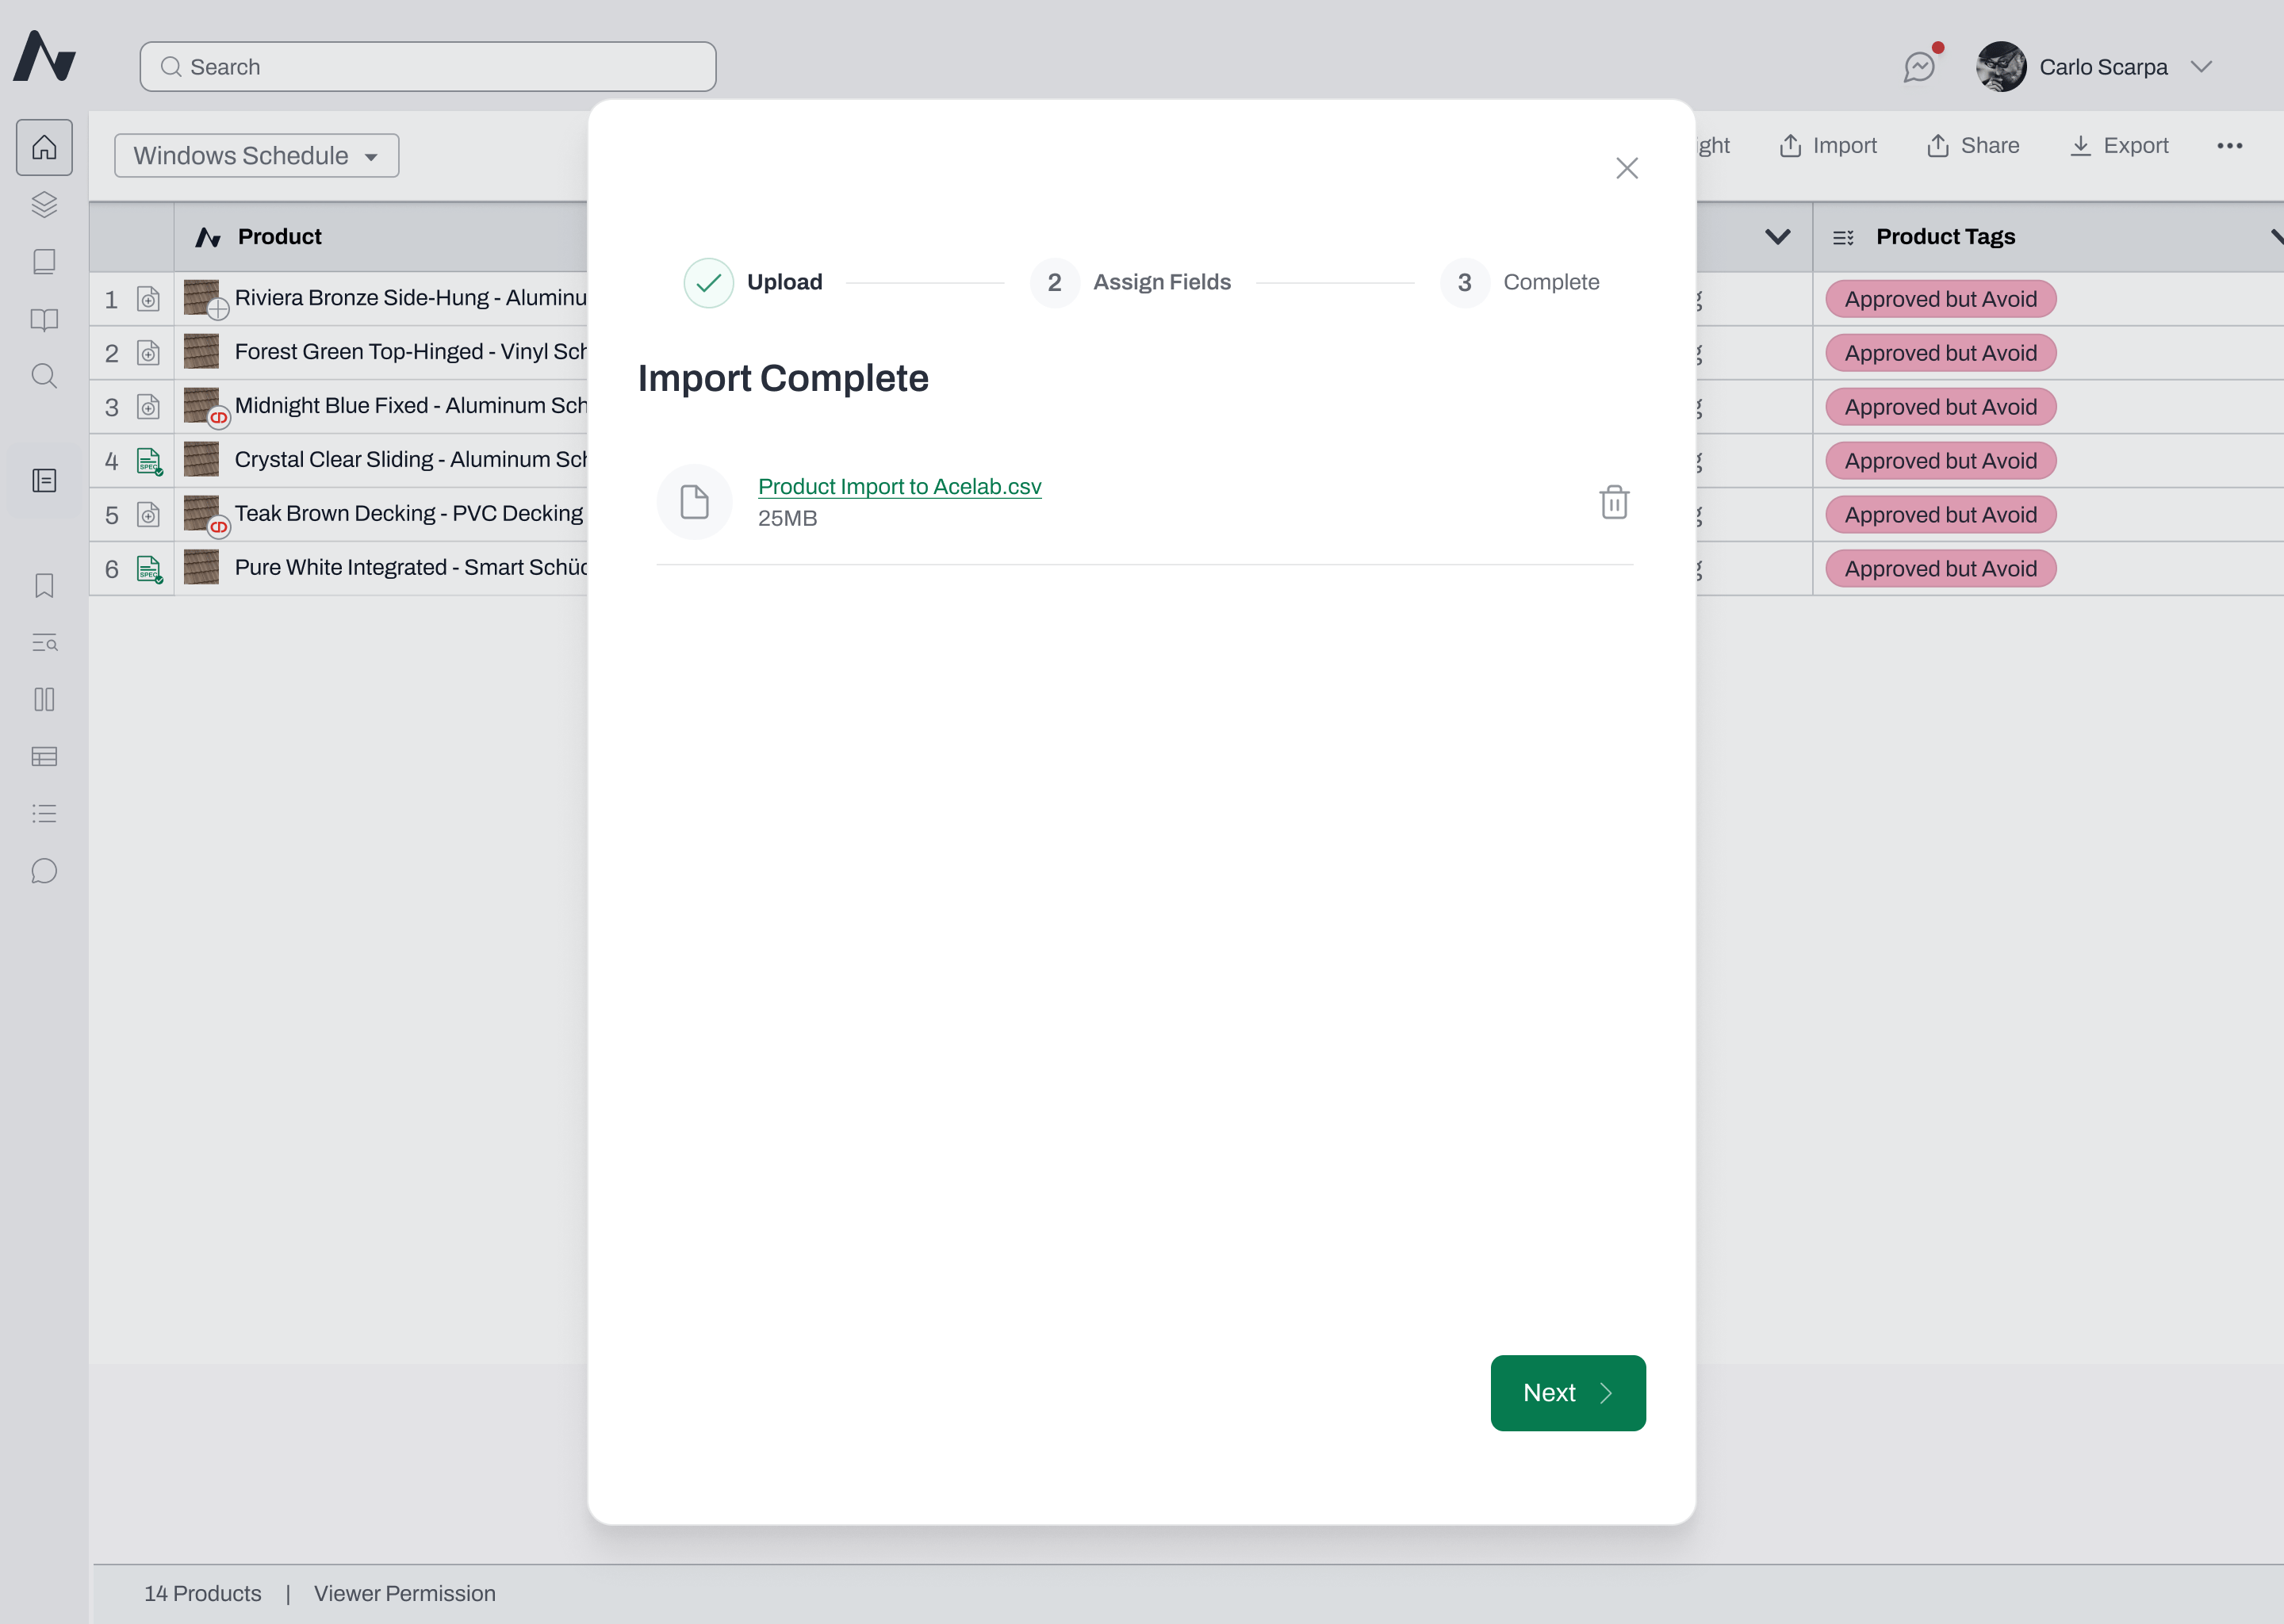 **If you see an error:**
* *"File size exceeds 25MB limit."* — Split your file into smaller files and try again.
* *"Invalid file format."* — Only CSV files are supported. Convert your spreadsheet to CSV before uploading.
* *"Invalid CSV format."* — Download the sample CSV template from the modal and use it as a reference.
## **Step 2: Assign Fields**
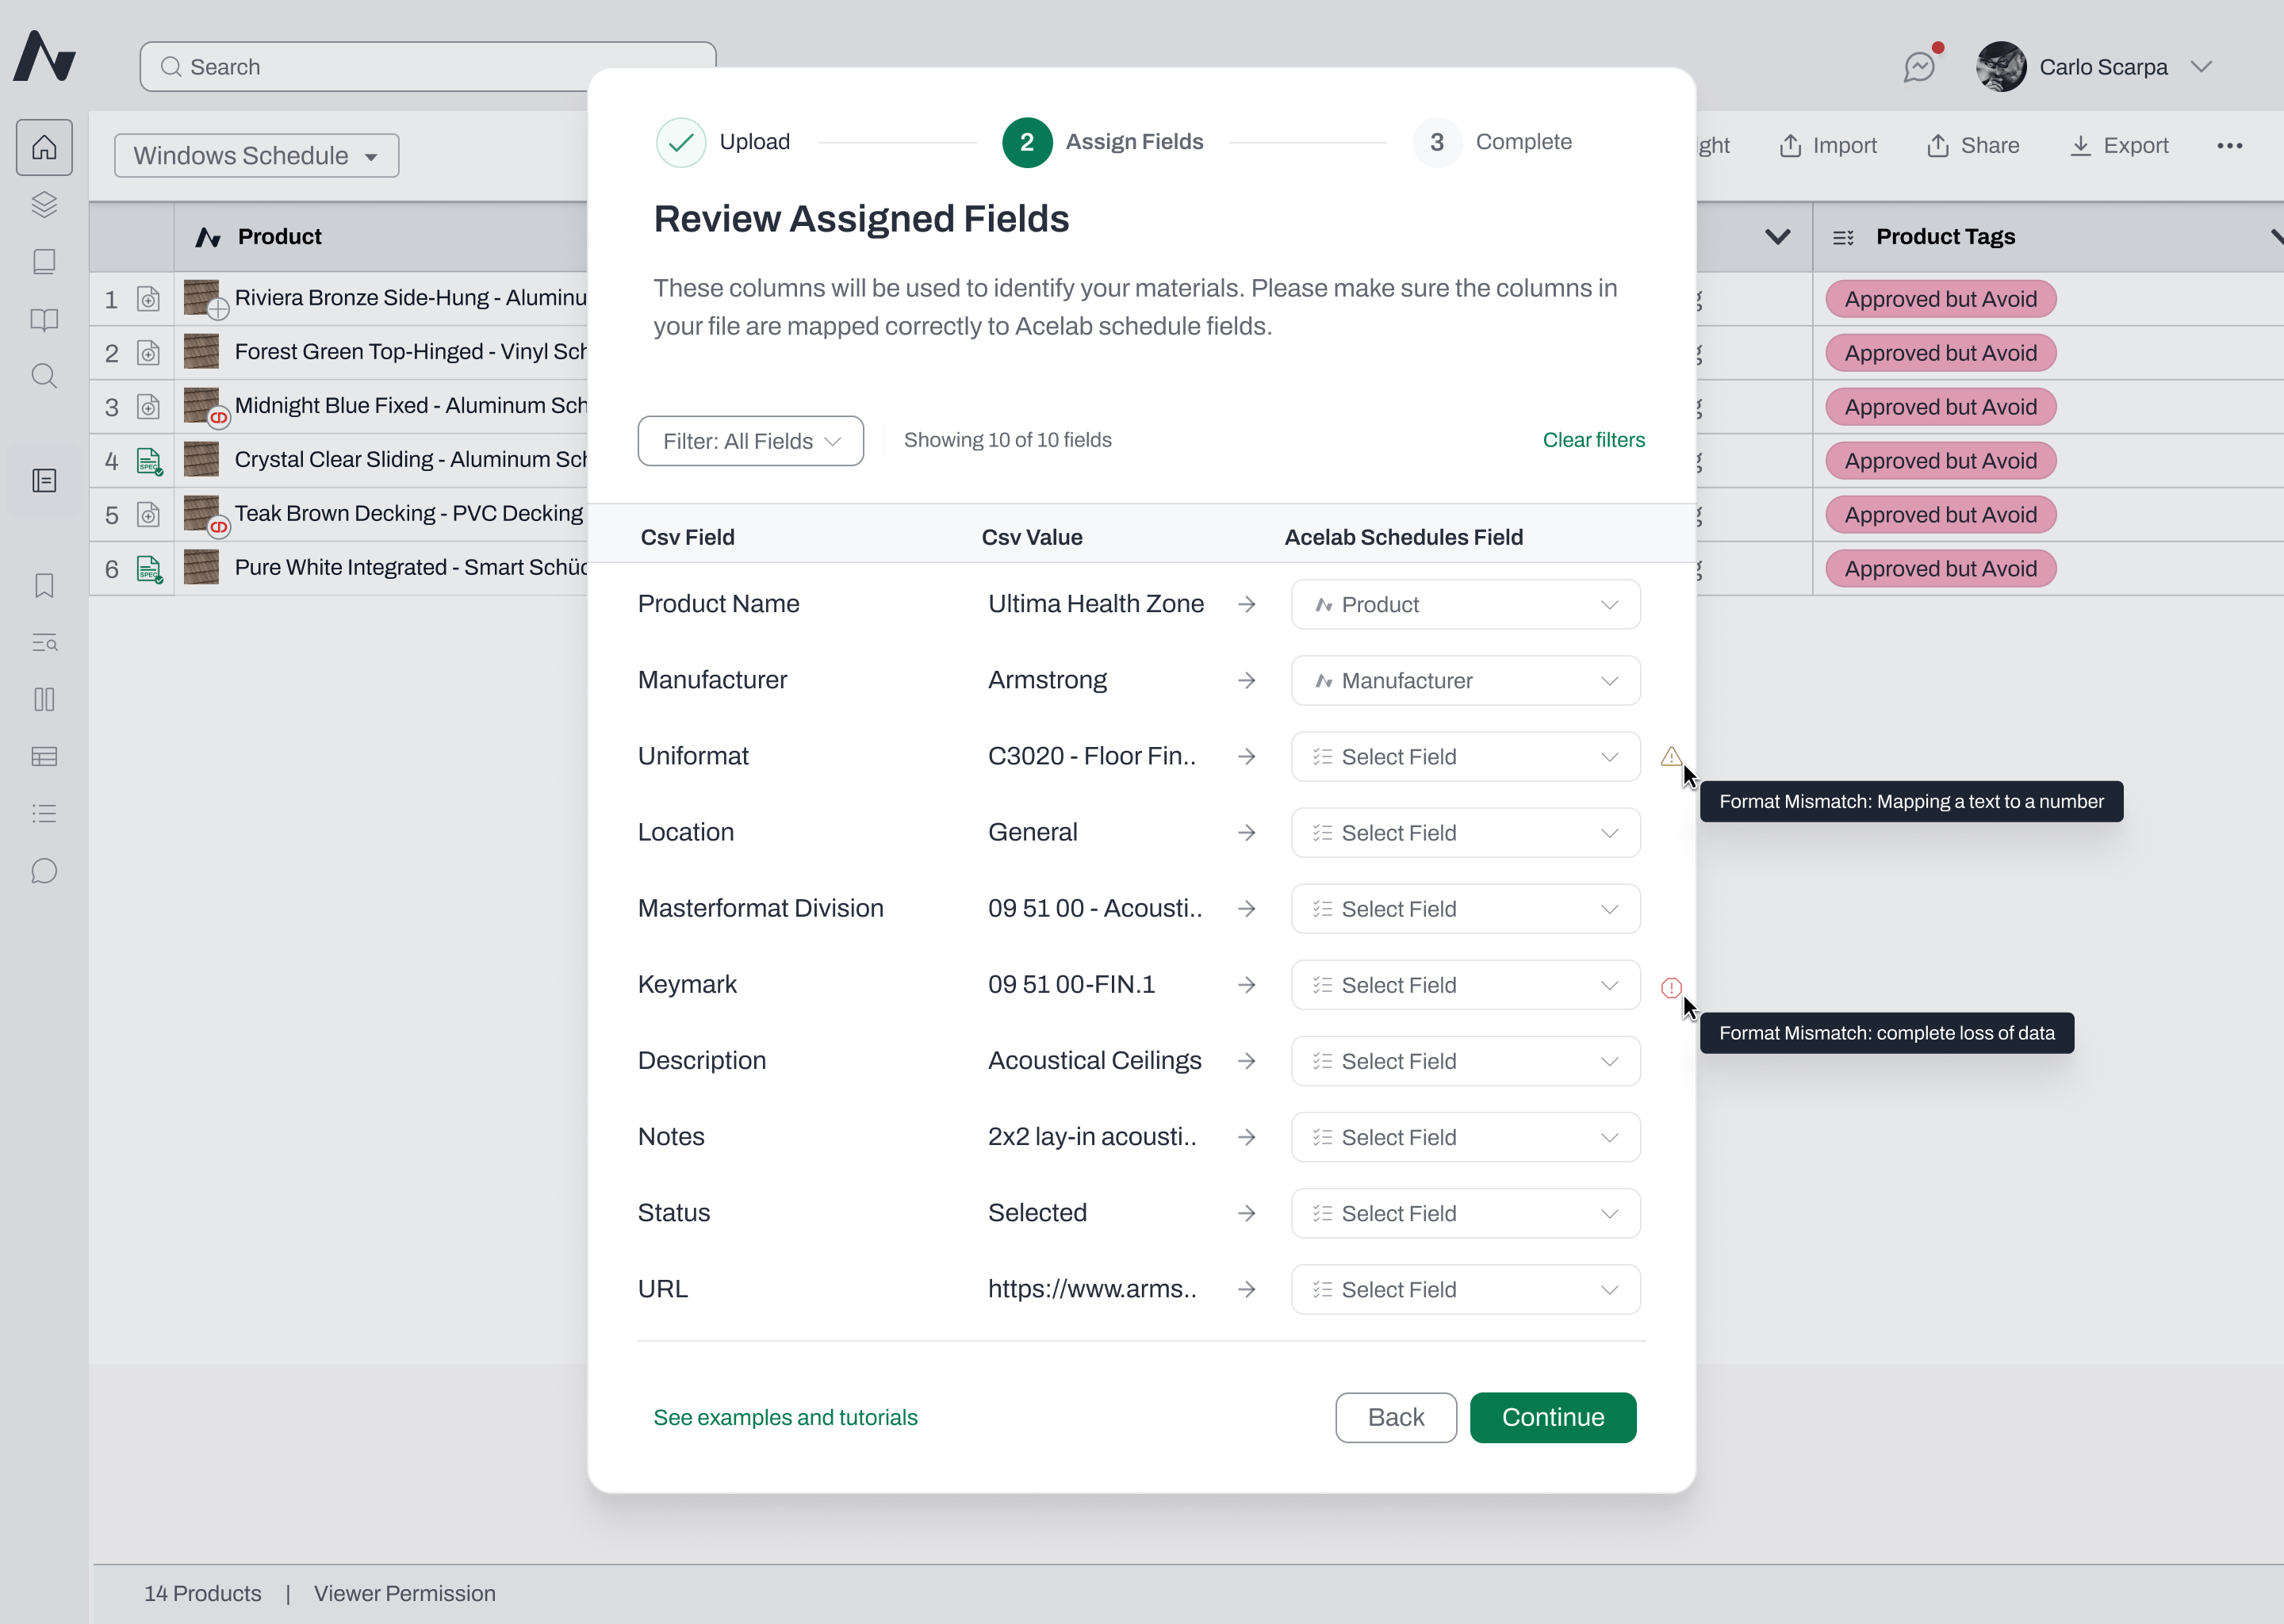
This screen lets you map each column in your CSV to a field in your Acelab schedule.
1. Review the mapping table, which shows three columns: **CSV Field**, **Sample Values**, and **Acelab Schedule Field**.
**If you see an error:**
* *"File size exceeds 25MB limit."* — Split your file into smaller files and try again.
* *"Invalid file format."* — Only CSV files are supported. Convert your spreadsheet to CSV before uploading.
* *"Invalid CSV format."* — Download the sample CSV template from the modal and use it as a reference.
## **Step 2: Assign Fields**
This screen lets you map each column in your CSV to a field in your Acelab schedule.
1. Review the mapping table, which shows three columns: **CSV Field**, **Sample Values**, and **Acelab Schedule Field**.
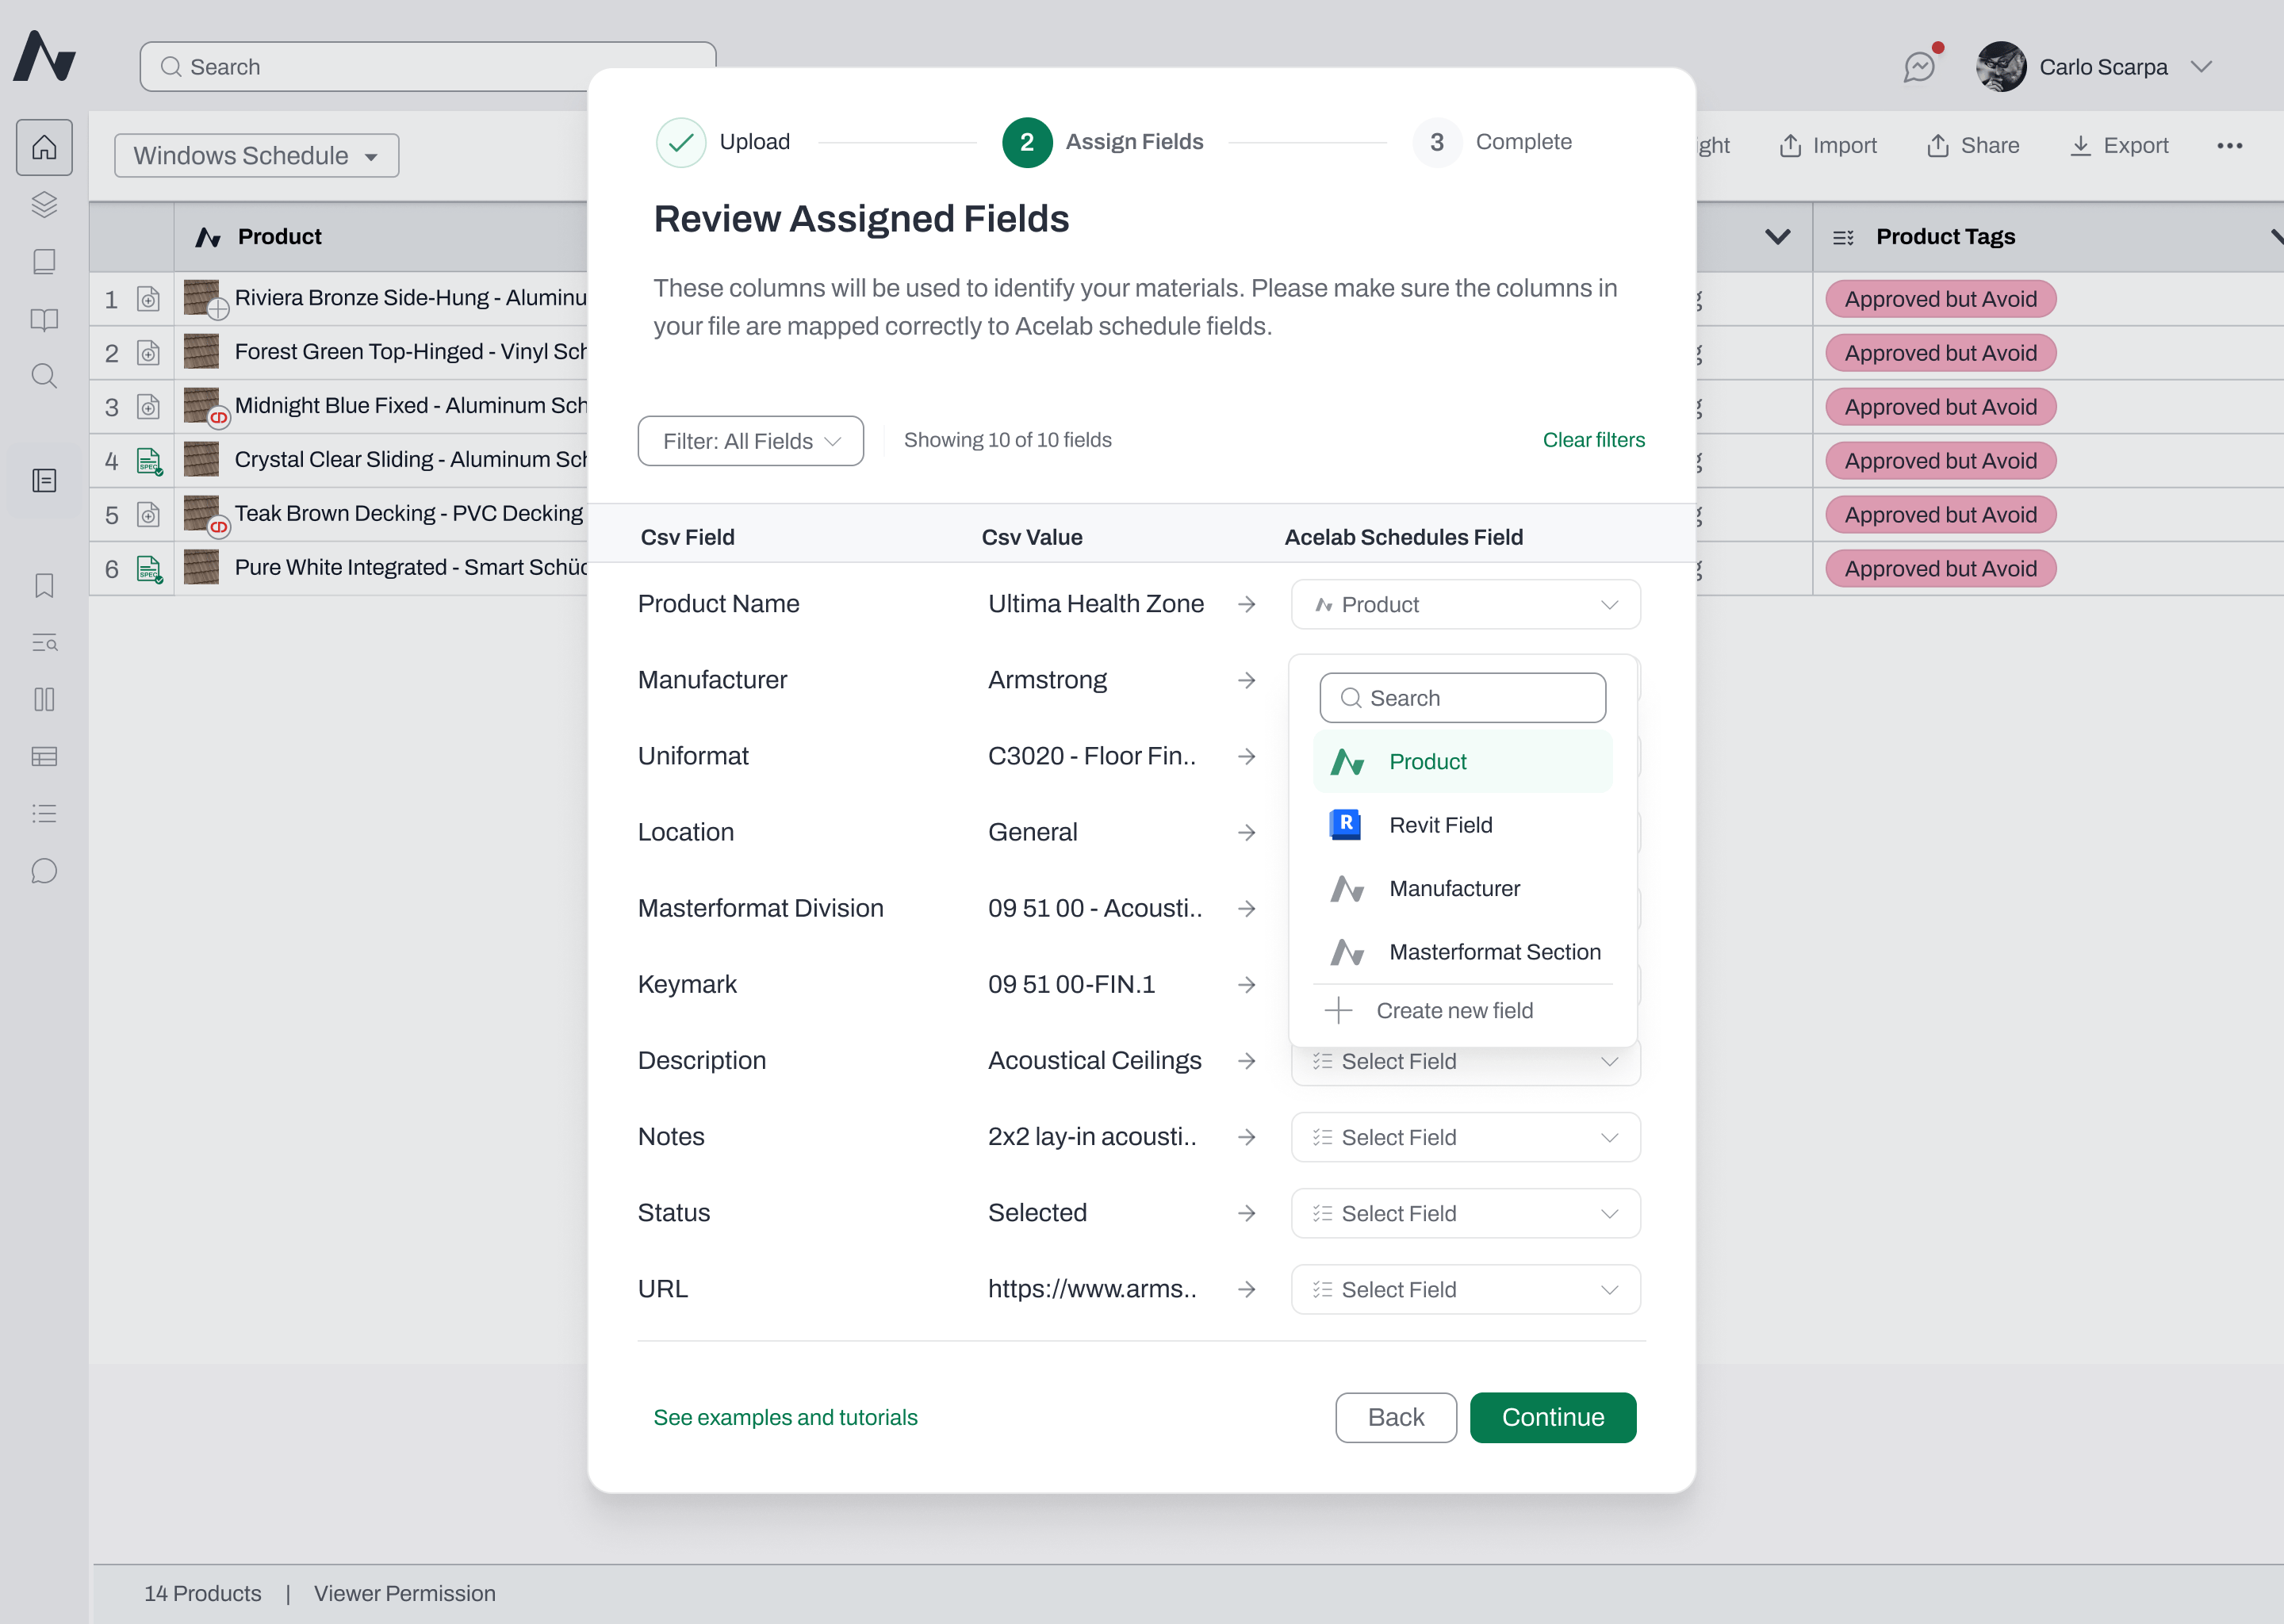 2. Use the dropdown in the **Acelab Schedule Field** column to assign a field to each CSV column. Available fields include Product Name, Manufacturer Name, URL, and any custom project or company fields.
*Notes:*
* *Once a field is assigned to one column, it is removed from the dropdowns for all other columns to prevent duplicates.*
* *Mapping a CSV field to Acelab’s MasterFormat Section field is currently unavailable in this feature. If you have a CSV field related to the MasterFormat Section field and you want to import it in your schedule, you will need to create a new field in your schedule to map this CSV field to. See below on how to create a new field during import.*
3. Use the **Filter** dropdown to view **All Fields**, **Assigned** fields only, or **Unassigned** fields only. The field counter updates to reflect what you're viewing.
2. Use the dropdown in the **Acelab Schedule Field** column to assign a field to each CSV column. Available fields include Product Name, Manufacturer Name, URL, and any custom project or company fields.
*Notes:*
* *Once a field is assigned to one column, it is removed from the dropdowns for all other columns to prevent duplicates.*
* *Mapping a CSV field to Acelab’s MasterFormat Section field is currently unavailable in this feature. If you have a CSV field related to the MasterFormat Section field and you want to import it in your schedule, you will need to create a new field in your schedule to map this CSV field to. See below on how to create a new field during import.*
3. Use the **Filter** dropdown to view **All Fields**, **Assigned** fields only, or **Unassigned** fields only. The field counter updates to reflect what you're viewing.
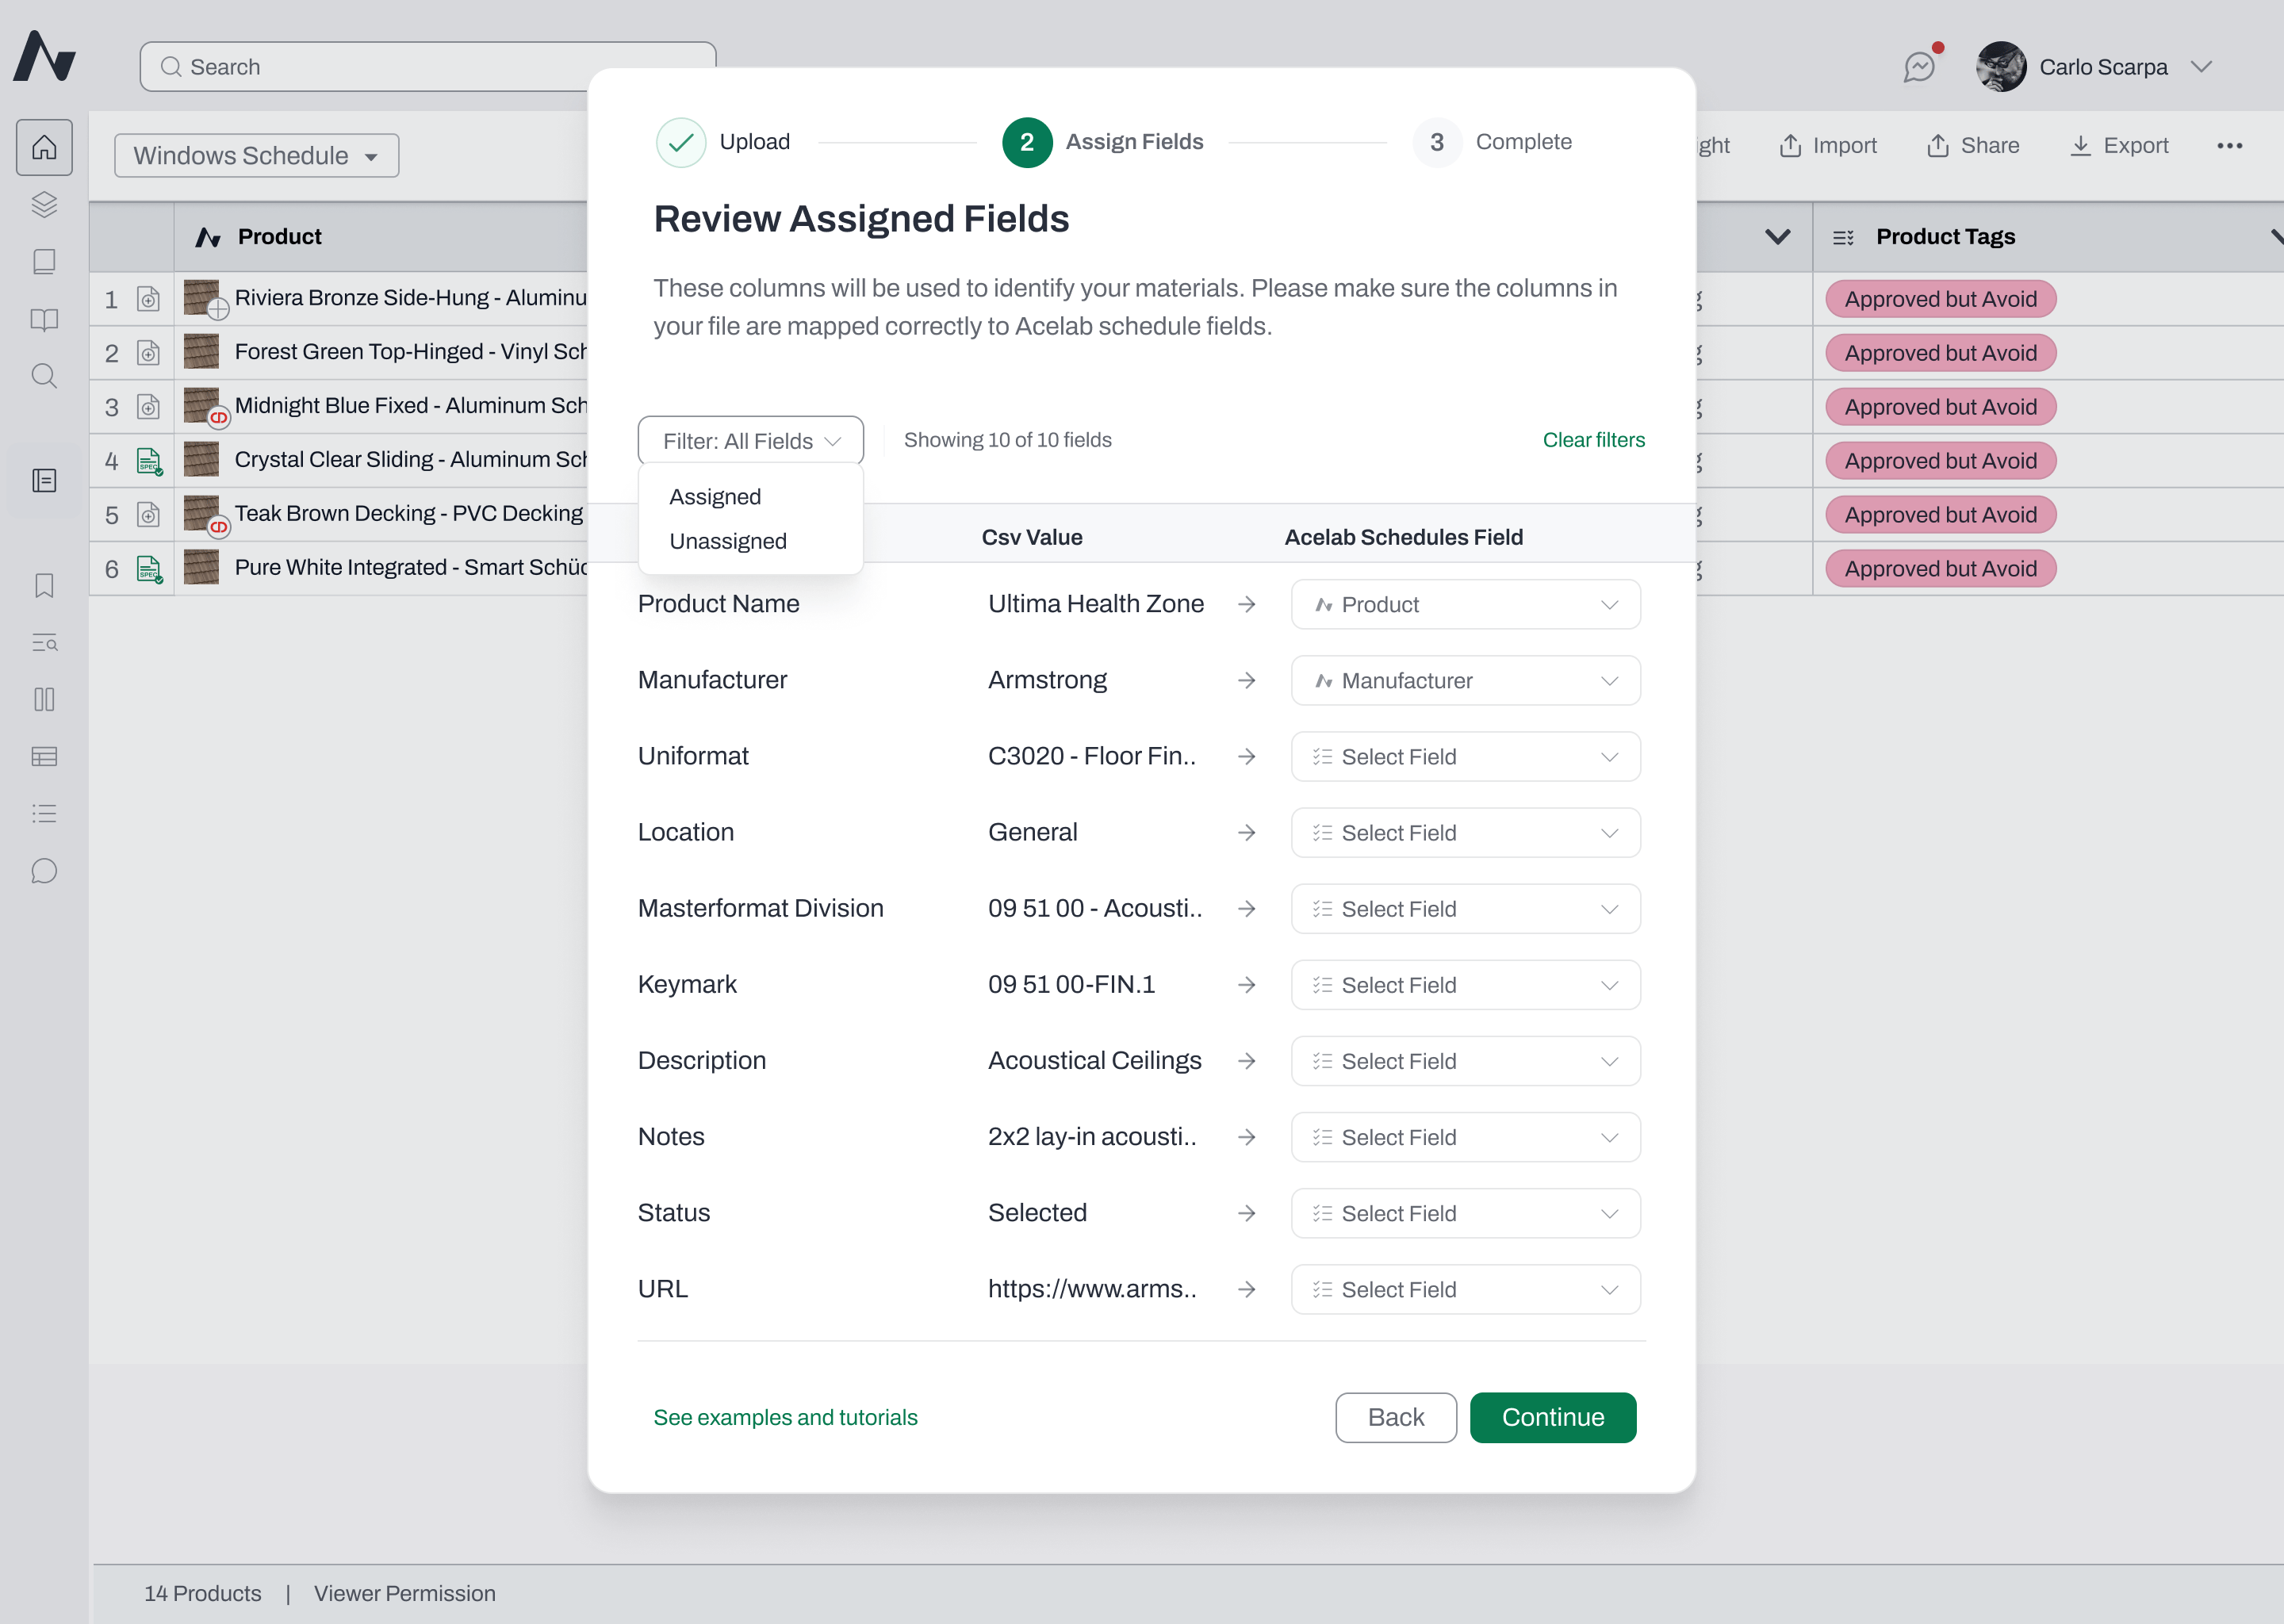 4. Click **Continue** once at least one field is mapped.
**Creating a new field during import:**
If you need a field that doesn't exist yet, select **Create Field** from any dropdown. A field creation modal will open with the CSV column name pre-filled. Configure the field type (Text, Number, or List) and save — the new field will be automatically mapped to that column.
4. Click **Continue** once at least one field is mapped.
**Creating a new field during import:**
If you need a field that doesn't exist yet, select **Create Field** from any dropdown. A field creation modal will open with the CSV column name pre-filled. Configure the field type (Text, Number, or List) and save — the new field will be automatically mapped to that column.
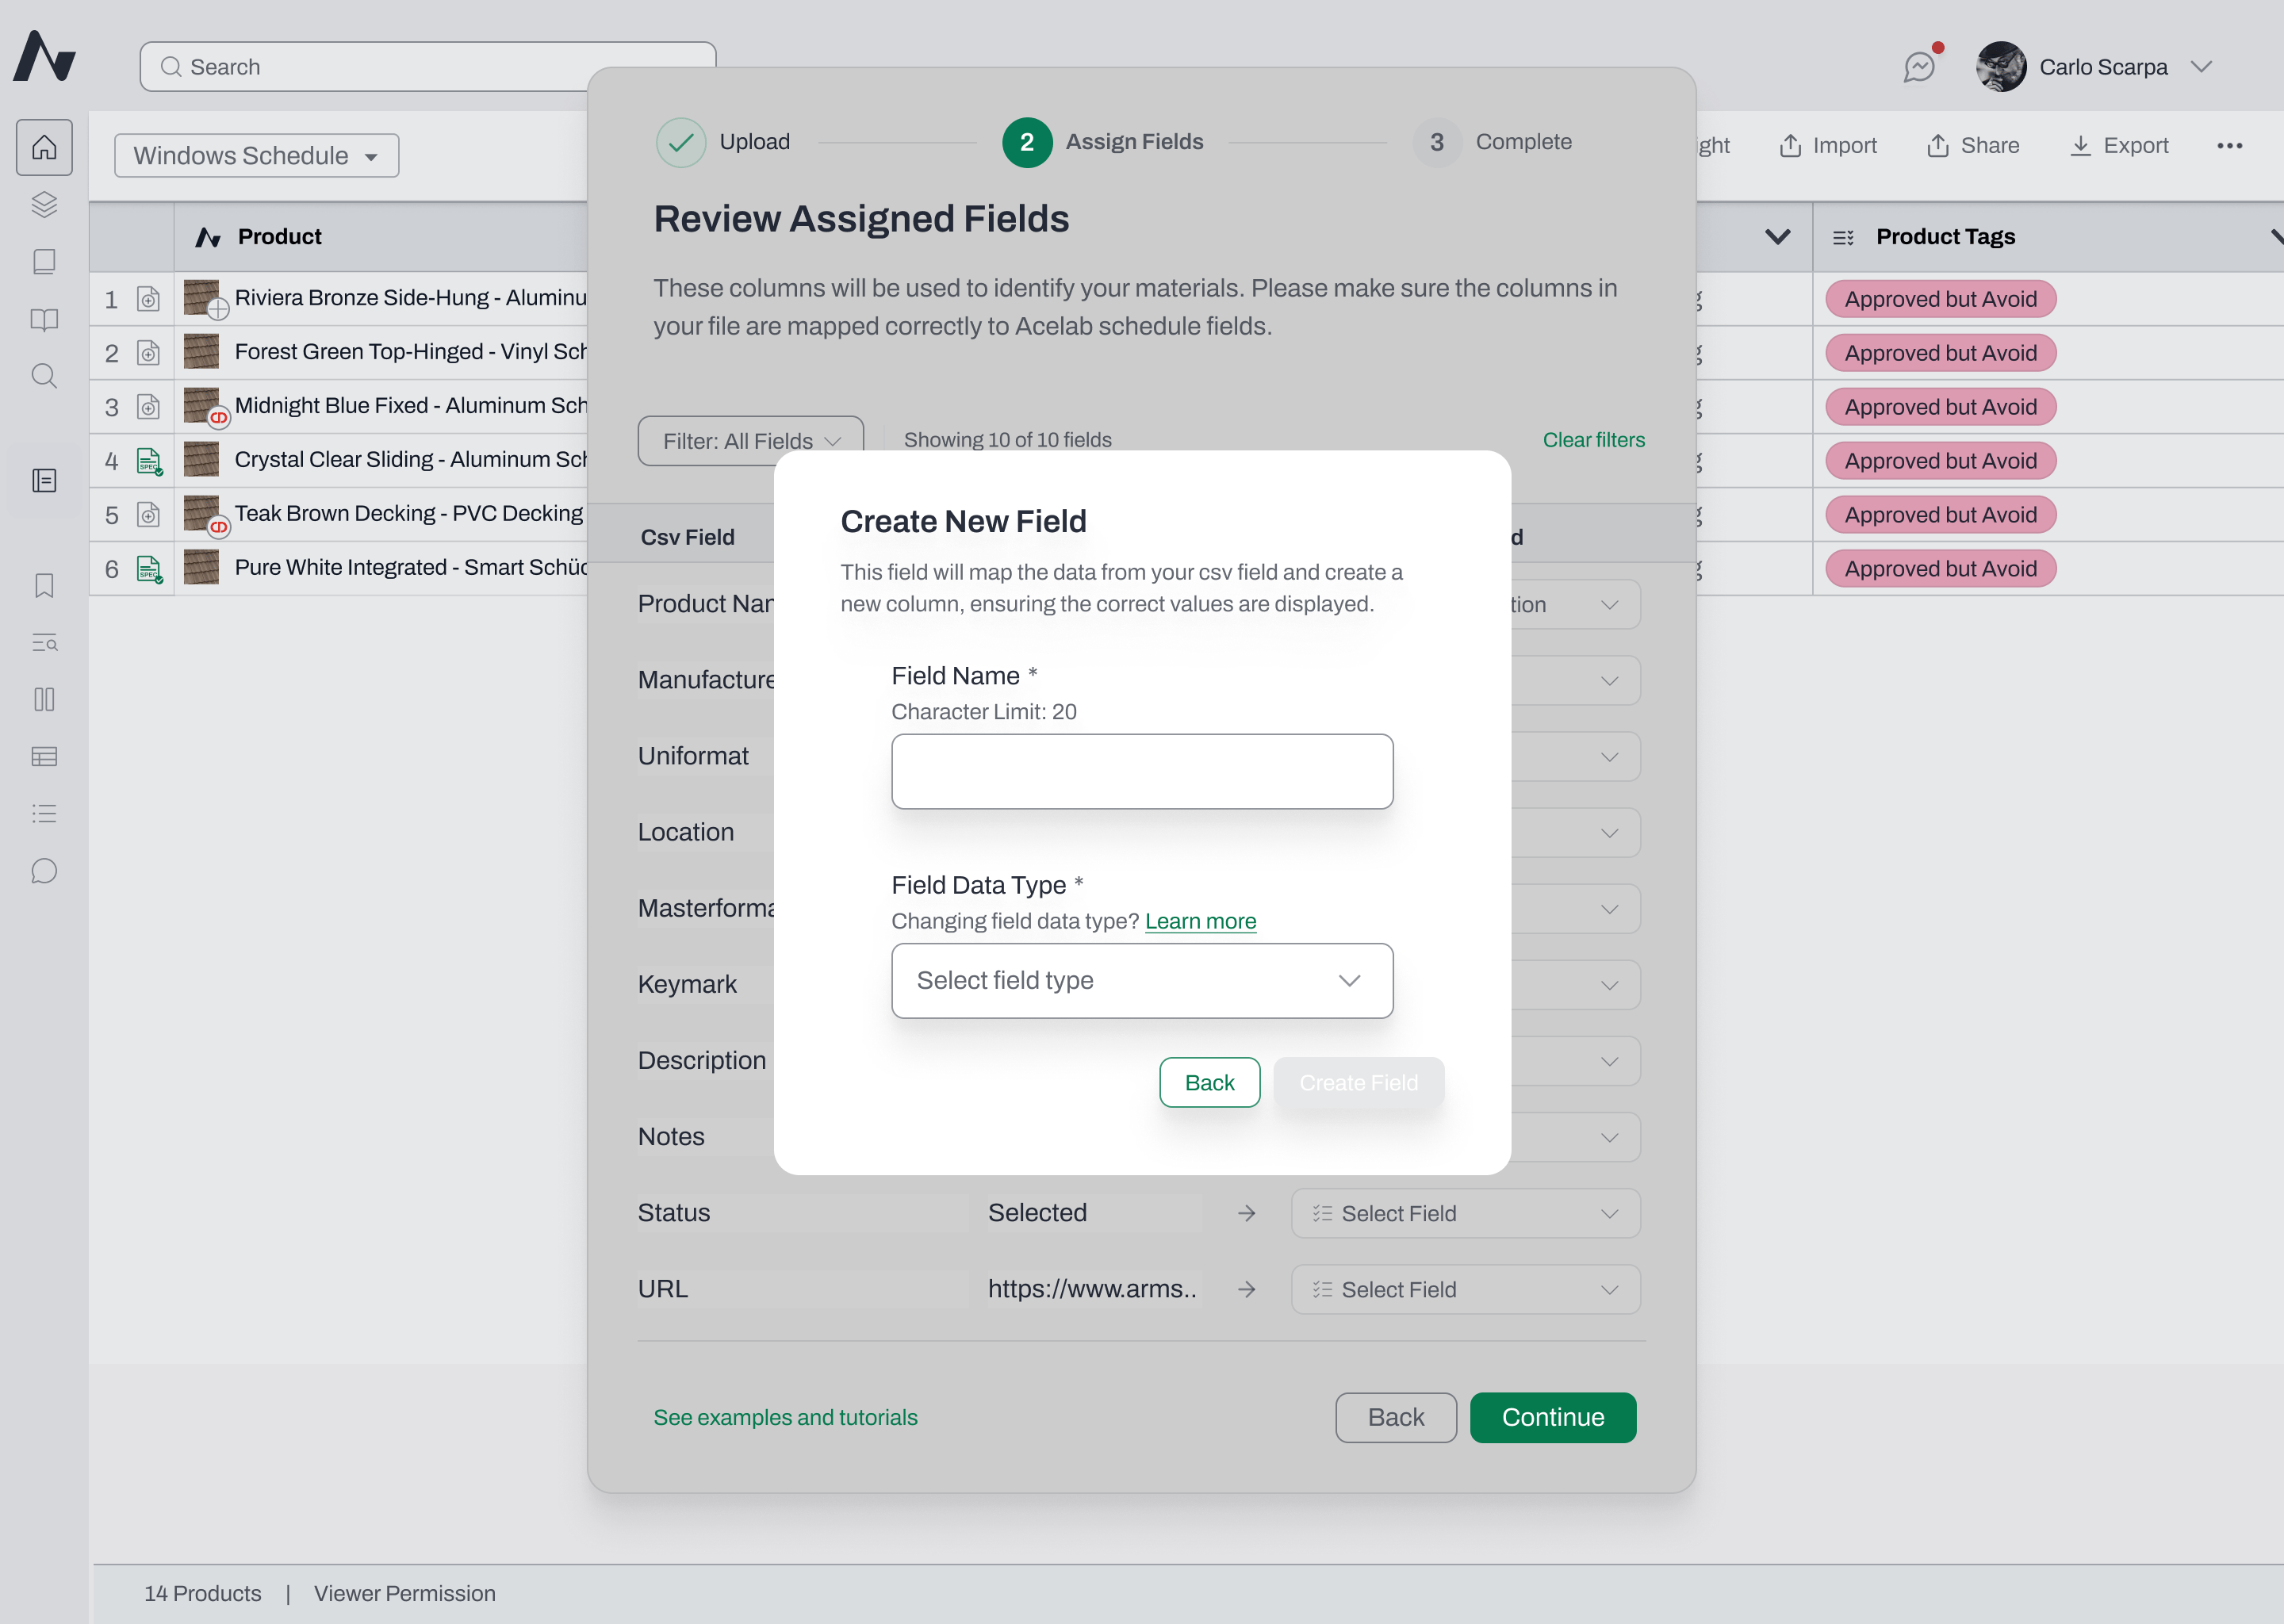 **Data type warnings:**
If a CSV column contains data that doesn't match the field type you've assigned (for example, text values mapped to a Number field), a warning icon ⚠️ will appear next to the dropdown. Hover over it to see the details. You can still proceed — rows with mismatched data will import with that field left empty.
**Data type warnings:**
If a CSV column contains data that doesn't match the field type you've assigned (for example, text values mapped to a Number field), a warning icon ⚠️ will appear next to the dropdown. Hover over it to see the details. You can still proceed — rows with mismatched data will import with that field left empty.
 ## **Step 3: Review Unmapped Fields**
After clicking **Continue**, you'll see a summary of any CSV columns that weren't mapped to an Acelab field.
## **Step 3: Review Unmapped Fields**
After clicking **Continue**, you'll see a summary of any CSV columns that weren't mapped to an Acelab field.
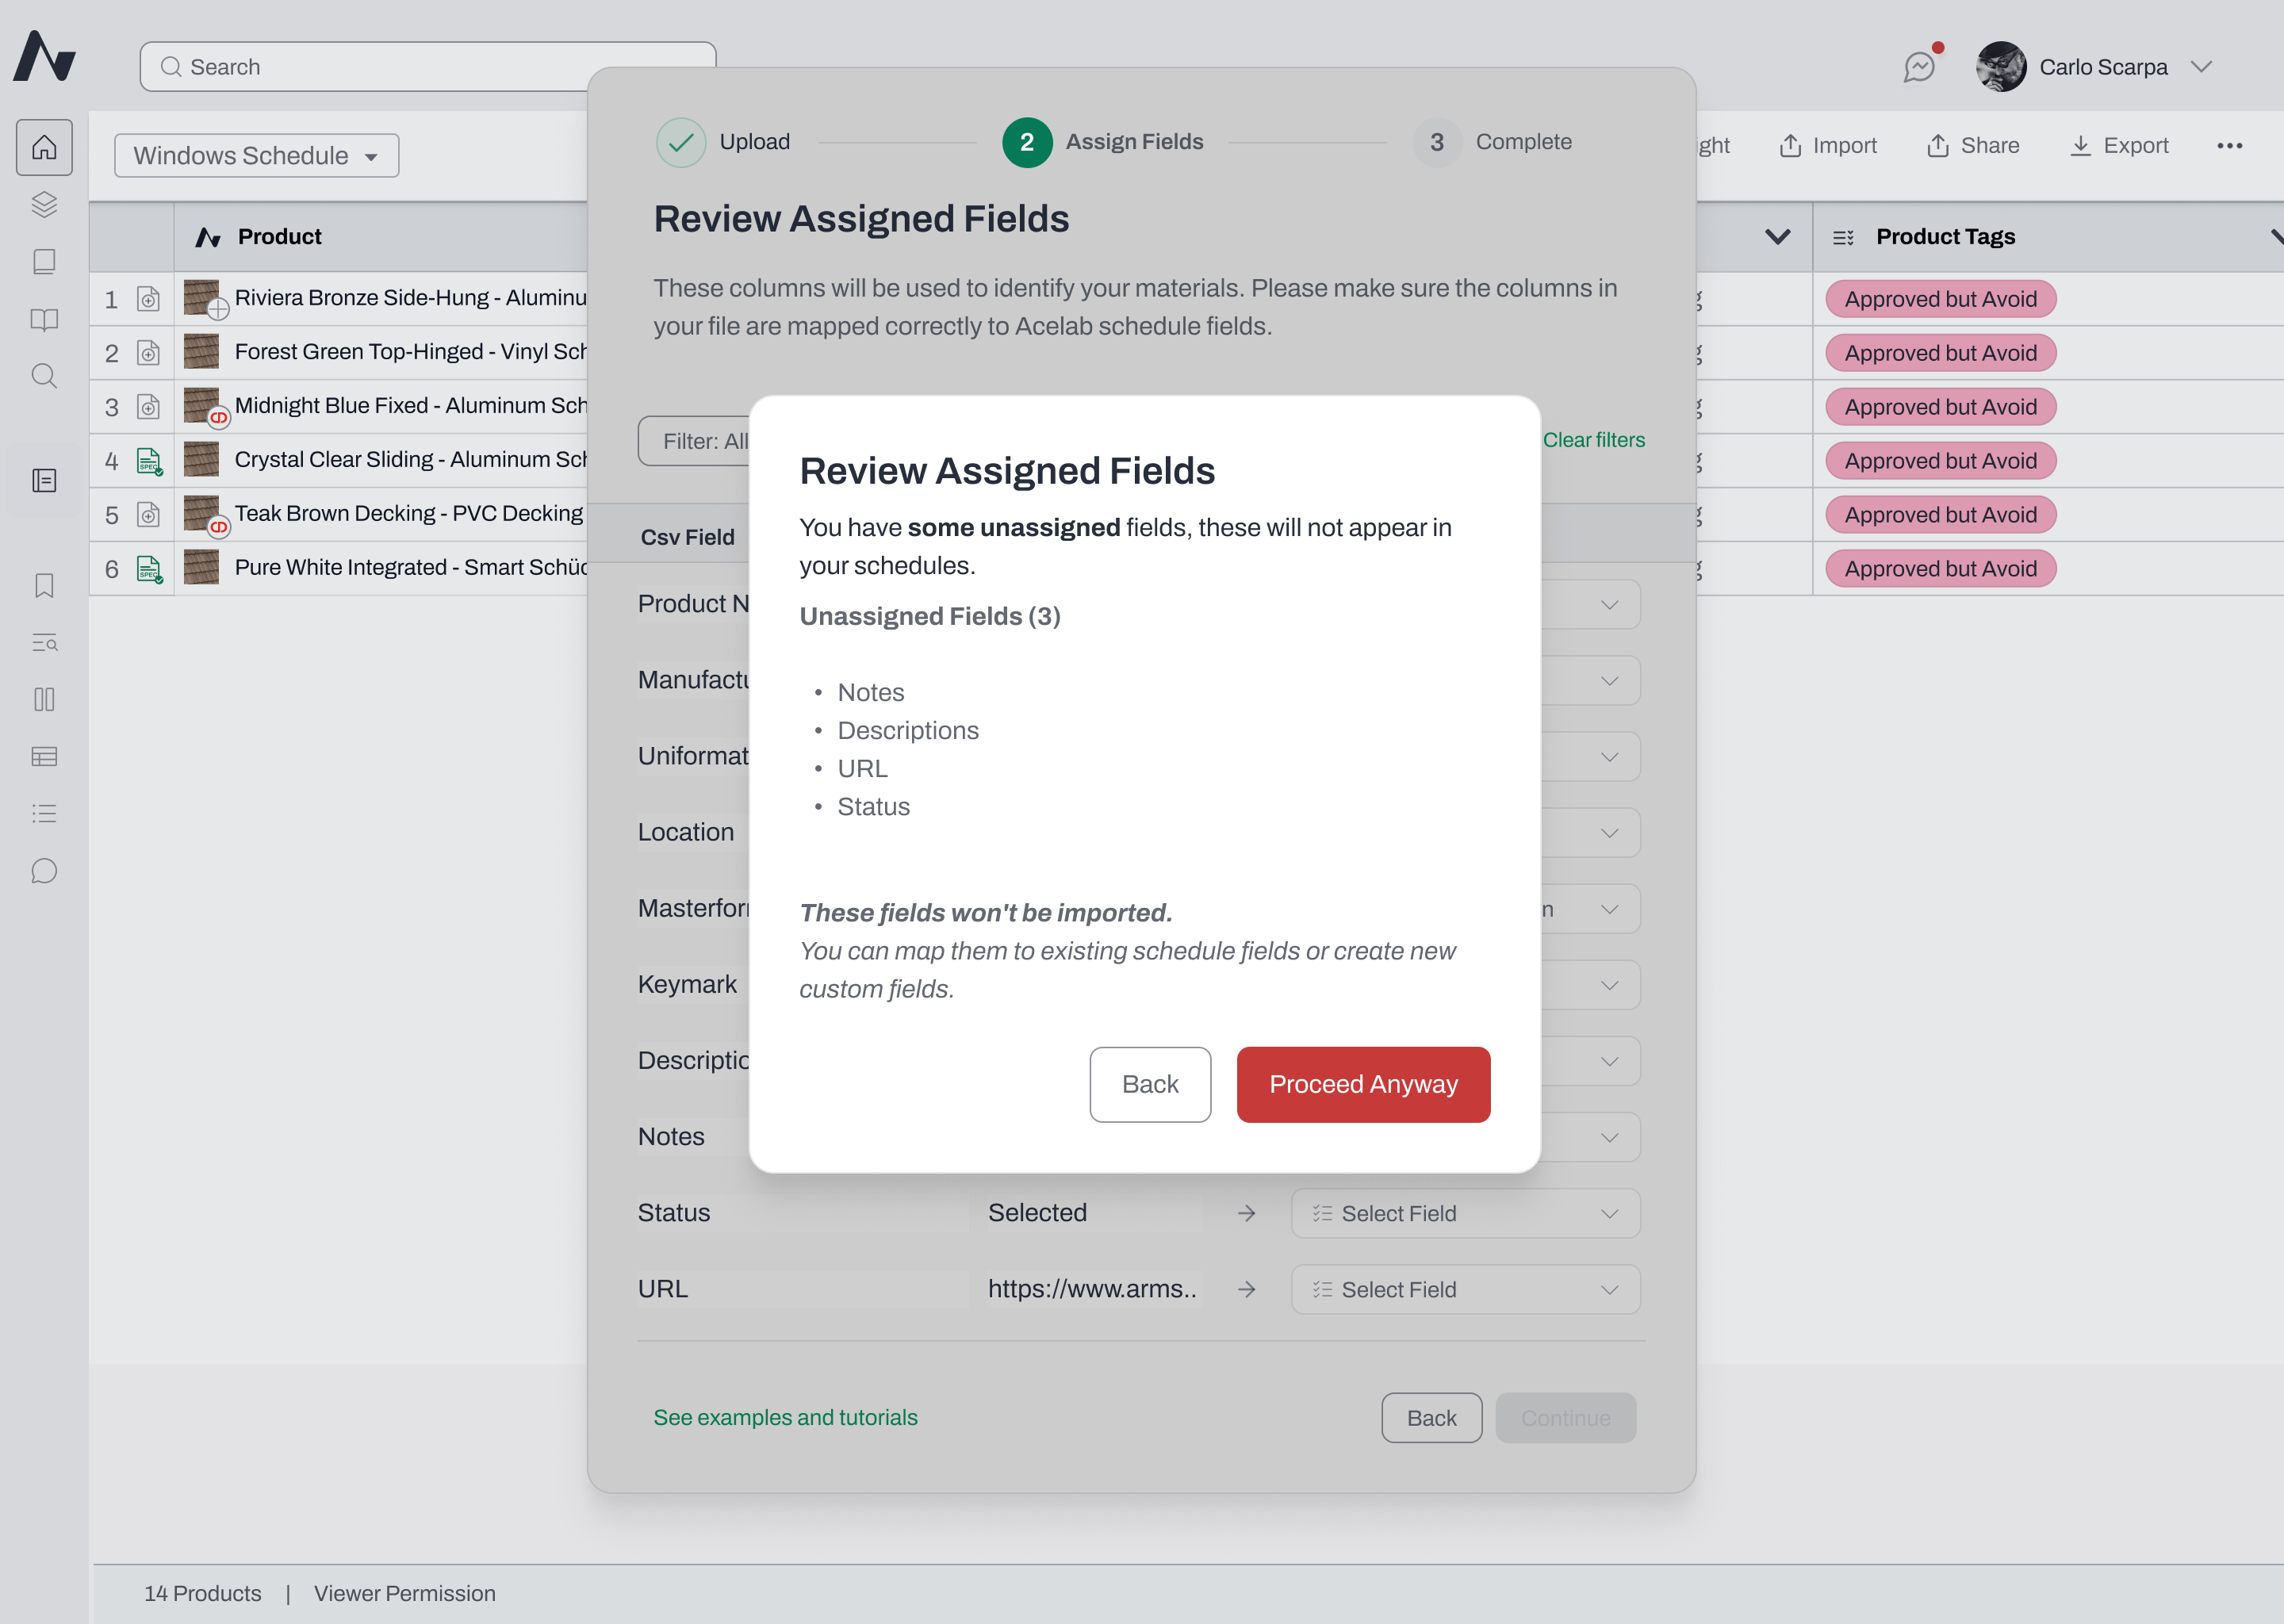 * Unmapped columns will not be imported — that data will be ignored.
* To go back and map additional fields, click **Back**.
* To continue without mapping them, click **Proceed Anyway**.
## **Step 4: Import Progress and Completion**
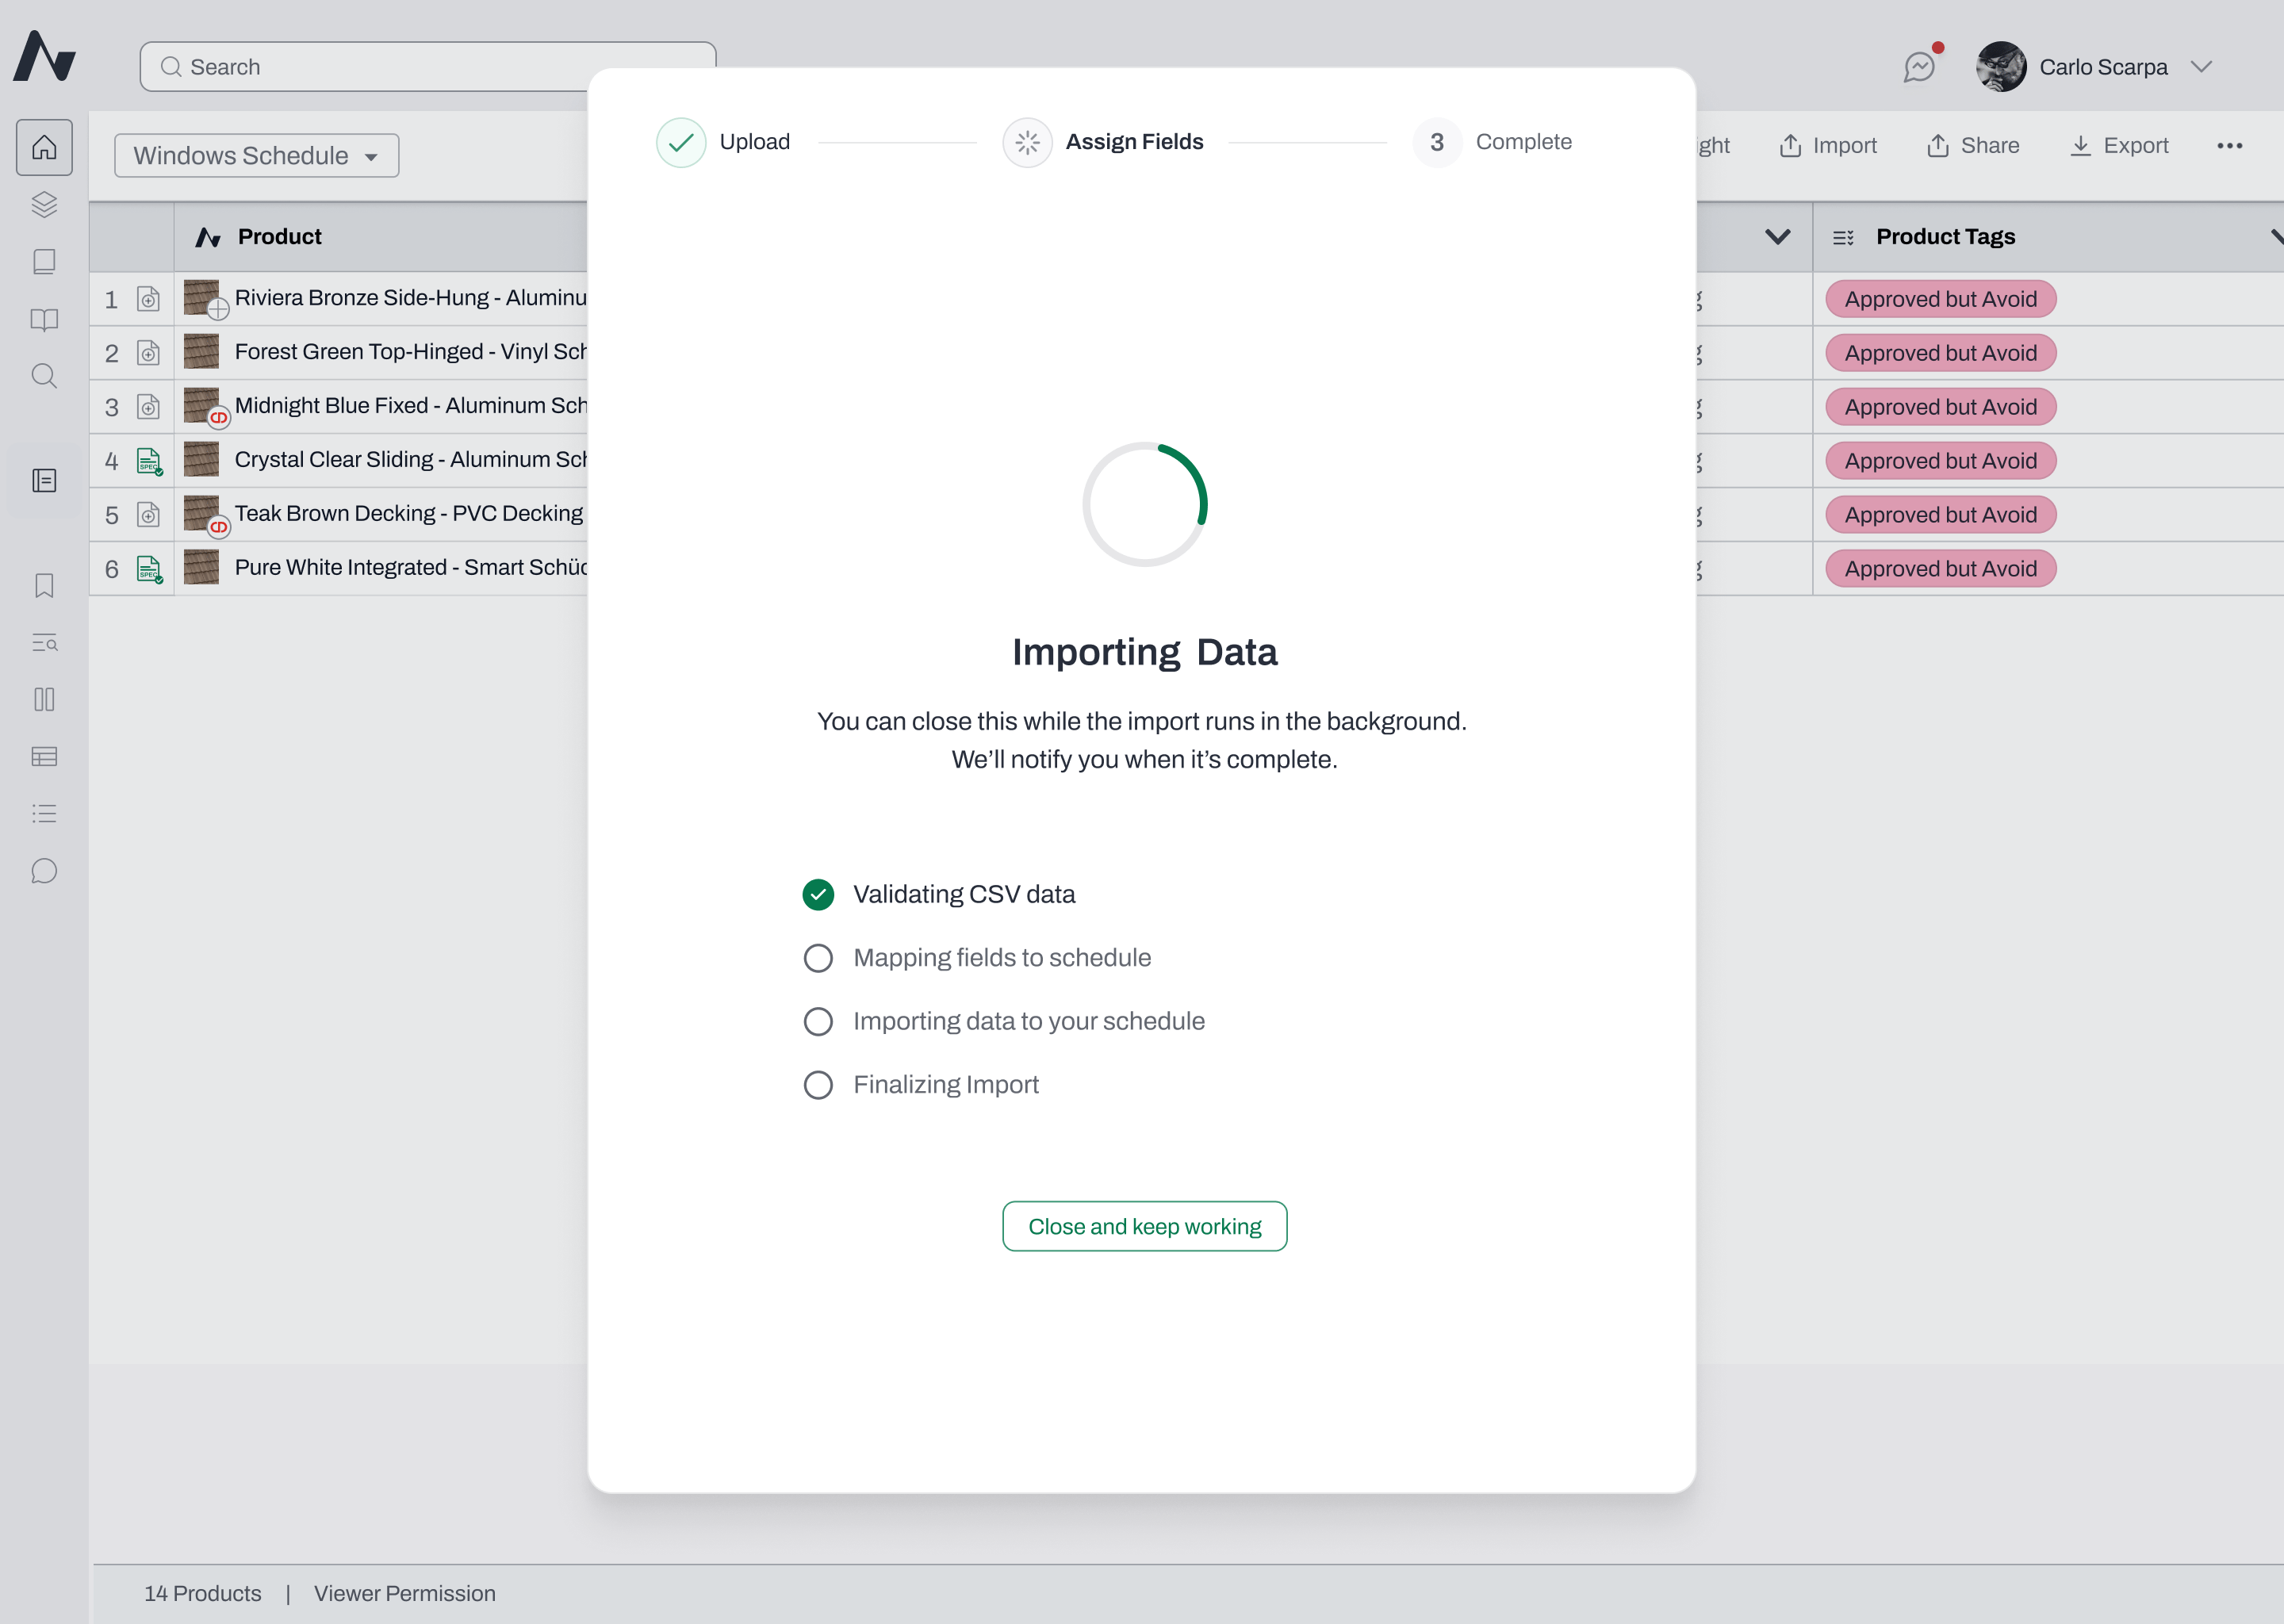
1. After clicking **Proceed Anyway**, a loading screen will appear while your products are being created. You can close the modal — the import will continue processing in the background.
* Unmapped columns will not be imported — that data will be ignored.
* To go back and map additional fields, click **Back**.
* To continue without mapping them, click **Proceed Anyway**.
## **Step 4: Import Progress and Completion**
1. After clicking **Proceed Anyway**, a loading screen will appear while your products are being created. You can close the modal — the import will continue processing in the background.
 2. Once complete, you'll see a success screen with a **View Schedule** button. A notification will also appear with a link to your schedule.
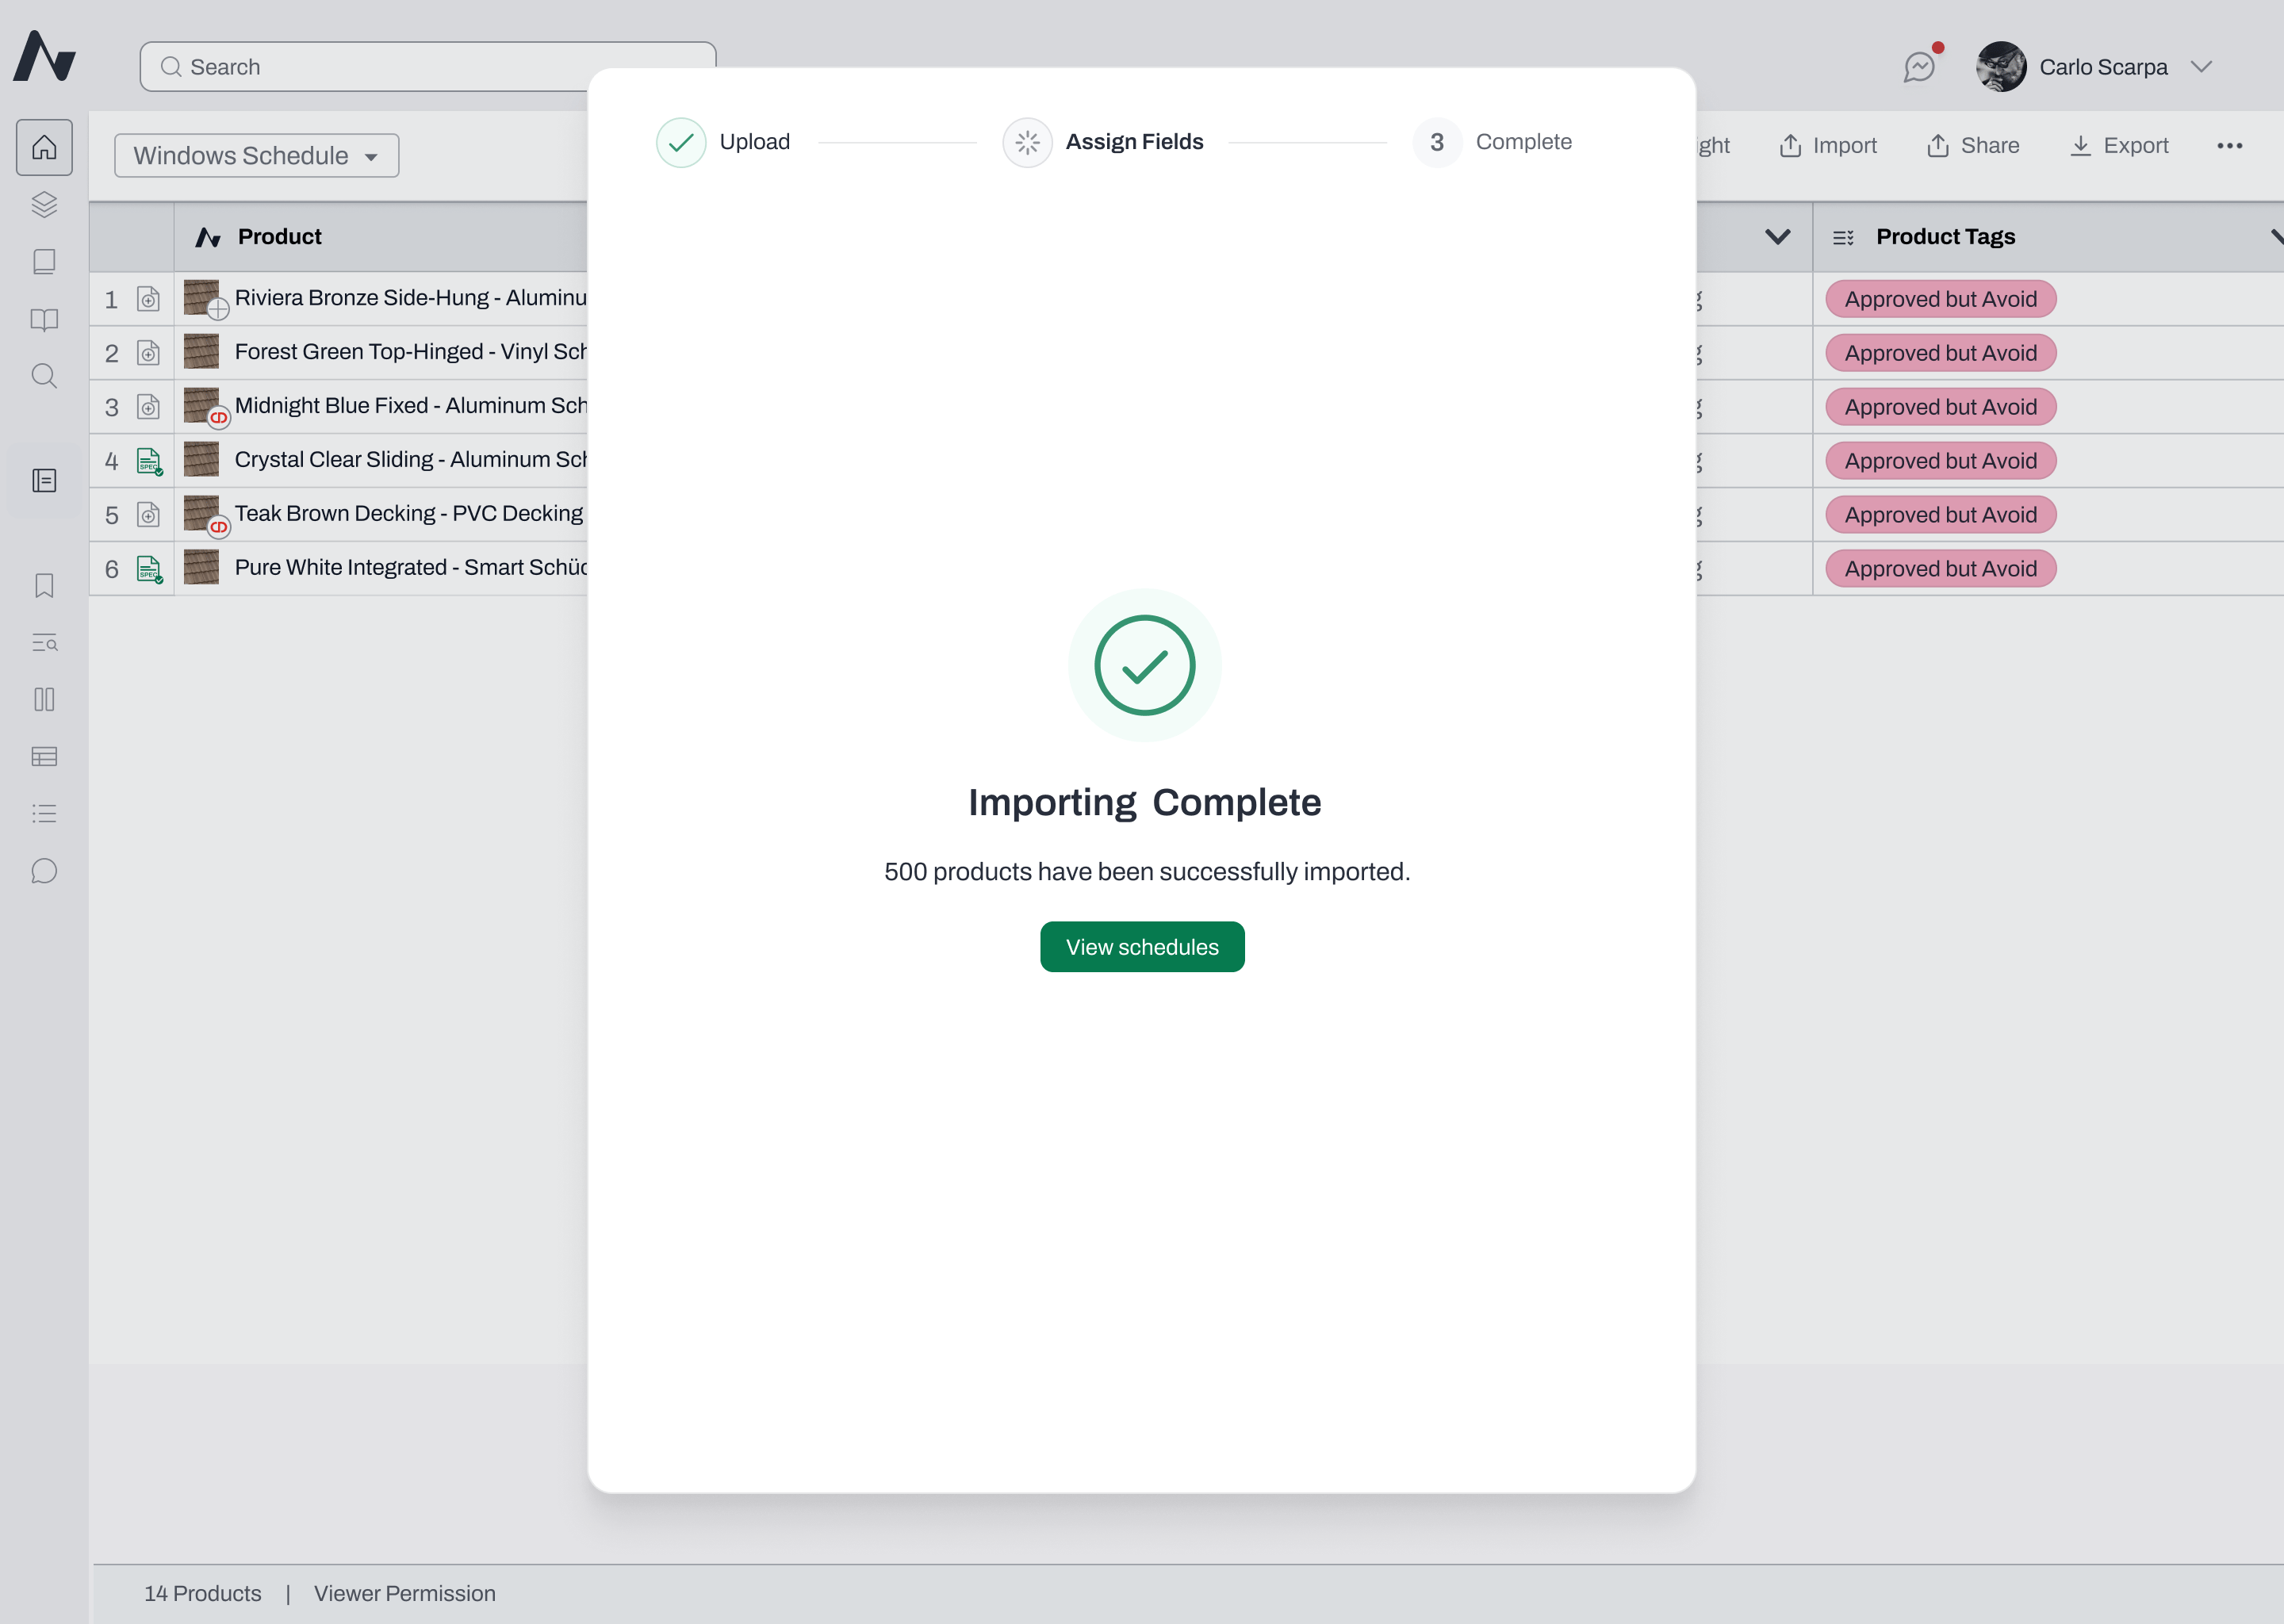 3. Click **View Schedule** to see all imported products in the **All Products** view.
**If the import fails**, an error screen will appear with an **Import Again** button. A notification will also appear with a link to retry.
**Outcome:** Each row in your CSV becomes a placeholder product in the schedule, with mapped field data populated in the corresponding columns. Unmapped columns and mismatched data result in empty cells for those fields.
***
## What to Expect After Import
* All imported products appear in the **All Products** view as **[Custom Products](/help-center/working-on-projects/adding-custom-products-to-your-schedules)**.
* You can edit the new custom products in the schedule, replace them with real products, delete them, add them to Spec Planner, and include them in exports.
* If Revit integration is enabled on your project, imported Custom Products will sync to Revit.
* Other team members viewing the schedule will see the imported products in real time.
***
## *Coming Soon: Discover Matches*
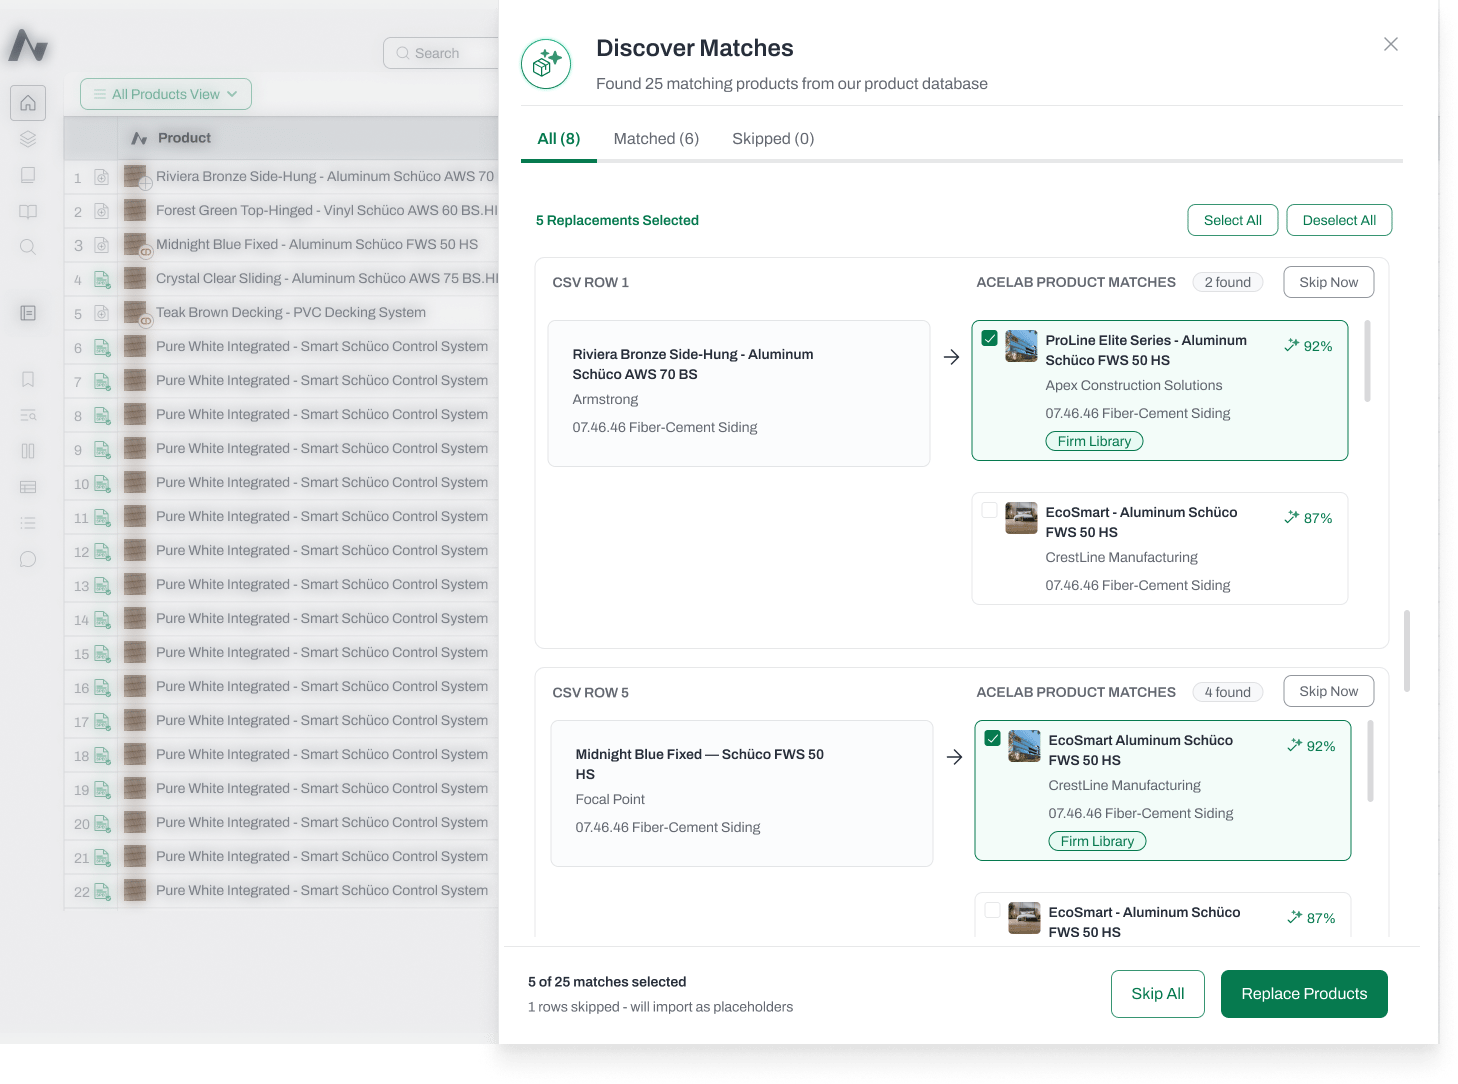
After your products are imported, you'll be redirected to your schedule. A side drawer will open automatically with AI-suggested matches for your imported products.
For each imported product, Acelab's AI searches the Materials Hub database and suggests the closest real product match, along with a **confidence percentage** indicating how strong the match is.
From the **Discover Matches** drawer, you can:
1. **Review** the AI-suggested match and confidence score for each product.
2. **Confirm** a match to replace the placeholder product with the matched product from the database.
3. **Search manually** if you'd prefer a different match — use the search bar to find and select an alternative product.
4. **Skip** any product to leave it as a placeholder and move on.
3. Click **View Schedule** to see all imported products in the **All Products** view.
**If the import fails**, an error screen will appear with an **Import Again** button. A notification will also appear with a link to retry.
**Outcome:** Each row in your CSV becomes a placeholder product in the schedule, with mapped field data populated in the corresponding columns. Unmapped columns and mismatched data result in empty cells for those fields.
***
## What to Expect After Import
* All imported products appear in the **All Products** view as **[Custom Products](/help-center/working-on-projects/adding-custom-products-to-your-schedules)**.
* You can edit the new custom products in the schedule, replace them with real products, delete them, add them to Spec Planner, and include them in exports.
* If Revit integration is enabled on your project, imported Custom Products will sync to Revit.
* Other team members viewing the schedule will see the imported products in real time.
***
## *Coming Soon: Discover Matches*
After your products are imported, you'll be redirected to your schedule. A side drawer will open automatically with AI-suggested matches for your imported products.
For each imported product, Acelab's AI searches the Materials Hub database and suggests the closest real product match, along with a **confidence percentage** indicating how strong the match is.
From the **Discover Matches** drawer, you can:
1. **Review** the AI-suggested match and confidence score for each product.
2. **Confirm** a match to replace the placeholder product with the matched product from the database.
3. **Search manually** if you'd prefer a different match — use the search bar to find and select an alternative product.
4. **Skip** any product to leave it as a placeholder and move on.
 Products you skip or that couldn't be matched remain in your schedule as placeholder Custom Products. You can edit, replace, or delete them at any time.
***Note:*** *Matching is optional. You can close the drawer at any time — unmatched products remain in your schedule as placeholder (Custom) products and can be matched or replaced later.*
***
#### Example .csv Template
Products you skip or that couldn't be matched remain in your schedule as placeholder Custom Products. You can edit, replace, or delete them at any time.
***Note:*** *Matching is optional. You can close the drawer at any time — unmatched products remain in your schedule as placeholder (Custom) products and can be matched or replaced later.*
***
#### Example .csv Template