> ## Documentation Index
> Fetch the complete documentation index at: https://docs.acelabusa.com/llms.txt
> Use this file to discover all available pages before exploring further.
# Manually Add/Remove Sections - SpecPlanner
> Customizing Your SpecPlanner
*Written by Patricia Causey · Updated March 20, 2026*
The Manage Section option in SpecPlanner allows users to tailor their project scope by adding or removing MasterFormat sections and subsections. This functionality helps create a customized 'checklist' of product categories relevant to your specific project needs.
## 1. Using the Manage Section Option
Use this option to add/remove multiple sections
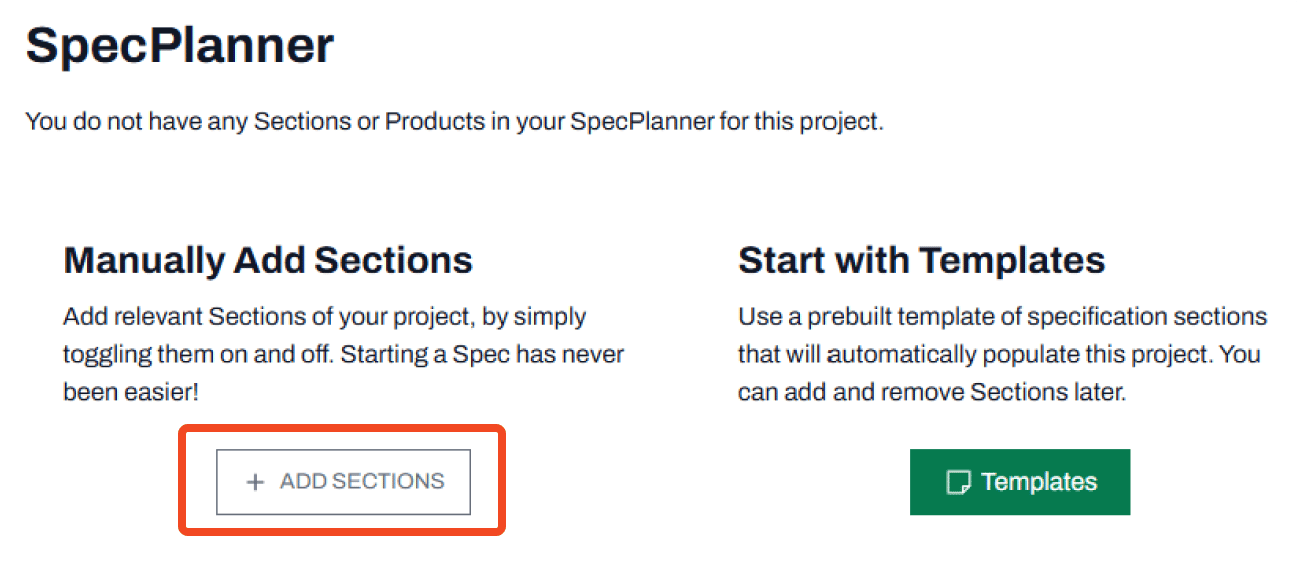
 * If starting with an **empty SpecPlanner**, click the **Add Section** button
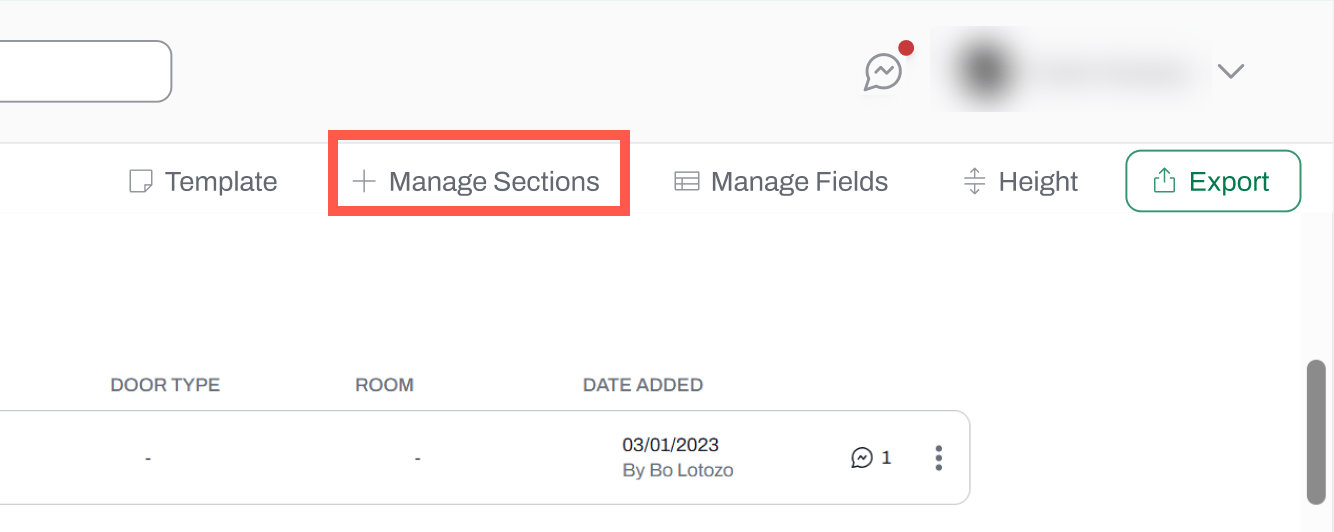
 * If **updating an existing SpecPlanner**, click **Manage Section** in the navigation bar
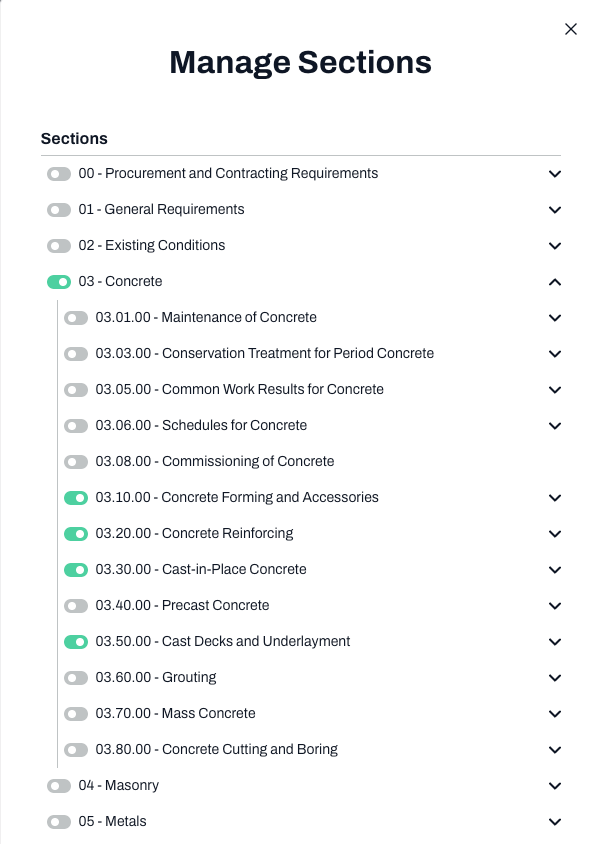
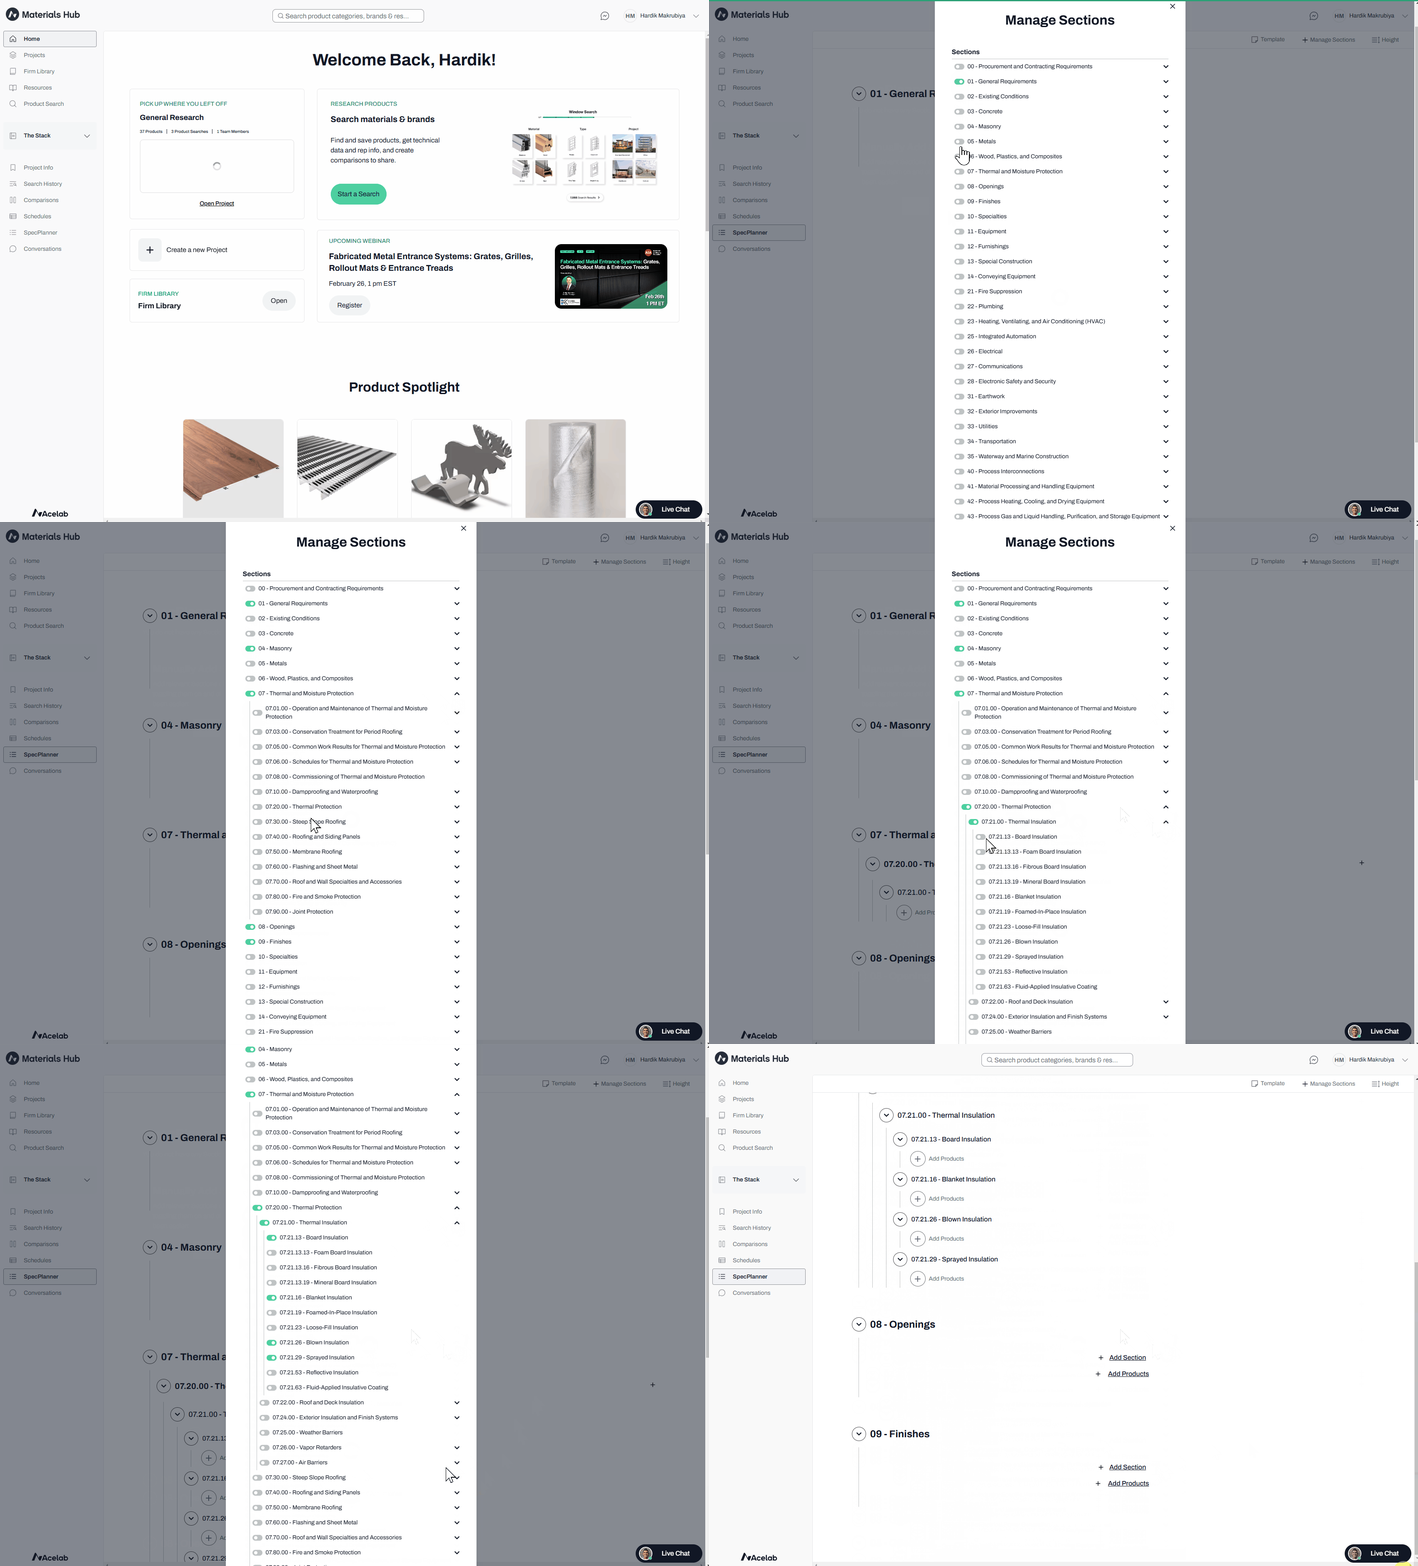
* Toggle on/off the sections you want to add (green indicates selection)
* Use the down arrow to selecting subsections (when selected, subsections will automatically make its parent section or division visible)
***
## 2. Using the Section option
This method adds sections within a specific sub-division, one MasterFormat section at a time
* If **updating an existing SpecPlanner**, click **Manage Section** in the navigation bar
* Toggle on/off the sections you want to add (green indicates selection)
* Use the down arrow to selecting subsections (when selected, subsections will automatically make its parent section or division visible)
***
## 2. Using the Section option
This method adds sections within a specific sub-division, one MasterFormat section at a time
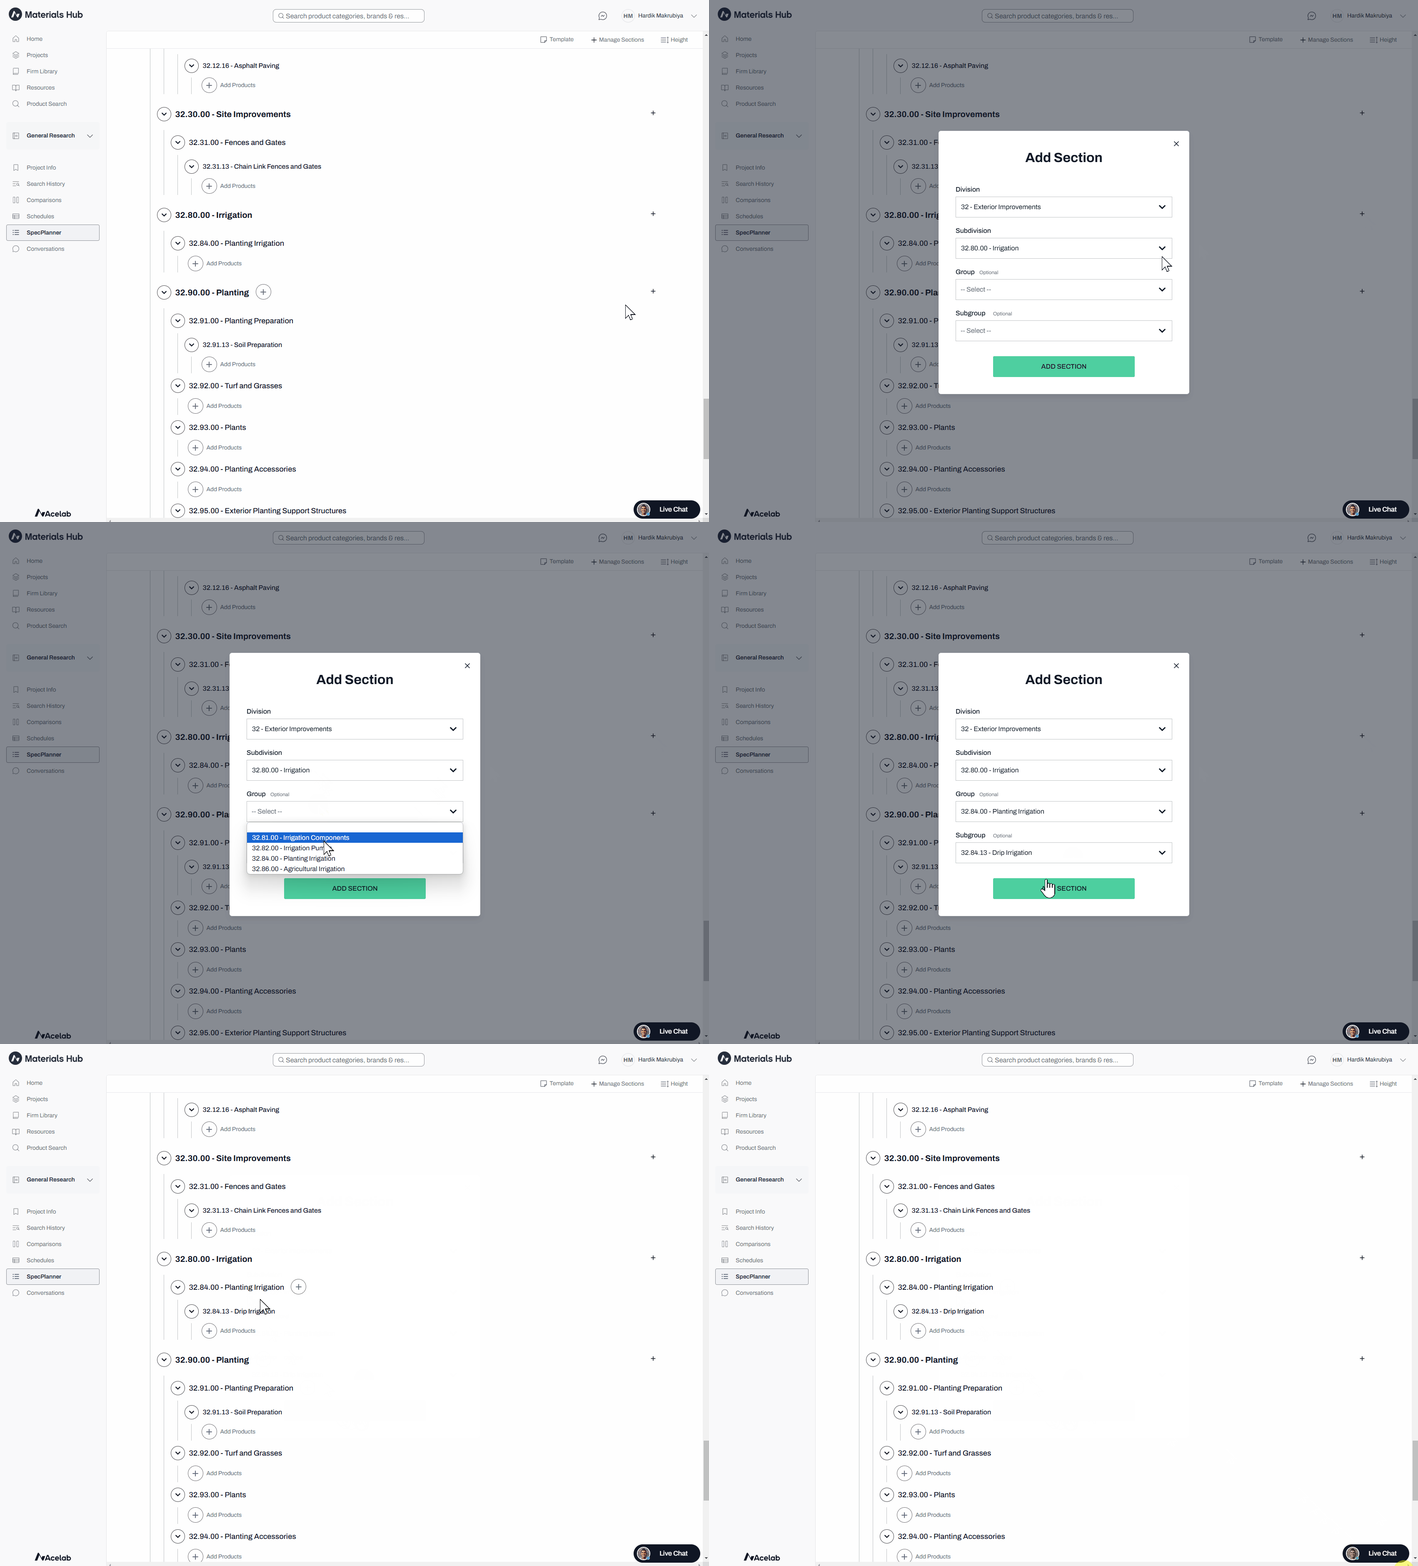 * Click the "+" button next to the desired Sub Division
* Select the Group and Sub Group
***
## Best Practices
* Review your project scope before adding sections
* Use the Manage Section option for initial setup or major revisions
* Use the Add Section Option to fine-tune or add individual sections
* Regularly review and update your sections to keep your SpecPlanner relevant and efficient
Remember, a well-organized SpecPlanner with relevant sections can significantly streamline your product specification process.
***
📚 Keep Learning 📚
## Next: **Getting Started With Schedules**
[Go to next article](https://help.acelabusa.com/en/collections/11661741-getting-started-with-schedules)
* Click the "+" button next to the desired Sub Division
* Select the Group and Sub Group
***
## Best Practices
* Review your project scope before adding sections
* Use the Manage Section option for initial setup or major revisions
* Use the Add Section Option to fine-tune or add individual sections
* Regularly review and update your sections to keep your SpecPlanner relevant and efficient
Remember, a well-organized SpecPlanner with relevant sections can significantly streamline your product specification process.
***
📚 Keep Learning 📚
## Next: **Getting Started With Schedules**
[Go to next article](https://help.acelabusa.com/en/collections/11661741-getting-started-with-schedules)