> ## Documentation Index
> Fetch the complete documentation index at: https://docs.acelabusa.com/llms.txt
> Use this file to discover all available pages before exploring further.
# Replacing a Product in Schedules
> Learn how to replace a product or placeholder with another product while retaining data already added to custom fields.
*Written by Armaan Shah · Updated March 18, 2026*
Replace any product in your schedule with a different one from the Acelab catalog — without losing your row's position, custom field data, or notes. This is especially useful for swapping out placeholder products once you've made a selection.
***
### Before You Begin
* You must be a project **Admin**, **Creator**, or **Editor** to replace products.
* Replace Product is available on any row that has a product, placeholder, or manufacturer-only value assigned. It is not available on empty rows.
* Replace mode searches the **global Acelab catalog only**. You cannot replace with a Custom Product. If you need a Custom Product in place of an existing product, remove the current product and add a Custom Product instead.
***
## How to Replace a Product
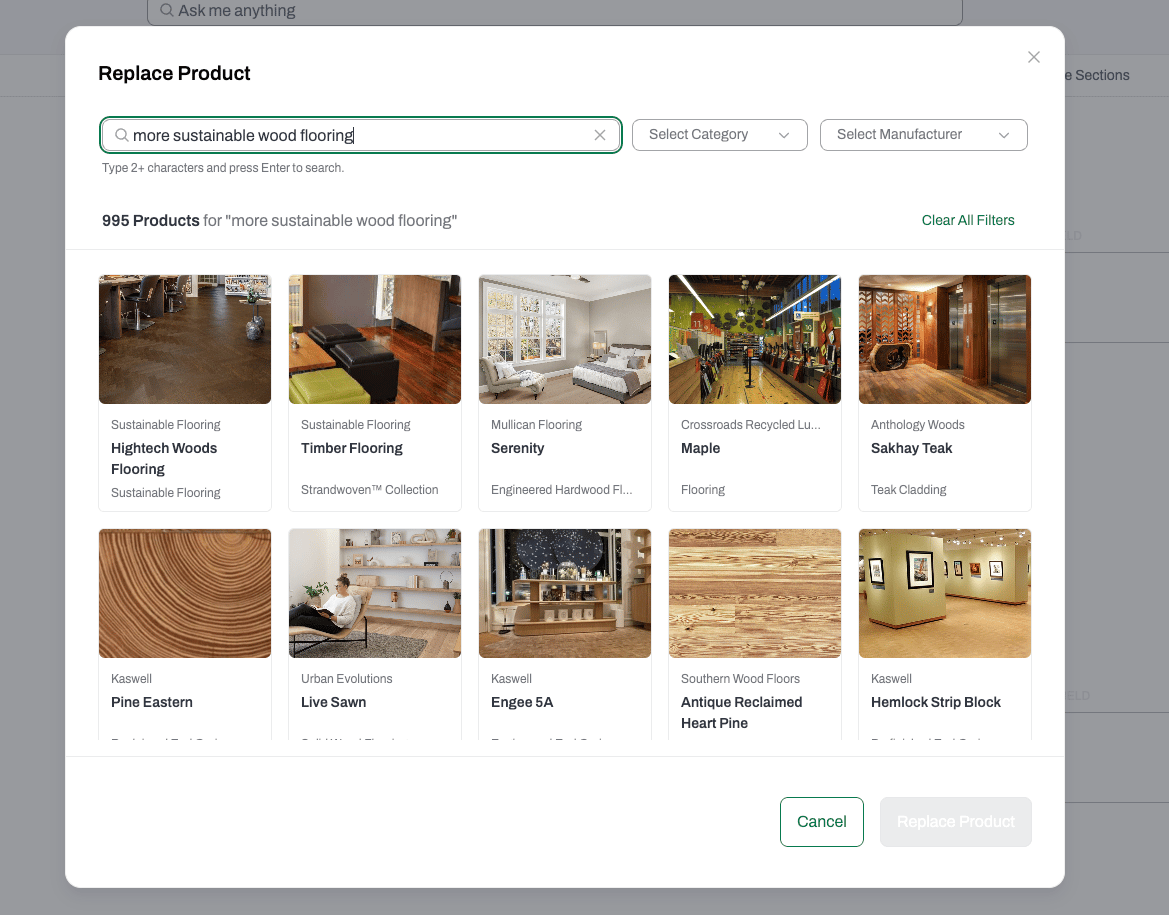
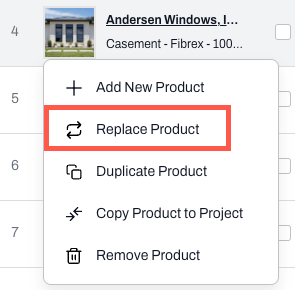 The header shows which product you're replacing.
 A success message will appear once the replacement is complete.
***
### What Happens to the Row Data?
The replacement is in-place — the row stays in its current position and does not move or reorder.
| **Data type** | **After replacement** |
| --------------------- | ----------------------------------------------------------------------------------------- |
| Row position | Preserved — row stays where it is |
| Custom field values | Preserved — all data you added carries over |
| Notes | Preserved |
| Quantities & units | Preserved |
| Acelab Default Fields | Updated to match the new product (e.g., product name, manufacturer, MasterFormat section) |
**💡 Tip:** This makes Replace Product ideal for working with custom products. **[Add custom products](/help-center/working-on-projects/adding-custom-products-to-your-schedules)** to your schedule as a checklist during early project phases, fill in custom field data as you go, then use Replace Product to swap in the final selection — all your field data stays intact.
A success message will appear once the replacement is complete.
***
### What Happens to the Row Data?
The replacement is in-place — the row stays in its current position and does not move or reorder.
| **Data type** | **After replacement** |
| --------------------- | ----------------------------------------------------------------------------------------- |
| Row position | Preserved — row stays where it is |
| Custom field values | Preserved — all data you added carries over |
| Notes | Preserved |
| Quantities & units | Preserved |
| Acelab Default Fields | Updated to match the new product (e.g., product name, manufacturer, MasterFormat section) |
**💡 Tip:** This makes Replace Product ideal for working with custom products. **[Add custom products](/help-center/working-on-projects/adding-custom-products-to-your-schedules)** to your schedule as a checklist during early project phases, fill in custom field data as you go, then use Replace Product to swap in the final selection — all your field data stays intact.