

Setting Up Your Company
Creating your Account in Acelab
Create your account first. 👉 If you need to create your account, check out the account-creation steps. 👉 If you have already created your account, follow the steps below.
1. Access Your Account Profile
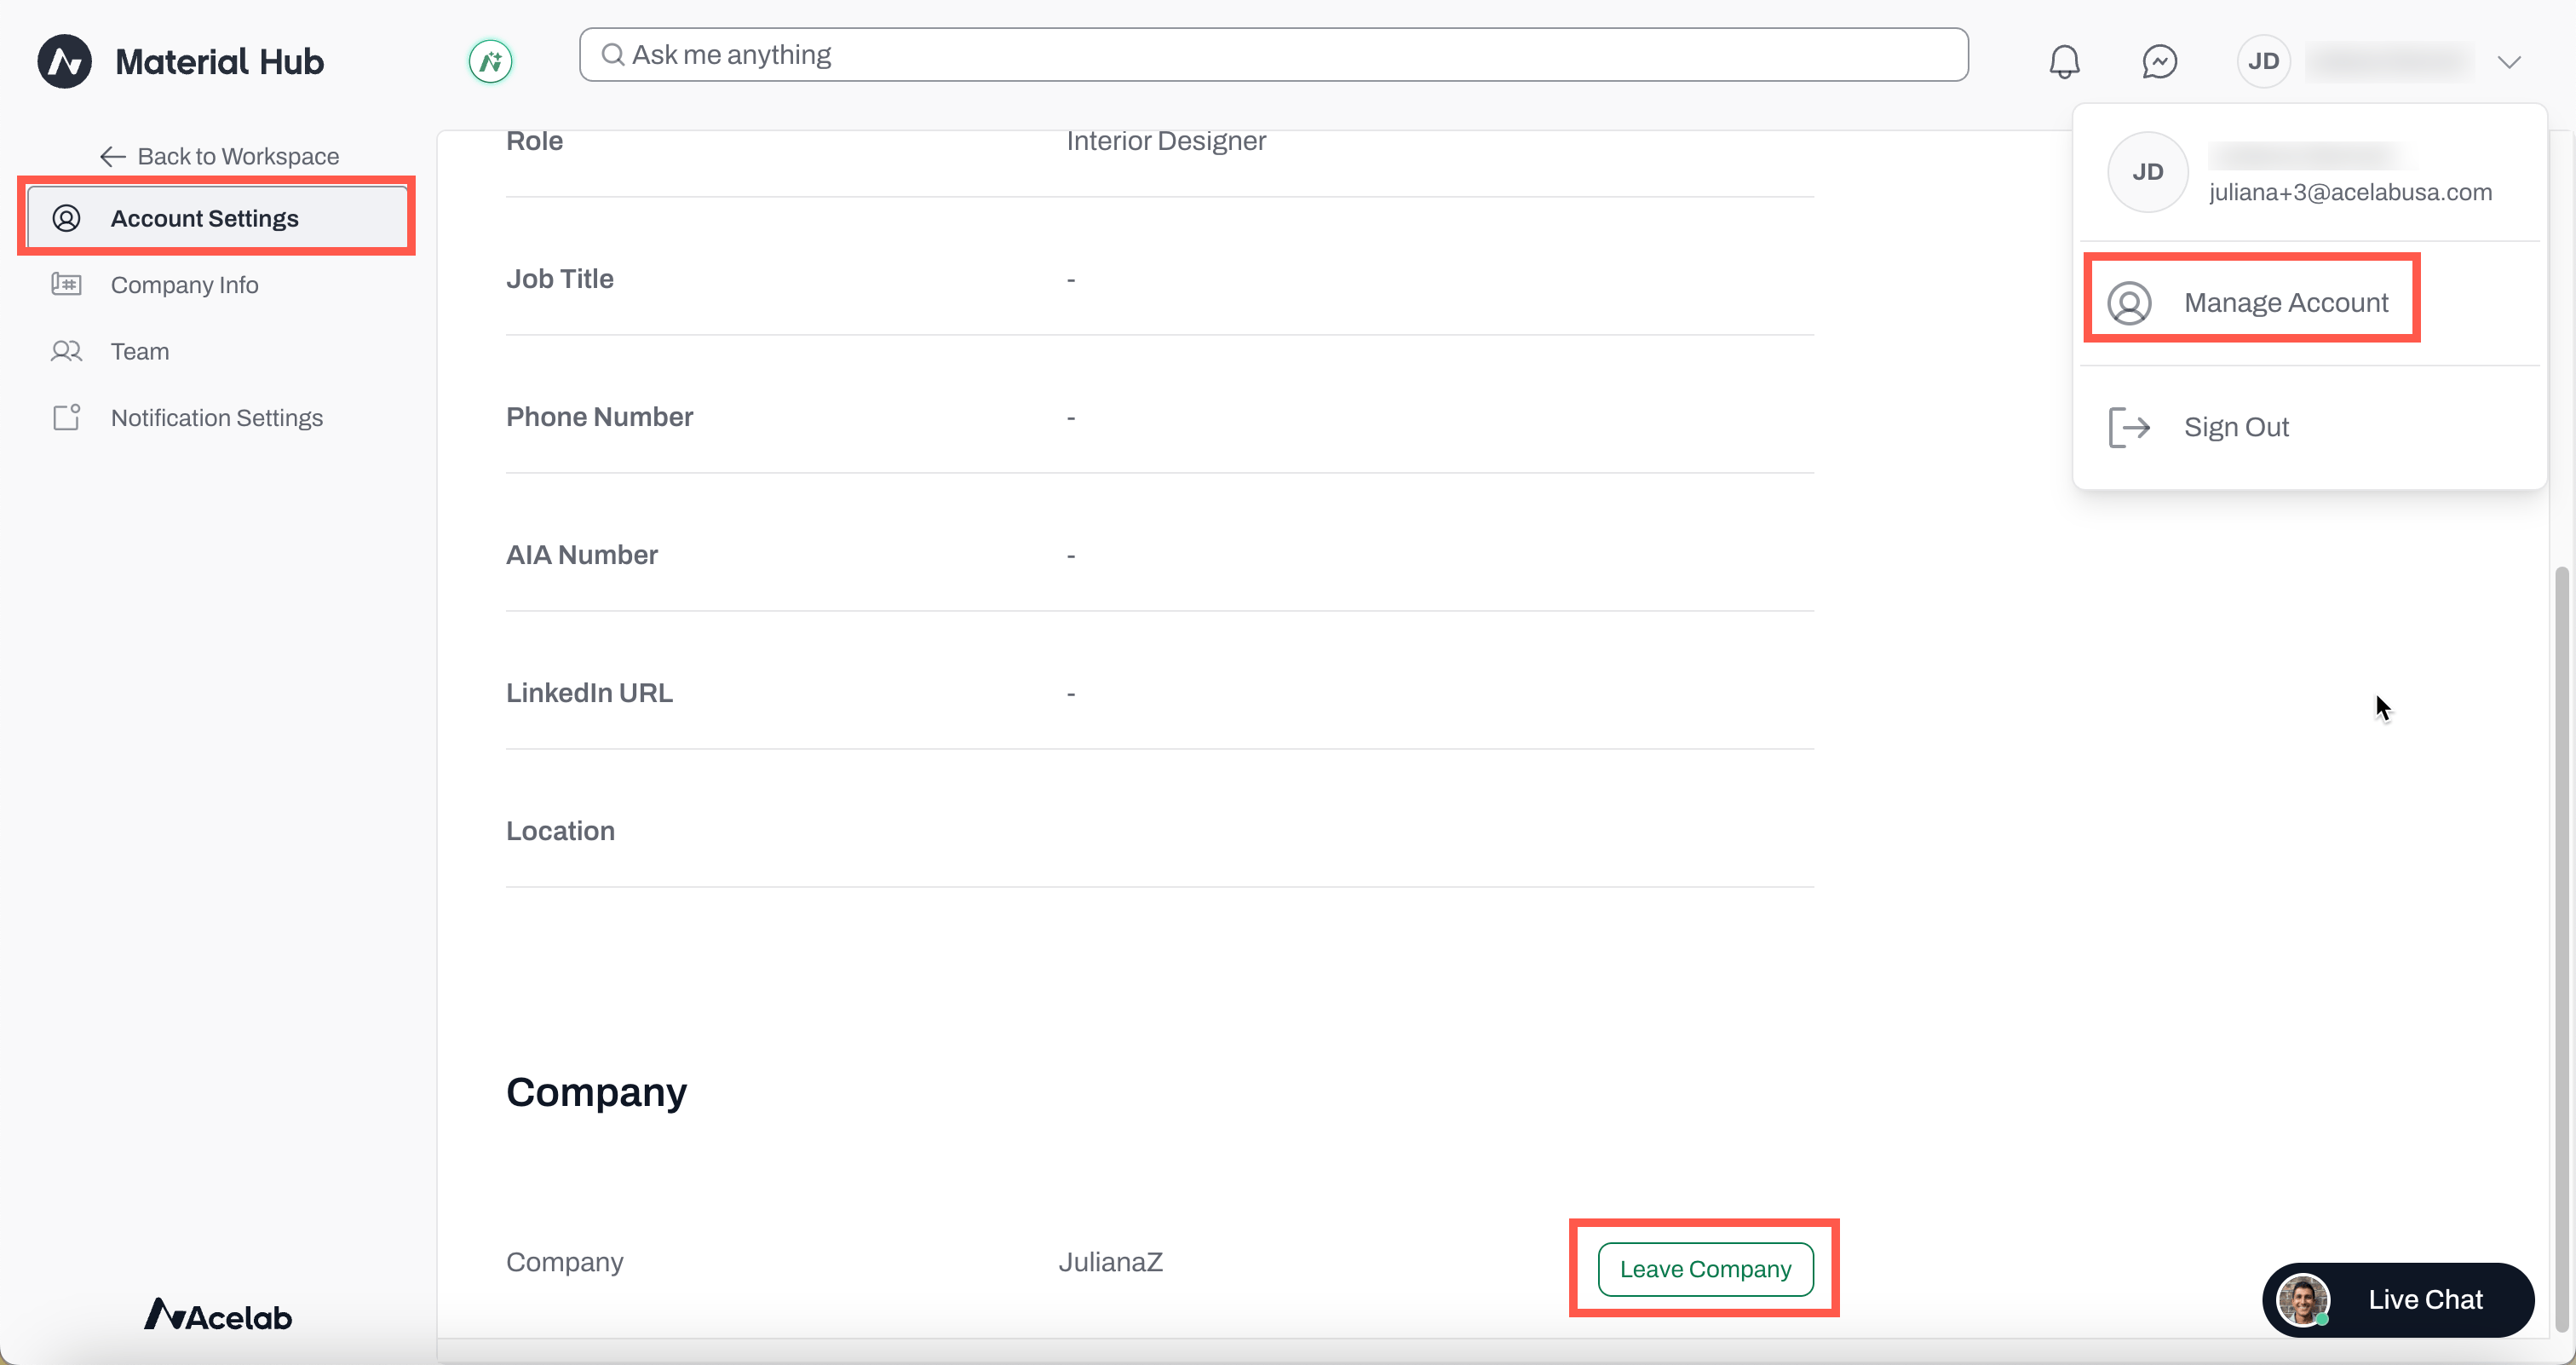
- Click on your photo (or name) at the top-right corner
- Click Manage Account
- Scroll down to the Company section
- You’ll see a default company name (your name+last name+company) has been added
2. Join or Create a Different Company
- Click Leave Company
- Confirm your choice to Leave
-
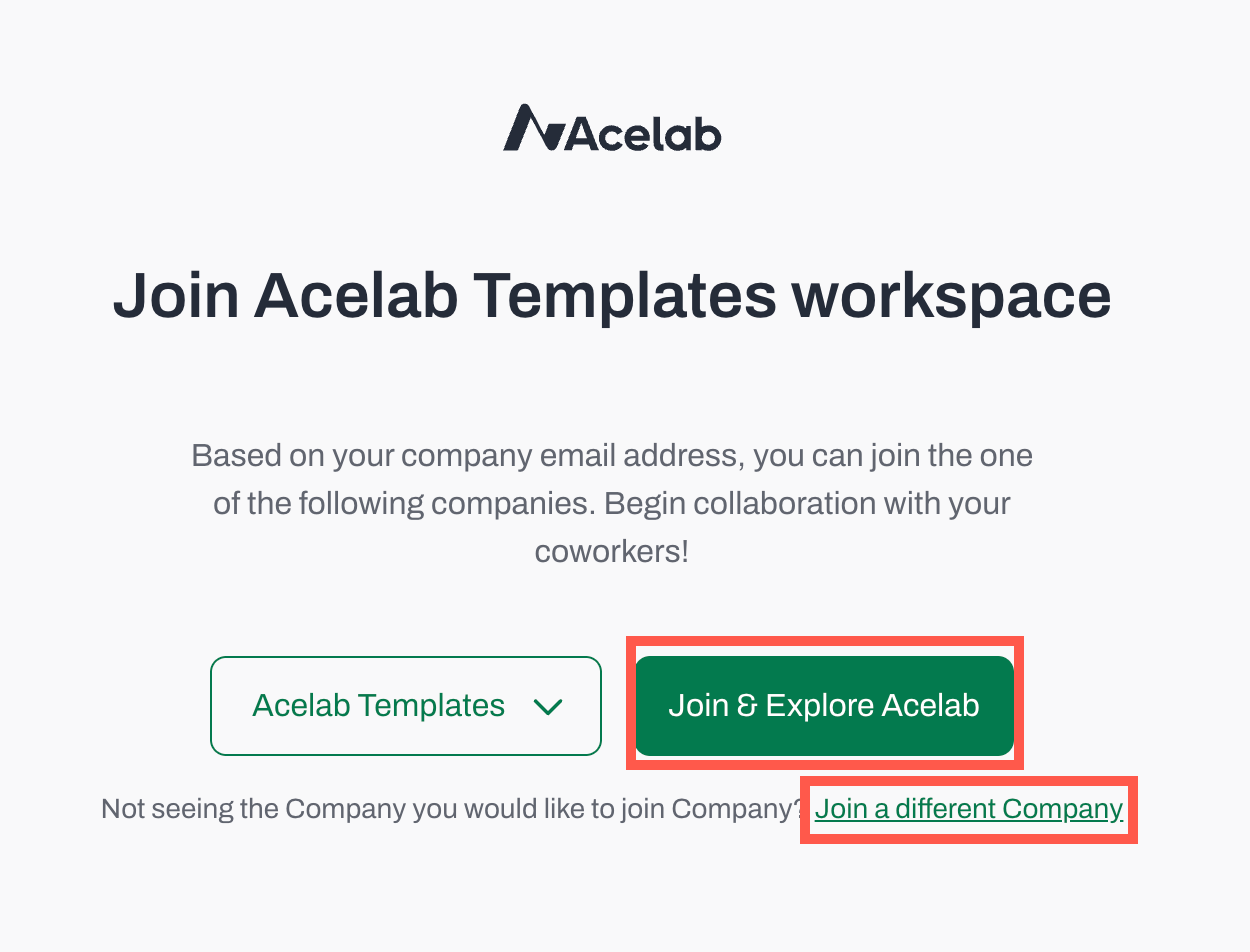
The system will look for matches based on your email domain
- If one of more companies have been found, it will offer you the option to join. Use the drop down menu to find the correct company and click Join & Explore Acelab
- If no matches were found, click Join a different Company
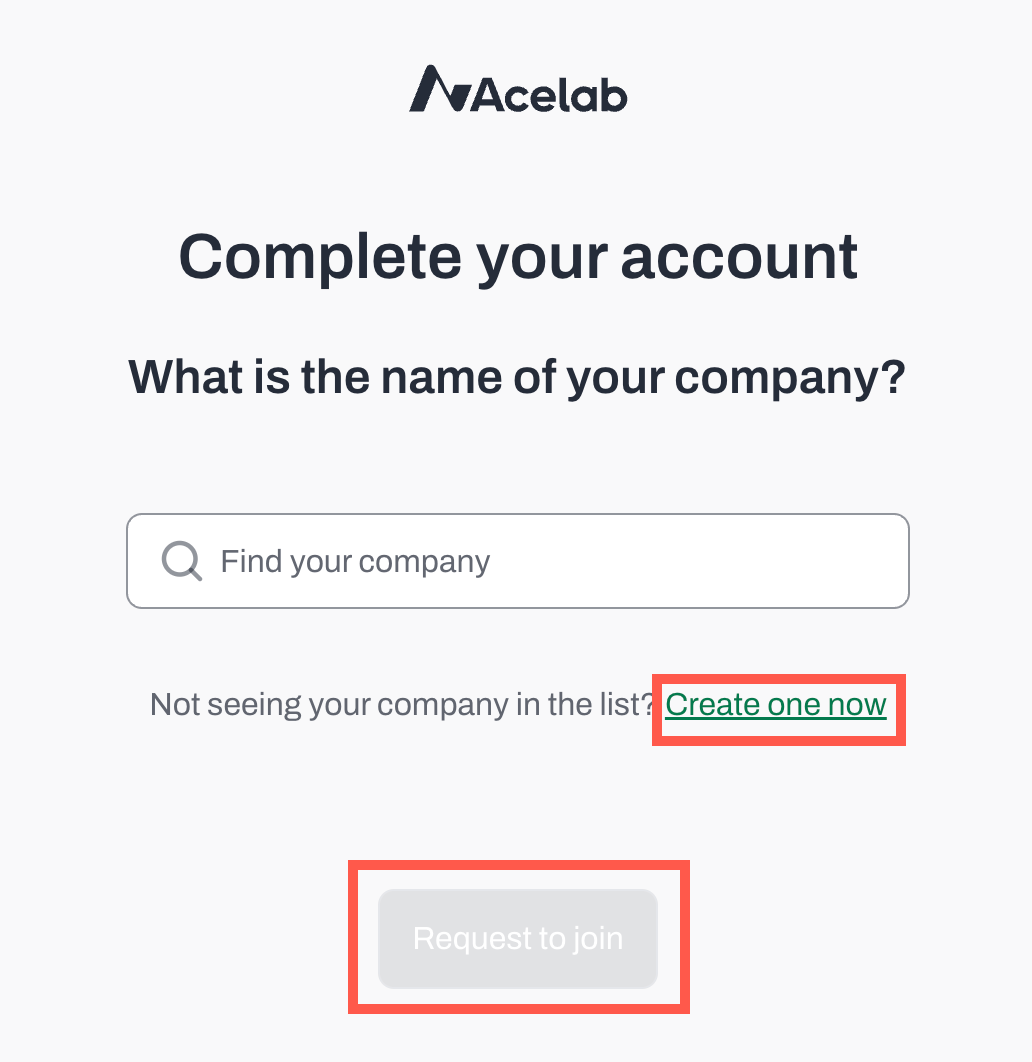
- Try to find your company by typing its name, then click Request to Join
- If no company is found, you’ll need to create a new one. Click Create one now
3. Enter company details
-
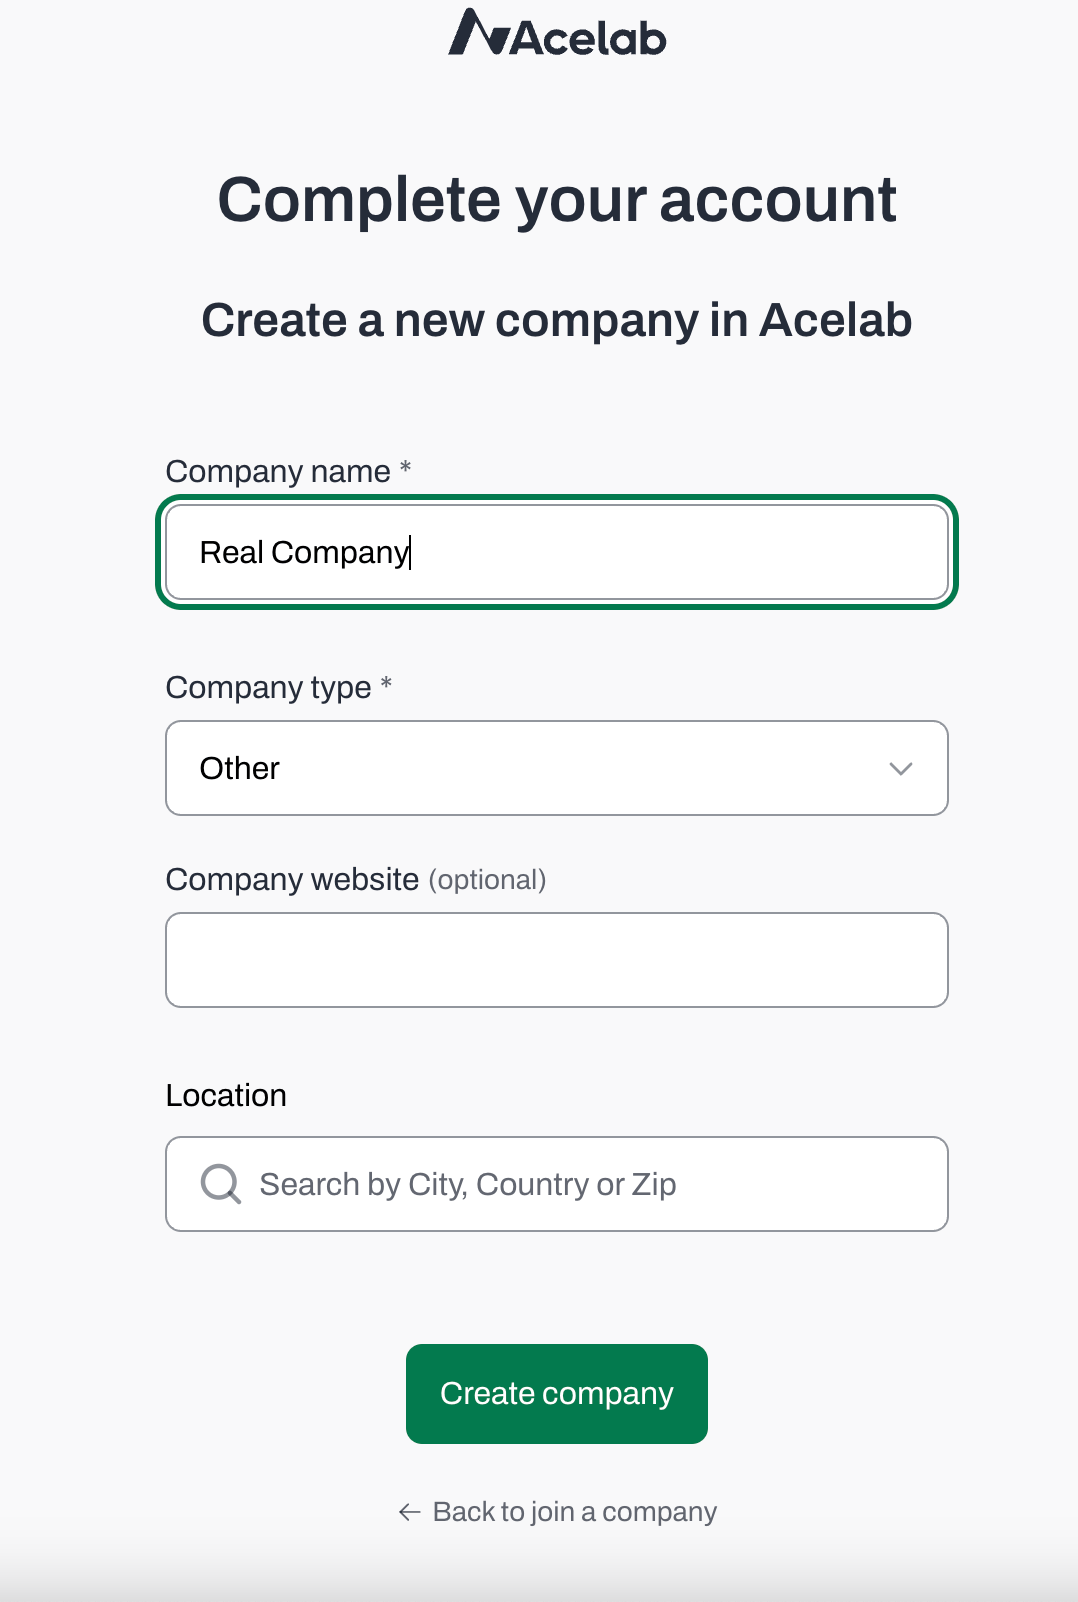
Company name (must be unique)
- You will see the default name (user first name + last name + company)
- Change it to the real company name
- Select company type
- Add website (optional)
- Enter location
- Click Create company
Inviting Collaborators
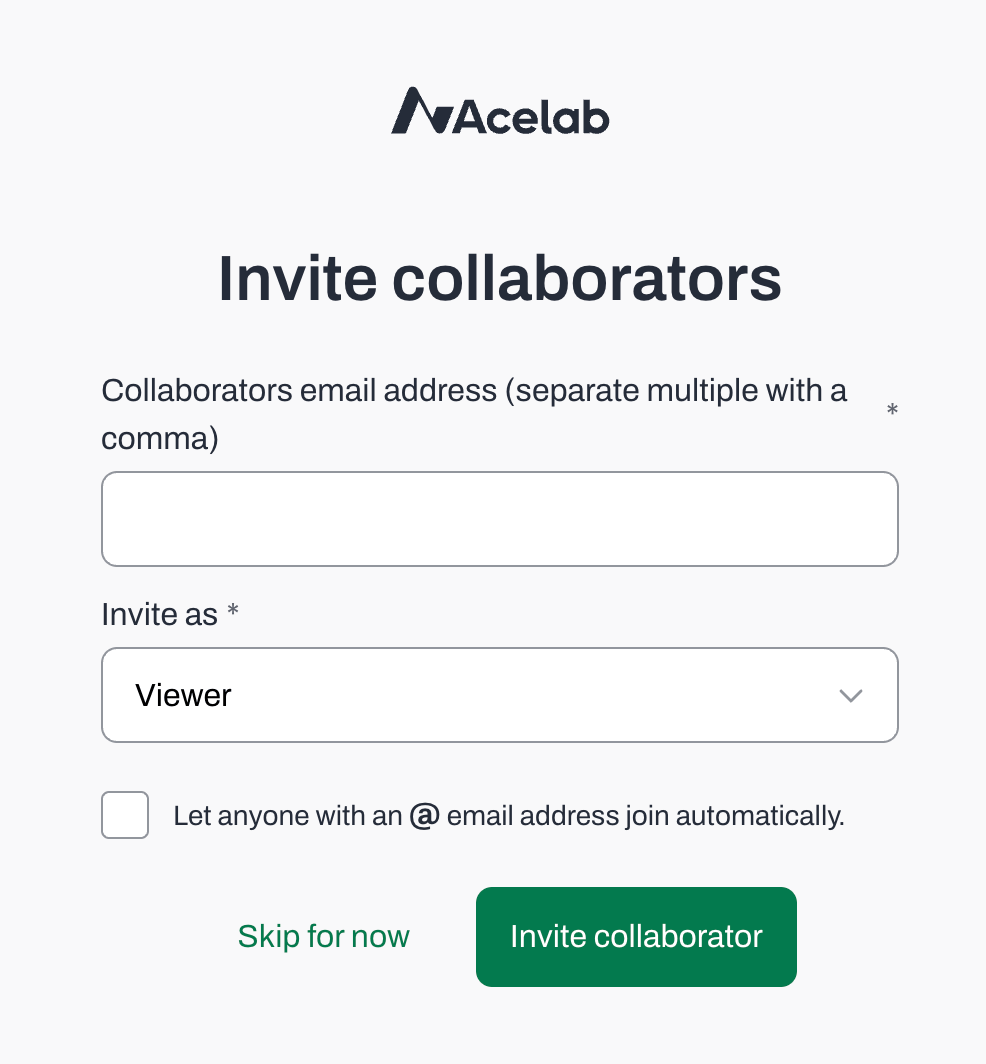
- Enter team member emails (separate with commas)
- Choose the permission level (this can be changed later for each collaborator)
-
Check the box to enable auto-join for your company’s email domain (optional)
- This streamlines the process since anyone who signs-up using an email with your company’s domain will join automatically and you will not need to approve individual requests.
- Click Invite Collaborator to send invitations
- If you did not enable auto-join by email domain, you will receive emails from your team members with requests to join
- Click Approve Request
- Done! Your team members will have access to the Company workspace

📚 Keep Learning 📚