

How it works (the short version)
Revit stores custom data on elements using Shared Parameters. A Shared Parameter is a custom field defined once in a.txt file on your computer or network, then loaded into a Revit project so its values can be filled in and scheduled.
When you enable a Material Hub field for sync, the plugin does three things for you:
- Registers the field in your Shared Parameters
.txtfile, namedMH_[FieldName]— for example, “Submittal Status” becomesMH_Submittal_Status. - Loads it into your current Revit project and makes it available on all element categories and all material categories.
- Writes the value from Material Hub onto your linked elements and materials every time you sync.
Note: Because Revit treats elements and materials differently, each field is registered twice behind the scenes — once for elements and once for materials. You’ll only ever see one field and one parameter name in the plugin.
Before you start
- The Acelab Revit plugin is installed and you’re signed in
- Your Revit project is linked to an Acelab project
- You’re on a PRO plan or the MH Fields tab in you setting panel is read-only on other plans
- You know where your firm’s Shared Parameters
.txtfile lives, and you can save to it
Step 1 - Open the MH Fields tab
- Open the Acelab panel in Revit.
- Click Settings.
- Select the MH Fields tab.
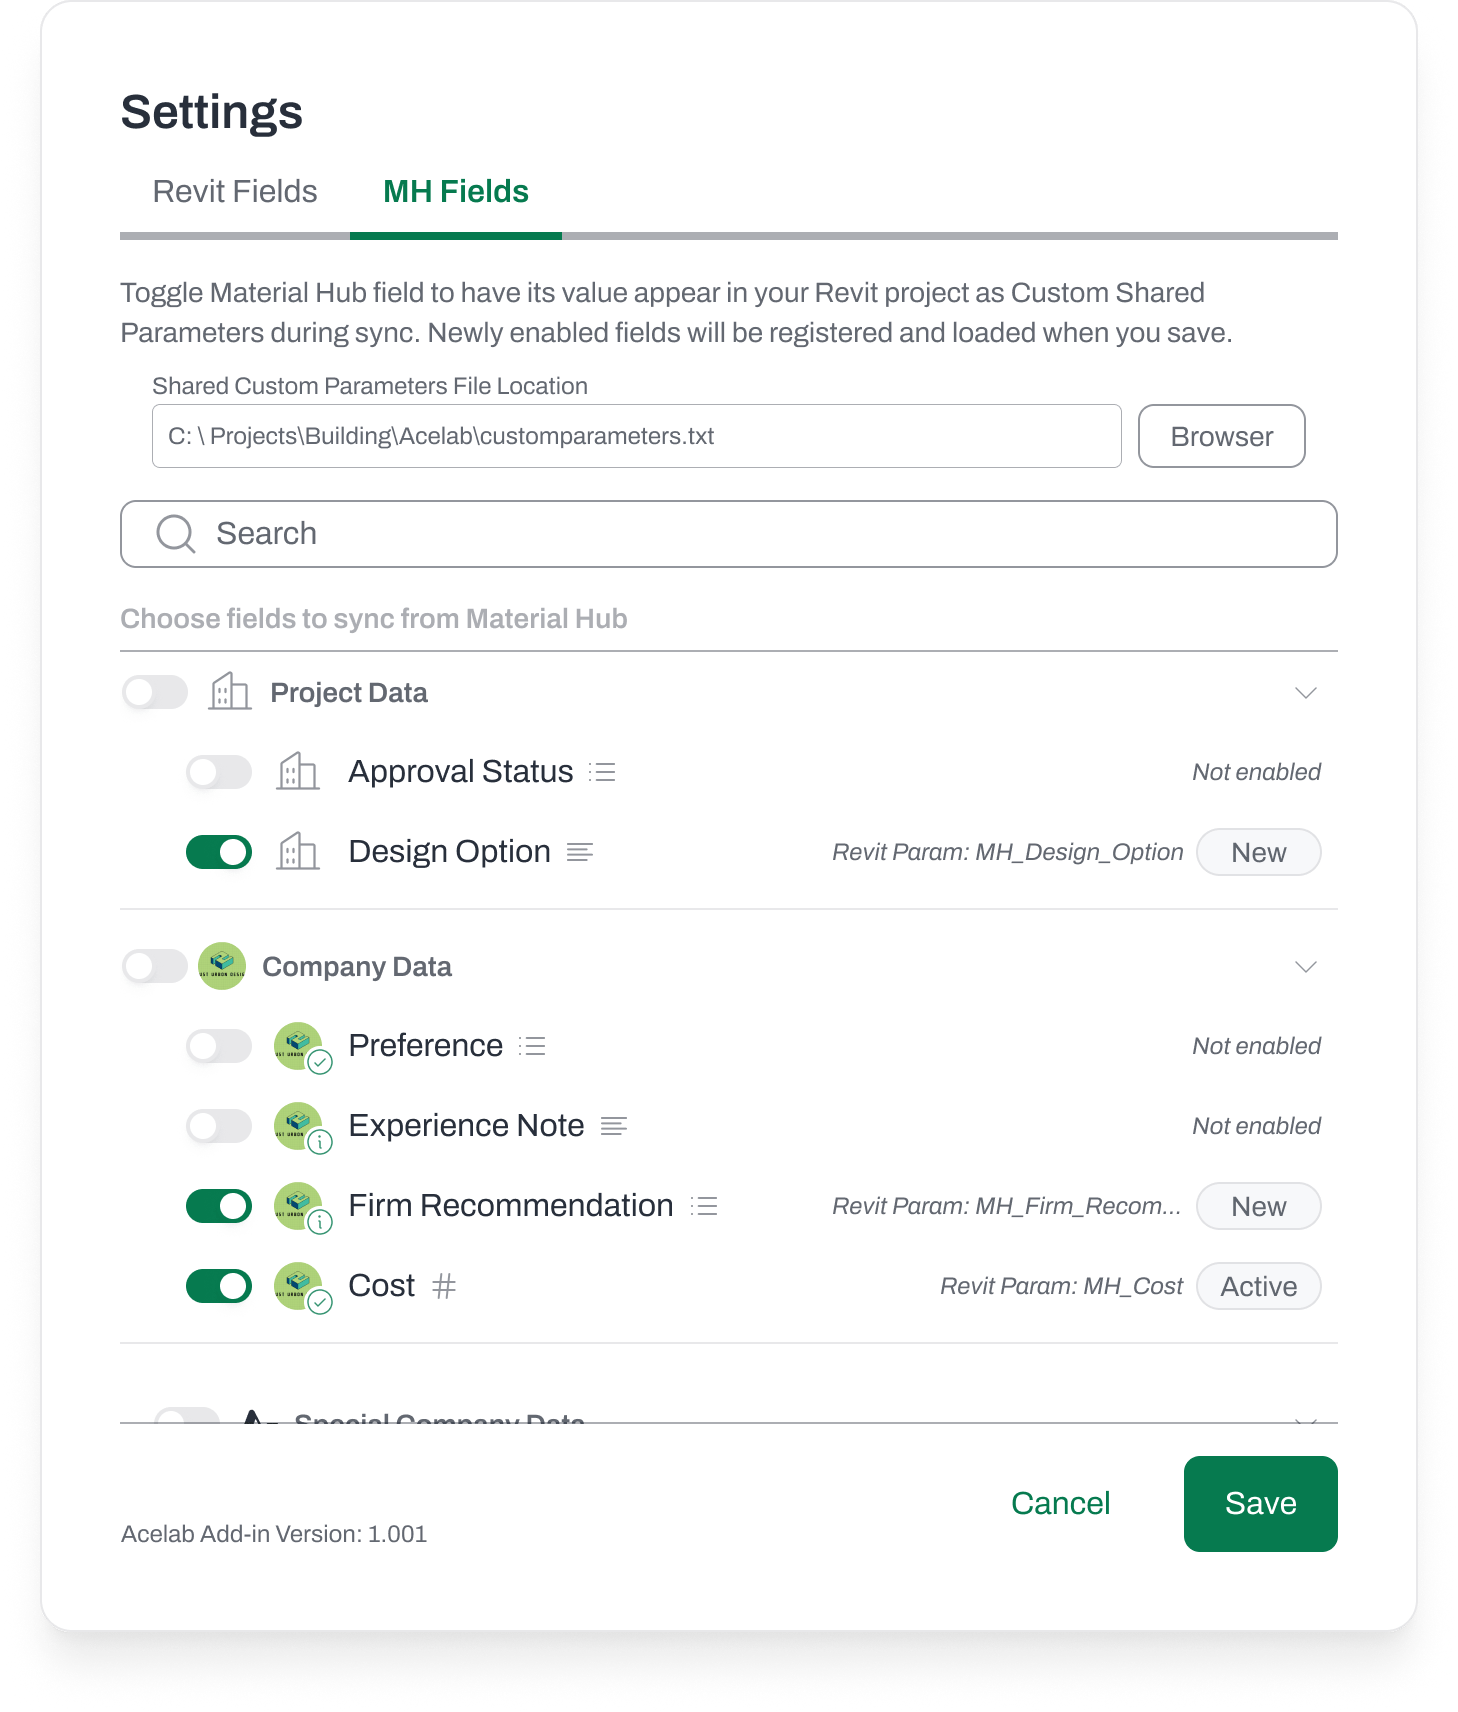
On a non-PRO plan? You’ll see a PRO badge next to the tab. You can look at everything, but toggles and Save are disabled.
Step 2 - Confirm your Shared Parameters file location
At the top of the tab you’ll see Shared Custom Parameters File Location.- If Revit already has a Shared Parameters file set, the path appears here automatically.
- To point to a different file, click Browse and select a
.txtfile.
Step 3 - Choose which fields to sync
Under Choose fields to sync from Material Hub, your fields are organized into four groups: Click a group row to expand it, then:- Turn on a whole group with the group toggle - every field inside turns on.
- Turn on individual fields with the toggle on each field row.
Toggles update instantly in the panel, but nothing is written to Revit until you click Save.
Step 4 - Save and load the parameters into your project
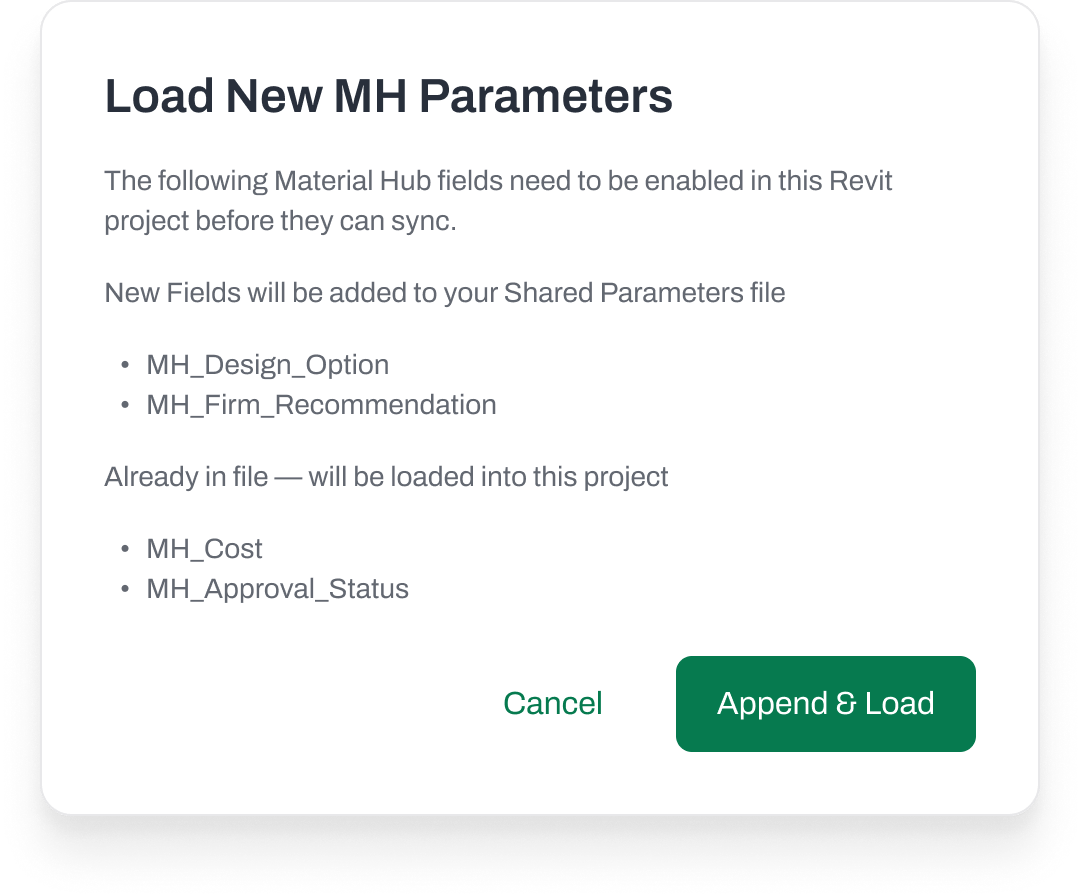
Click Save. If you enabled any new fields, the Load New MH Parameters dialog appears. It tells you exactly what’s about to happen, in up to two lists:- New Fields will be added to your Shared Parameters file: fields that don’t exist in your
.txtfile yet - Already in file — will be loaded into this project: fields that exist in the file but haven’t been used in this project yet
Step 5 - Run a sync and find your Material Hub values in Revit
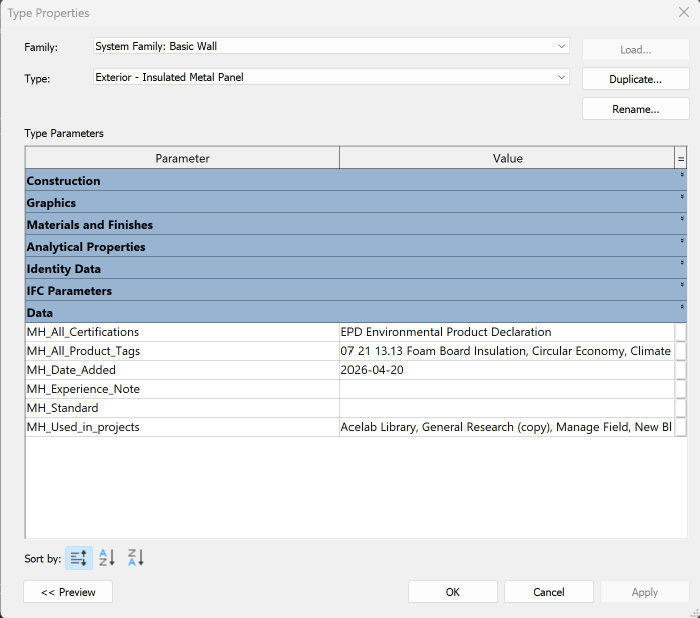
Sync as you normally would. Material Hub field values are written after your standard sync finishes.On elements:
- select an element and look in the Edit Type Properties, or
- add the
MH_[FieldName]parameter as a column in any schedule.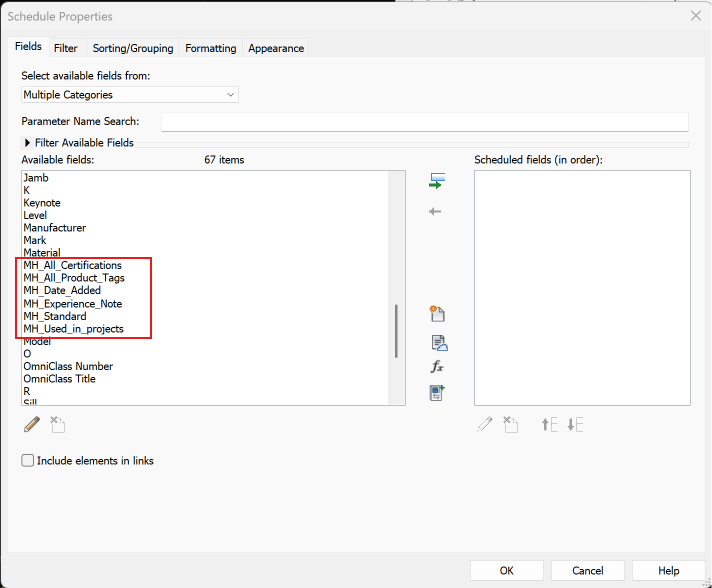
On materials:
- open the Materials Browser, select a material, and look for its custom parameters. Depending on your Revit version these appear either on the Identity tab or in a separate custom-parameters dialog opened from the bottom-left of the Materials Browser.
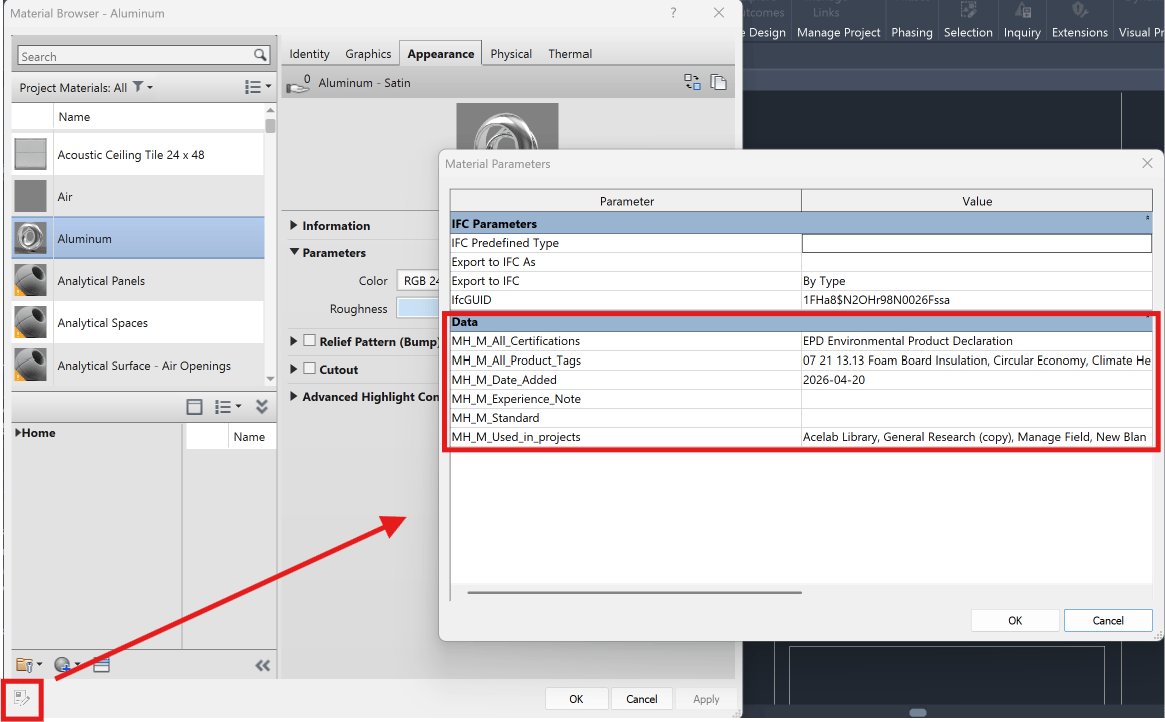
- The most reliable place to confirm the values is a Material Takeoff schedule — add
MH_M[FieldName]as a column.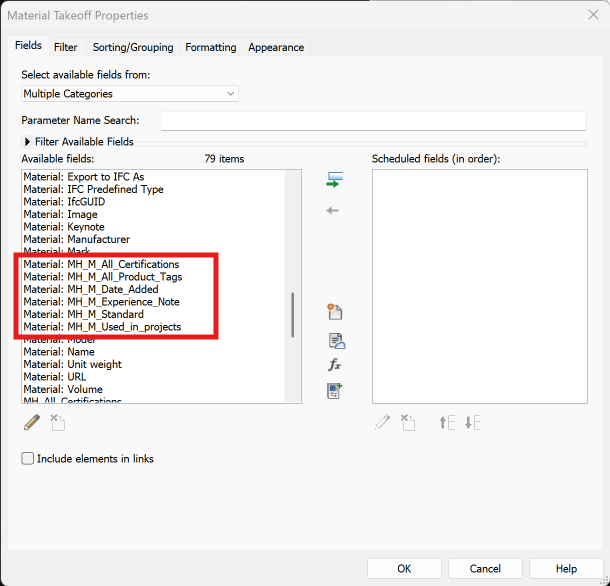
Tip: Parameter names always start with MH_M, but you can rename the column header in any schedule via the schedule’s Formatting tab → Heading. That lets you present a clean label like “Submittal Status” without changing the underlying parameter.
Turning a field off
Flip its toggle off and click Save. From then on, syncs stop writing to that field. What doesn’t happen when you disable a field:- The parameter definition is not removed from your
.txtfile - The parameter is not unbound from your Revit project
- Values already written to your model are not erased
Good to know
- Material Hub is the source of truth. Every sync overwrites Revit with whatever Material Hub currently holds. If you edit a value directly in Revit, the next sync will replace it.
- Clearing a value in Material Hub clears it in Revit. The parameter is blanked rather than left with a stale value.
- Elements without an Acelab link are left alone. Their
MH_parameters aren’t touched or blanked. - Parameters are available on every category. Binding isn’t limited to Acelab-linked elements, so the parameters show up in your category lists whether or not a given element has data.
- Settings are saved per project. Enabling fields in one project doesn’t change another.
Troubleshooting
“Invalid Path: Browse to select where your Shared Parameters file should be saved.” No valid file is set. Click Browse and select your.txt Shared Parameters file, then click Save again.
“File In Use: Close this file in any other open programs, then try again.” The .txt file is open somewhere else — often a text editor. Close it everywhere and click Save again.
The dialog says the file can’t be written to Your Shared Parameters file is read-only, which usually means your BIM team controls it. Two options:
- Ask your BIM manager to add the
MH_parameters to the firm’s file. Once they’re in the file, come back and save — Acelab will find them and load them without needing to write anything. - Point the plugin at a file you can write to via Browse, or change the file in Revit under Manage → Shared Parameters.
.txt file — saving again will load them without duplicating anything.