

Before you start
- The Acelab panel is open and your model is linked to an Acelab project. See Using the Acelab Panel in Revit.
- Your Acelab project has products in its schedule.
Step 1: Select elements in Revit
Select one or more elements in the model, using any selection method. The panel updates on its own:- Nothing selected: No Revit Elements Selected.
- One element: the type name, with its family below.
- Several elements: Multiple Elements Selected, with the number of elements below.
Step 2: Choose what the link applies to
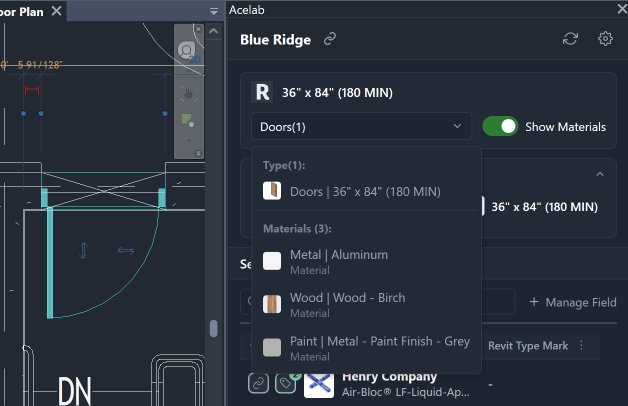
By default, a link applies to every type in your selection. To narrow it:- Click the scope dropdown in the selection box.
- Under Type, pick one type. Rows read Category | Type, with the family underneath. A green tick marks the active choice.
- To link a material instead, turn on Show Materials. A Materials section lists every material inside the selected types, as Class | Material name. Pick one.
Step 3: Check what is already linked
The Linked Product section shows each selected type or material next to the product it is linked to, or No product. Click the section header to collapse or expand it. When more than three types or materials are in scope, the section shows a summary instead, such as 2 products linked and the number of families, types and materials.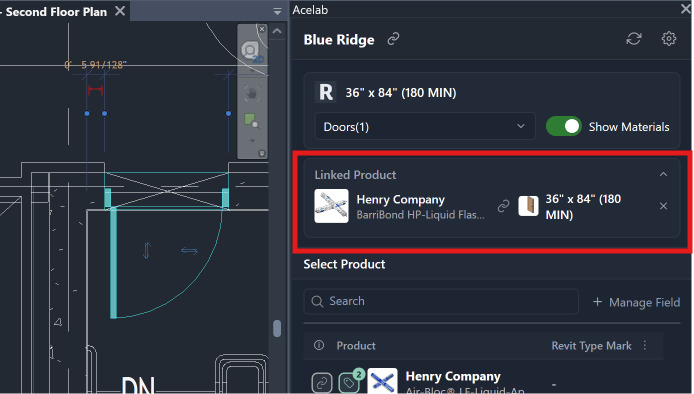
Step 4: Link a product
Find the product in the list (see Finding Products in the Acelab Panel), then click its link button, the first button on the row.- If nothing was linked before, the product links straight away and the panel shows Product linked.
- If the type or material already has a different product, the panel asks Replace linked product? Click Replace to confirm.
- If several types or materials are in scope, the panel asks Assign to N elements? and lists any that already have a product and will be replaced. Click Assign to all to confirm.
What the link button shows
The link button shows the product’s status for your current selection. Hover over it to see what a click will do, or click ⓘ in the Product column header to see this key in the panel.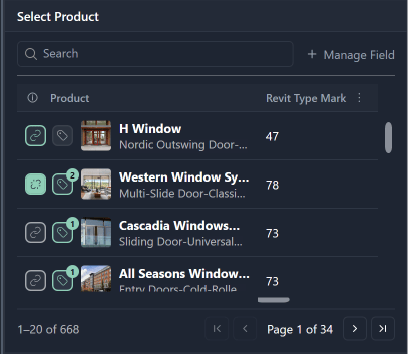
Unlink a product
- Select the element in Revit.
- Click the filled green link button on its product, or the × next to the pairing in Linked Product.
- The panel asks Remove linked product? Click Remove.
Find a product’s elements in the model
Hover over a product row and click the eye icon (Highlight in view). Revit selects every element linked to that product across the whole project, not only in the current view.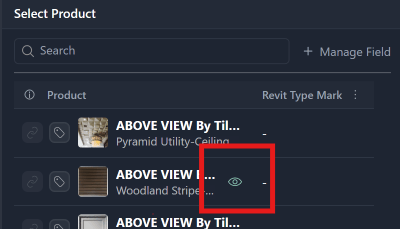
Troubleshooting
| What you see | What to do |
|---|---|
| Every link button is dimmed | Select an element in Revit first |
| The panel ignores my selection | MH Tags, rooms and annotations are not linkable, so the panel skips them. Select a modelled element |
| No Materials section | Turn on Show Materials. If it reads The selected types carry no materials., link the type instead |
| Nothing was changed - the active model changed before this ran. | You switched models mid-click. Switch back and try again |
| Could not update the link. | Check that the model is not read-only and that you own the element if you work in a central model, then try again |
| This product doesn’t have any elements linked | The product has no links yet, so there is nothing to highlight |
| On Revit 2023 the panel takes a moment to follow the selection | This is expected on 2023. Later versions update straight away |
Related articles
- Using the Acelab Panel in Revit
- Finding Products in the Acelab Panel
- Mapping Acelab Products to Revit Elements (the Map Assets and Map Products windows still work)
- Working with Central and Local Models in Revit