From your schedule: Select one or more rows, then click Send RFIs (N) in the schedule toolbar. N is the number of RFIs your selection will create, one per manufacturer, not the number of products.
From the RFIs dashboard: Click + New RFI, choose the schedule view to start from, then select your rows.
You can select all rows in a view and then deselect a few. The count and the wizard include every row in the filtered view, not only the rows currently visible on screen.
The Send RFI wizard has five steps: Products, Select Fields, Recipients, Details, and Review. Click Back to return to an earlier step, or Save as draft at any point to finish later. See Saving and resuming RFI drafts.
1
Products
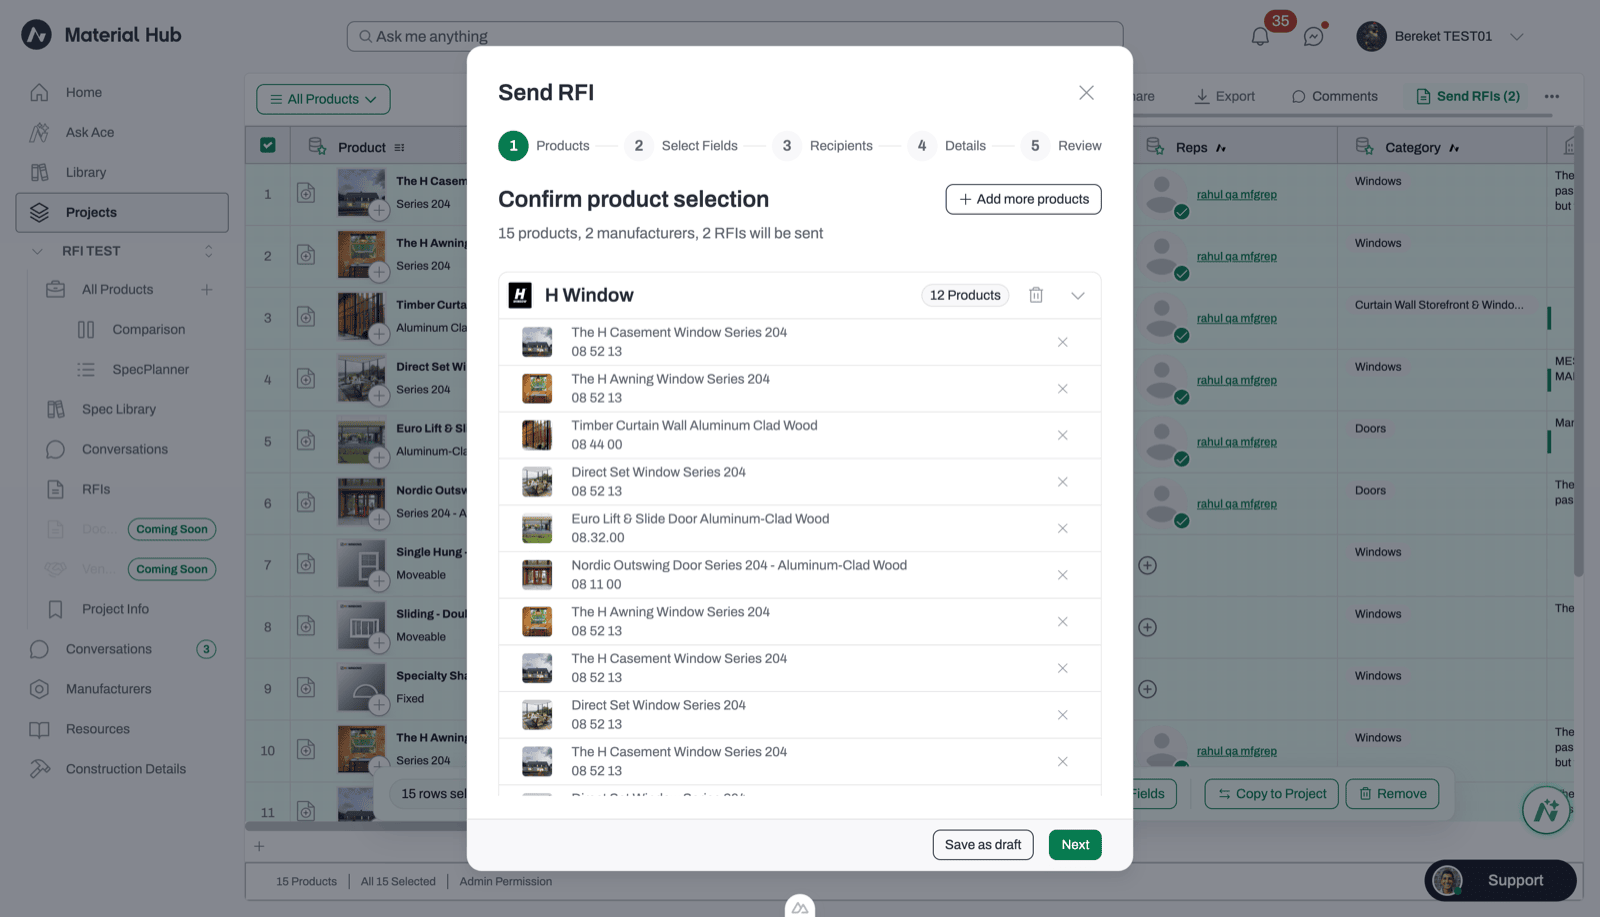
Confirm the products you selected. They’re grouped by manufacturer, with a summary such as “15 products, 2 manufacturers, 2 RFIs will be sent”.
Click the remove control to drop a single product or a whole manufacturer group.
Click Add more products to search the rest of the schedule view.
Products with no manufacturer appear in a red No manufacturer on file group. They won’t receive an RFI. To include them, add a manufacturer to those products in your schedule first.
Products grouped by manufacturer, with the batch summary at the top.
2
Select Fields
Choose the fields you want the manufacturer to fill in. The list shows the visible columns in your current schedule view.
The Product column is always included.
Select at least one other field to continue.
Fields marked Read-only can’t be requested. If you can’t edit a column in your schedule, a manufacturer can’t fill it either.
Some columns never appear in the list, including Manufacturer, Comments, Used in Projects, Reps, Date Added, Added By, and formula columns.
3
Recipients
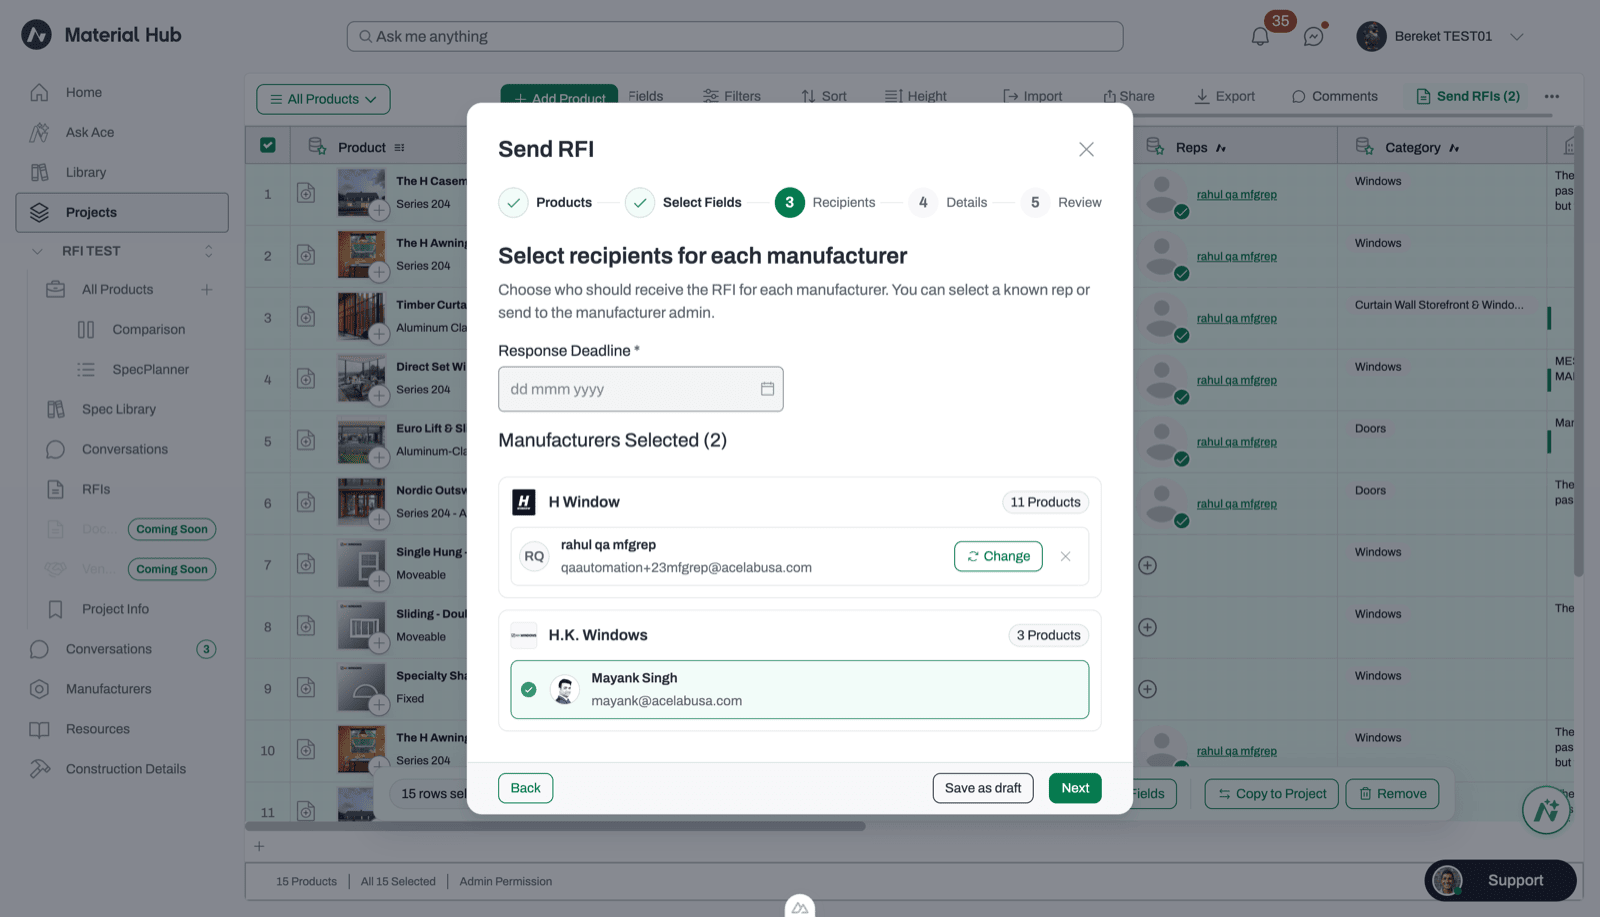
Set a Response Deadline for the whole batch. The earliest date you can choose is tomorrow.Each manufacturer has its own card with a recipient already selected for you. Click Change to choose a different recipient:
A named rep from that manufacturer.
Manufacturer Admin, who assigns the RFI to the right rep for you.
Acelab Connection, used automatically when no rep is available to you. Acelab’s team reaches out to the manufacturer on your behalf. This option can’t be changed.
If the deadline or a recipient is missing when you click Next, the wizard highlights what needs attention.
The Response Deadline above a recipient card for each manufacturer.
4
Details
Add the context the manufacturer needs:
Project Information: Choose which project details to share, using the Basic Information and Detailed Information tabs or the All Fields toggle. The project name is always shared. Fields with no value can’t be selected.
Message: Required, up to 1,000 characters. A default message naming your firm is filled in for you, and you can edit it.
Attached Documents: Add PDF, Word, Excel, PNG, or JPEG files by clicking or dragging them in. Each file can be up to 5 MB.
5
Review
Check the summary: the deadline, shared project details, requested fields, each recipient and their products, your message, and attachments. Click Submit RFI when you’re ready.
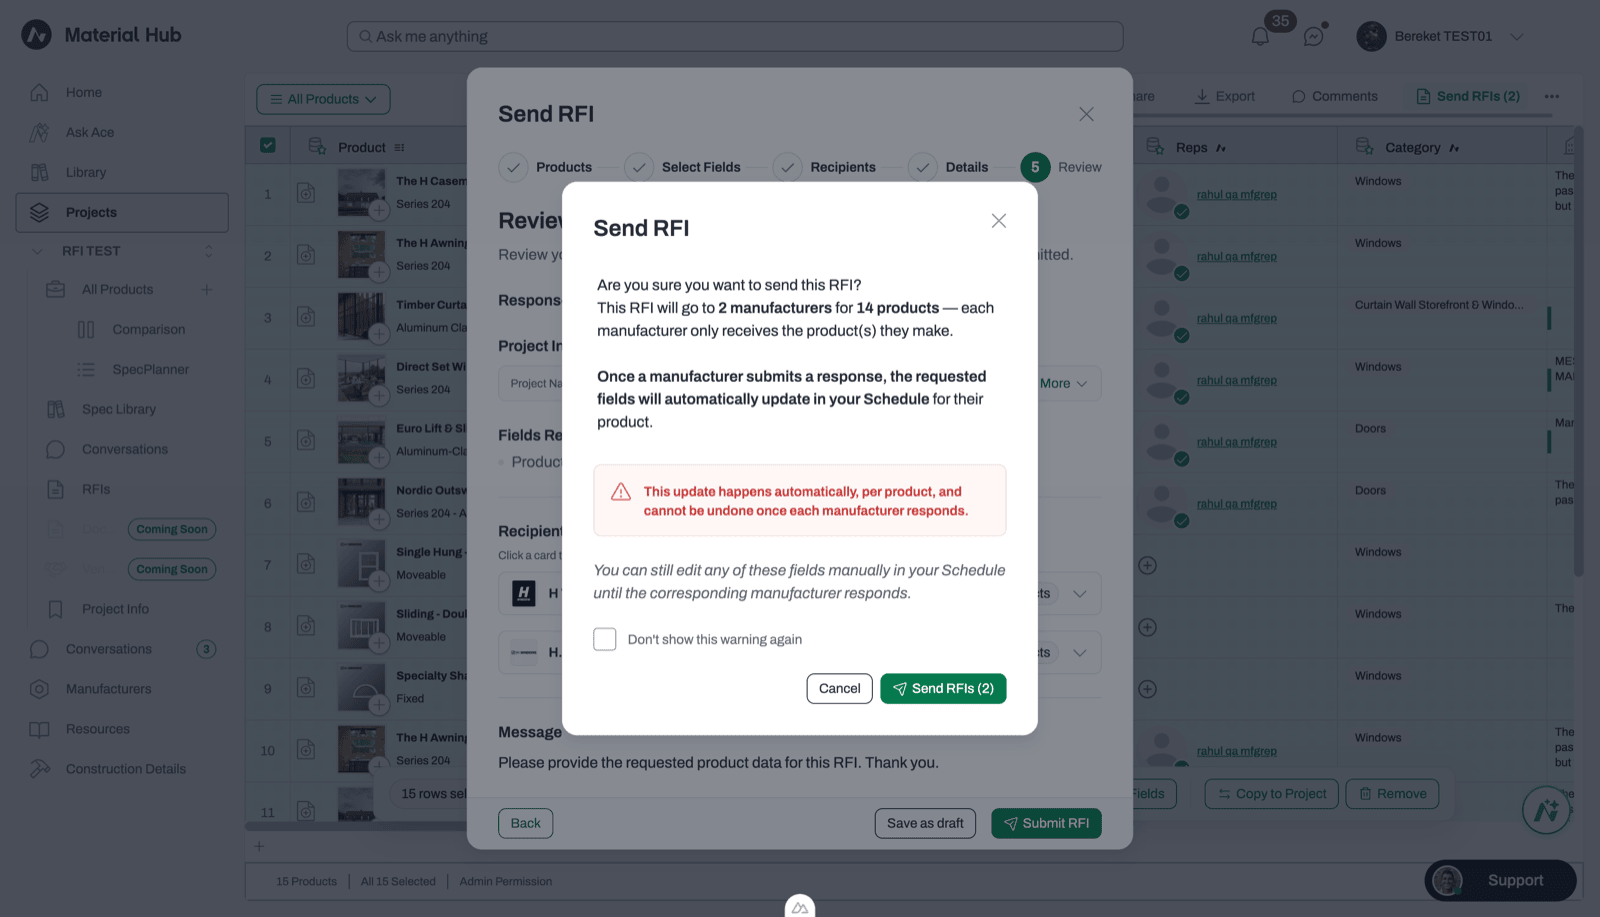
Before sending, a confirmation shows how many manufacturers and products are included. It reminds you that:
Each manufacturer only receives the products they make.
Responses update your schedule automatically and can’t be undone.
Click to confirm. If you don’t want to see this confirmation again, check Don’t show this warning again. Acelab remembers this choice across all your projects.
The confirmation shown before an RFI is sent.
After sending, a message confirms the RFI with a shortcut to the project’s Conversations. The manufacturer is notified in the app and by email.
You can’t cancel or delete an RFI after you send it.